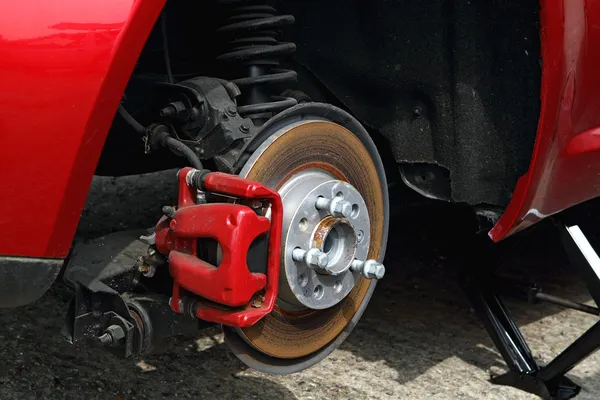
The single most common reason trailers break down on the road is something that would have taken five minutes to catch before leaving the driveway. A blown tire from low pressure. A burned-out tail light. A wheel bearing that’s been grinding for weeks. A coupler that wasn’t latched properly. None of these are complicated failures. They’re all preventable with a basic pre-trip inspection and a reasonable maintenance schedule.
Whether you’re hauling equipment to a job site, livestock to auction, or a car to a show, the checklist is essentially the same. Walk around the trailer, check the critical systems, and fix what needs fixing before you’re on the highway at 65 miles per hour with a problem that’s now dangerous instead of just inconvenient.
Here’s the full checklist, organized by what to check before every single trip and what to check on a longer maintenance cycle.
Before Every Trip: The 10-Minute Walk-Around
This takes 10 minutes and should become automatic. Every time you hook up, every time you leave. No exceptions.
Tires and tire pressure. This is number one for a reason. Underinflated trailer tires are the leading cause of blowouts, and trailer tires run higher pressures than most people expect. Check the sidewall for the maximum rated pressure and inflate to that number, not the lower pressure you’d run on your truck tires. Look for cracks in the sidewall, uneven wear, bulges, or embedded objects. If a tire looks questionable, replace it before the trip, not during.
Lug nuts. Give every lug nut a quick check with a wrench. Loose lug nuts don’t always make noise before the wheel comes off. This is especially important on new trailers and trailers that recently had wheel work done. The first 50 to 100 miles after any wheel service, lug nuts should be retorqued.
Lights and wiring. Plug in the trailer, turn on the truck, and have someone stand behind the trailer while you run through every light: running lights, brake lights, left turn, right turn, hazards. A burned-out brake light is a ticket waiting to happen and a rear-end collision waiting to happen. Check the wiring harness and connector for corrosion, exposed wires, and secure connections. Carry spare bulbs and fuses.
Coupler and hitch. Confirm the coupler is fully seated on the ball, the latch is closed and locked, and the safety pin or lock is in place. Tug on it. If there’s any play or the coupler lifts off the ball, something is wrong. A coupler that comes undone at highway speed is one of the most dangerous trailer failures there is.
Safety chains. Cross the chains under the coupler in an X pattern. This creates a cradle that catches the tongue if the coupler fails, keeping the trailer connected to the truck long enough to stop safely. The chains should have enough slack to allow full turns but not so much that they drag on the ground.
Breakaway cable or chain. If your trailer has electric brakes, it should have a breakaway system: a cable or chain connected to a small battery that activates the trailer brakes if the trailer separates from the truck. Make sure it’s connected, the battery is charged, and the cable has enough slack for turns but would pull the pin if the trailer actually separated.
Brakes. If your trailer has brakes, test them. Pull forward slowly and apply the trailer brake controller. The trailer should slow the rig noticeably. If you feel nothing, the brakes aren’t working and you need to find out why before you leave.
Load securement. Straps, chains, binders, whatever is holding your cargo should be tight, rated for the weight, and positioned correctly. Check that nothing has shifted since you loaded. Loose cargo on a trailer is a highway hazard for everyone behind you.
Jack and stands. Make sure the tongue jack is fully raised and the crank handle is secured. A dangling jack that hits a speed bump or a steep driveway transition can bend or break, and at worst can catch the road and lever the trailer off the hitch.
Mirrors and visibility. With the trailer attached, confirm you can see both sides of the trailer in your mirrors. If the trailer is wider than your truck, you may need extended tow mirrors. Not being able to see what’s beside and behind you is a hazard you can prevent with a $40 mirror extension.
That’s the full before-every-trip walk-around. Ten minutes. Once it’s habit, it goes faster.
Monthly Maintenance: The Deeper Check
Once a month, or every 500 to 1,000 miles of towing, go deeper than the walk-around.
Wheel bearings. Grab each wheel at the 12 and 6 o’clock position and try to rock it. Any play or looseness means the bearings need attention. Listen for grinding or humming while towing, which are early signs of bearing wear. Bearing failure is one of the most common and most preventable trailer breakdowns. If your trailer has grease zerks on the hubs, pump fresh grease in monthly during heavy use.
Brake inspection. For electric brakes, pull a wheel and check the brake shoes for wear. Most have a wear indicator: if the shoe material is below the indicator line, replace them. Check the magnet on electric brakes for wear. For surge brakes (hydraulic), check the master cylinder fluid level and look for leaks around the actuator. Brake maintenance is the single most safety-critical item on this list.
Springs, hangers, and suspension. Look under the trailer at the leaf springs, spring hangers, shackles, and U-bolts. Cracked or broken leaf springs are common on trailers that haul heavy loads on rough roads. Loose U-bolts can let the axle shift, which throws off tracking and causes tire wear.
Frame and welds. Inspect the frame rails, cross members, and any visible welds for cracks. Pay attention to high-stress areas: where the coupler meets the tongue, where the axle mounts to the frame, and where the fenders attach. Small cracks caught early are a simple weld repair. Left alone, they become structural failure.
Floor condition. On flatbed and utility trailers, check the deck boards or steel floor for rot, rust, warping, or loose fasteners. A rotten deck board that breaks under a loaded pallet or a piece of equipment is a bad day for everyone. On enclosed trailers, check the floor from underneath for rust or soft spots.
Electrical connections and ground. Clean the plug connector contacts with electrical contact cleaner or fine sandpaper. Corrosion on the ground pin is the most common cause of intermittent light problems. A bad ground makes lights dim, flicker, or not work at all even when the bulbs are fine.
Seasonal Maintenance: Twice a Year
Twice a year, typically before the busy season and before winter storage, do a more thorough service.
Repack or replace wheel bearings. If your trailer doesn’t have bearing buddies or EZ-lube hubs, the bearings should be pulled, cleaned, inspected, repacked with fresh grease, and reassembled at least once a year. If you tow frequently or haul heavy, twice a year is better. This single maintenance item prevents more roadside breakdowns than any other.
Brake adjustment and service. Electric brakes need periodic adjustment as the shoes wear. Most have an adjuster accessible through a hole in the backing plate. Hydraulic surge brakes need fluid changes and actuator inspection. If your brakes feel weak or uneven, service them before the next trip, not after.
Tire age check. Trailer tires age out even if they still have tread. The rubber degrades from UV exposure and oxidation. Check the DOT date code on the sidewall (a four-digit number: the first two digits are the week, the last two are the year of manufacture). Most manufacturers recommend replacing trailer tires after 5 to 6 years regardless of tread depth. Old tires with good tread blow out without warning.
Rust treatment and paint touch-up. Inspect the frame, fenders, and any exposed steel for rust. Catch it early with a wire brush, rust converter, and spray paint. Untreated rust weakens structural members over time. In salt-belt states, undercarriage rust inspection is especially important after winter.
Winch, ramps, and tie-down points. If your trailer has a winch, test the cable or strap for fraying and the ratchet for smooth operation. Check ramp hinges and springs. Inspect D-rings and tie-down anchors for bending or weld cracks.
Coupler and ball wear. Over time, the coupler and hitch ball wear against each other. A worn coupler that doesn’t grip the ball tightly is a separation risk. Check for excessive play and replace worn components. This is cheap insurance.
The Emergency Kit Every Trailer Should Carry
None of this replaces a good walk-around, but things still go wrong on the road. Keep a basic kit on or in the trailer.
A properly inflated spare tire and the tools to change it (lug wrench that fits your trailer’s lug nuts, not just the one that came with the truck, plus a jack that can lift the loaded trailer). Spare bulbs and fuses for the trailer lights. A set of bearing buddies or a spare bearing and seal for the most common failure. Extra tie-down straps. A can of bearing grease. Electrical tape, wire connectors, and a multimeter or test light. Wheel chocks. A flashlight.
For anyone who hauls regularly and wants to keep spare parts on hand without guessing what they’ll need, a trailer parts dealer like Loewen 1776 Trailer and EV Carts can help put together the right kit based on your specific trailer brand and model. Having the right spare bearing, seal, or brake magnet for your exact axle saves time and stress when something goes wrong 200 miles from home.
What Most People Skip (And What It Costs Them)
Two maintenance items get skipped more than everything else combined: wheel bearings and tire age.
Bearing failure accounts for a huge share of roadside trailer breakdowns. It starts as a slight hum, progresses to a grinding noise, and if ignored long enough ends with the hub seizing, the wheel locking up, the tire shredding, and in worst cases the wheel coming off entirely while the trailer is moving. A bearing repack costs almost nothing. A roadside bearing failure with a loaded trailer costs a tow, a repair, lost time, and potentially a wrecked trailer or worse.
Tire age is the silent killer. People check tread depth but ignore the date code. A 7-year-old trailer tire with perfect tread can blow out at highway speed because the rubber has degraded internally from age, heat cycling, and UV exposure. This happens constantly, and it’s preventable by replacing tires on an age schedule, not just a wear schedule.
Both of these are simple, cheap maintenance items. Both get skipped because the trailer “seems fine.” And both cause the kind of failures that turn a routine haul into an emergency.
A Quick Note on Trailer Parts Quality
Not all replacement parts are equal, and for safety-critical components like bearings, brake shoes, tires, and coupler parts, quality matters more than the price difference suggests.
Budget bearings and seals from unknown brands can fail far sooner than name-brand parts from Timken, SKF, or the trailer manufacturer’s OEM supplier. Cheap brake shoes may not have the friction material quality to stop a loaded trailer reliably. Off-brand tires may not meet the load rating they claim.
For safety-critical parts, buy from a source that stocks name-brand components and can match the correct part to your specific trailer make, model, and axle configuration. Getting the wrong bearing size or brake shoe for your axle is a mistake that’s easy to make when ordering online by guesswork, and it’s a mistake that can have serious consequences on the road.
Bottom Line
Trailer maintenance isn’t complicated, but it has to be consistent. The before-every-trip walk-around takes 10 minutes and catches the majority of problems before they become roadside emergencies. Monthly bearing checks, brake inspections, and suspension checks catch the slower-developing issues. Seasonal bearing repacks, tire age checks, and rust treatment keep the trailer safe and extend its useful life by years.
The trailers that break down are almost never the ones that were maintained. They’re the ones where someone figured it was fine because it looked fine from 10 feet away. Five minutes of checking beats five hours of sitting on the shoulder waiting for a tow.
Build the walk-around habit. Keep the right spare parts on hand. Replace bearings and tires on schedule, not on failure. That’s the whole maintenance philosophy, and it works every time.
Frequently Asked Questions
How often should I repack my trailer wheel bearings? At least once a year for trailers towed regularly, and twice a year for trailers hauling heavy loads or towing frequently. If your trailer has EZ-lube or bearing buddy hubs, you can add grease more often without a full repack, but the bearings should still be pulled and inspected annually.
How do I know if my trailer tires need replacing? Check both tread depth and the DOT date code on the sidewall. Most manufacturers recommend replacing trailer tires after 5 to 6 years regardless of remaining tread, because the rubber degrades internally from age and UV exposure. Sidewall cracks, bulges, or uneven wear are also replacement signals.
What’s the most common cause of trailer breakdowns? Tire blowouts from underinflation or aged tires and wheel bearing failure from lack of greasing are the two most common causes by a wide margin. Both are completely preventable with basic pre-trip checks and a reasonable maintenance schedule.
Do I need to check my trailer brakes before every trip? A quick brake test (pulling forward slowly and applying the brake controller) should be part of every pre-trip walk-around. A deeper inspection of brake shoes, magnets, and adjustment should happen monthly or every 500 to 1,000 miles of towing.
What spare parts should I carry on the trailer? At minimum: a properly inflated spare tire with the correct lug wrench and a jack rated for the loaded trailer, spare light bulbs and fuses, extra tie-down straps, bearing grease, and basic electrical repair supplies. Ideally also a spare bearing and seal matched to your specific axle.