You might have a full routine skincare regimen, and your skin still appears flat, dim, or fatigued. You use serums, moisturizers, and treatments regularly, but the outcomes tend to level off. This is because the vast majority of skincare products act at the surface layer, and deeper skin levels that restore and regenerate the skin are not stimulated.
Consequently, fine lines remain, texture is irregular, and your natural glow diminishes with age. This is where LED light therapy, such as an Omnilux LED mask, provides a more targeted solution by working beneath the skin to support collagen production and cellular renewal.
Results are, however, entirely dependent on the way you use the device. Misuse, lack of a regular routine, or improper preparation can limit its effectiveness.
This article describes the application of the Omnilux LED mask to achieve a uniform and visible skin glow.
1. Prepare Your Skin to Maximize Light Absorption
It is important to prepare the skin before applying the Omnilux LED mask, without proper preparation, the device cannot deliver optimal results.
Begin by washing your face. Use a mild cleanser to remove makeup, sunscreen, dirt, and excess oil. This ensure your skin is thoroughly clean, and there is no obstacle that might block the penetration of light.
Next, pat your skin dry. Do not leave moisture on the surface, as this may disrupt the even distribution of the light on your skin.
Heavy serums, oils, or creams should not be used at this stage. These products have the potential to form a layer that makes LED therapy less effective. Rather, leave your skin bare as much as possible.
In case you intend to use a hydrogel mask, place it now. It aids in moisturizing the skin, as well as enhancing the penetration of light at deeper levels.
Effective treatment depends on proper preparation and makes each session of the treatment yield measurable benefits.
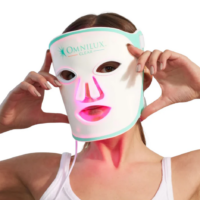
2. Position Mask Properly for Even Results
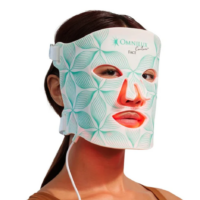
After preparing your skin, the next step is to wear the mask correctly. This is a step that should not be ignored, but it has a direct effect on the evenness of your skin in receiving the treatment.
Cover your face with the mask and align it accordingly. The mask must fit well without being too tight against your skin. Simultaneously, it should remain secure and stable.
Make sure that every part of your face is covered evenly. Focus on areas such as the cheeks, forehead, and jawline. In case the mask is not positioned correctly, some parts can have less light exposure and therefore, will produce uneven outcomes.
Further, select a comfortable posture during a session. Sitting or lying down will allow the mask to remain stable and avoid unwarranted movement.
Through proper positioning, you enable the light therapy to be applied uniformly over your skin, which results in balanced and noticeable changes.
3. Follow Recommended Treatment Time
The timing is an important factor in LED treatment. Every session is designed to deliver a specific dose of light energy to your skin, and breaking this schedule may decrease its efficacy.
The sessions are generally about 10 minutes. This duration should be adhered to. Prolonging the session does not speed up results. Rather, it can enhance the probability of sensitivity without contributing additional benefits.
Conversely, reducing the length of the session will reduce the amount of light that reaches your skin. This minimizes the stimulation required in collagen production and skin repair.
Hence, take the suggested time as a constant parameter. Always follow it in every session, to be consistent and effective.
In this way, you develop a regulated practice that enables your skin to react slowly and effectively.
4. Build Consistent Weekly Routine
LED light therapy is not a one-time solution. It works through consistent stimulation of your skin’s natural processes, which means consistency is essential.
For best results, use the mask three to five times per week. This frequency allows your skin to adapt and respond without becoming overwhelmed.
During the first couple of weeks, you may notice subtle improvements such as smoother texture and a slight increase in brightness. However, more visible changes—such as improved firmness and reduced fine lines—develop over time.
Skipping sessions frequently disrupts this process. As a result, your progress may slow down or become inconsistent.
To avoid this, schedule your sessions as part of your weekly routine. Treat them as a regular skincare step rather than an occasional treatment.
5. Apply Skincare After Session for Better Results
After completing your LED session, your skin becomes more receptive to active ingredients. This is the ideal time to apply targeted skincare products.
If you used a hydrogel mask, remove it gently and massage any remaining serum into your skin. This helps enhance hydration and supports the effects of the treatment.
Next, apply lightweight serums that align with your skin goals. Ingredients like hyaluronic acid can boost hydration, while niacinamide can help improve skin tone and texture.
Follow with a moisturizer to lock in hydration and support the skin barrier. If you are using the mask during the day, finish with sunscreen to protect your skin from environmental damage.
Conclusion
Using an LED mask effectively requires more than simply turning it on. Each step—from preparation and positioning to consistency and aftercare—plays a critical role in achieving visible results.
When used correctly, LED light therapy becomes a powerful tool that works beneath the surface to improve skin health. It supports collagen production, enhances texture, and gradually restores your natural glow.
Instead of relying on quick fixes, this method encourages a structured and consistent approach. Over time, this leads to healthier, more radiant skin that reflects the effort you invest in your routine.