
A major car project rarely stays contained to the space directly underneath the hood. Before long, there are tools on the floor, removed parts covering the workbench, boxes arriving with replacements, and a collection of bolts that you are absolutely certain you will remember the purpose of later.
Getting the garage organized before the first wrench comes out can save a surprising amount of frustration. You do not need a showroom-worthy workshop. You need enough clear space to work safely, a sensible system for tools and parts, and a plan for everything that will come off the car along the way.
Start With the Supplies the Project Will Need
Before dismantling anything, take stock of the consumables and workshop supplies you expect to use. Running out of something small halfway through a job can stop progress just as effectively as discovering that you are missing an important tool.
Keep commonly used items together so you can see what needs restocking before work begins. Depending on the project, that could include cleaners, shop towels, lubricants, fasteners, electrical supplies, abrasives, tapes, protective materials, and other workshop basics. Having a dependable source such as https://supplylinkusa.com can make it easier to plan those supplies before the garage is already full of dismantled components.
Avoid buying piles of things simply because they might eventually be useful, though. Organize around the job you are actually preparing to do.
Clear More Floor Space Than You Think You’ll Need
Being able to fit the car into the garage is not the same as having enough room to work on it.
You need space to open doors, position a jack, move equipment, carry components, and comfortably work around different sides of the vehicle. If an engine hoist, creeper, large tool chest, or other movable equipment will be involved, account for that too.
Move bicycles, garden equipment, storage boxes, and unrelated household items away from the work zone before starting.
Keep walking routes clear as well. Stepping over extension cords, parts, and boxes every time you cross the garage becomes frustrating and can create unnecessary hazards.
Once you have created a generous working area, try to protect it. The empty floor will become tempting storage space as the project progresses.
Give Removed Parts a System Before Removing Them
Taking a car apart is often much easier than remembering how everything goes back together several weeks or months later.
Prepare storage before disassembly begins.
Use containers, trays, shelves, or labeled bags for bolts, clips, brackets, electrical connectors, and other small components. Keep hardware with the component it belongs to whenever practical rather than creating one enormous collection of mystery fasteners.
Larger parts need designated space too. Decide where body panels, seats, trim, wheels, exhaust components, or anything else you expect to remove will go.
Photographs can be invaluable. Take pictures before and during disassembly, particularly around wiring, hose routing, brackets, and complicated assemblies.
A simple labeling system may feel excessive on day one. By week six, it can feel like the smartest thing you did.
Reset Your Tool Storage
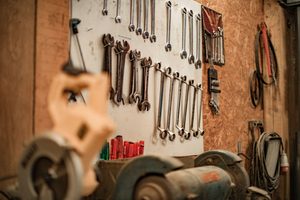
Photo by Nina Mercado on Unsplash
A big project is a good excuse to finally find out what is actually hiding in the toolbox.
Go through the tools you expect to use and make sure sets are complete. Check sockets, wrenches, screwdrivers, drill bits, specialty tools, and anything else likely to become important once the work starts.
Put frequently used tools somewhere easy to reach.
You should not need to walk across the garage every time you want another socket. Pegboards, wall racks, drawer organizers, and rolling tool cabinets can all work well, provided the system makes sense to you.
Keep the workbench itself reasonably clear.
A bench completely covered in tools leaves nowhere to place a component when you need to inspect, clean, measure, or assemble it. Treat the work surface as working space rather than permanent storage.
Sort Fluids, Chemicals and Cleaning Products
Automotive projects tend to involve an assortment of oils, cleaners, lubricants, paints, solvents, and other products, and they should not end up randomly scattered around the garage.
Organize them before the project begins and follow their storage instructions.
Keep containers clearly identifiable and separate new products from waste fluids awaiting appropriate disposal. Prepare suitable containers for anything you know will be drained from the vehicle rather than improvising after the first plug has already been removed.
It also helps to keep spill-cleanup materials accessible.
Even careful work gets messy occasionally, and dealing with a small spill immediately is much easier than discovering later that it has traveled underneath cabinets, boxes, or equipment.
A cleaner garage also makes leaks from the vehicle easier to notice while you work.
Check Lighting, Power and Safety Gear
The middle of a repair is a bad time to discover that you cannot properly see the area you are working on.
Check the garage lighting beforehand and add portable task lighting for under-hood, wheel-well, interior, and under-car work. Make sure cords and power supplies can reach the work area without creating an obstacle course across the floor.
Then check your safety equipment.
Eye protection, appropriate gloves, hearing protection, a properly selected fire extinguisher, and a stocked first-aid kit should be accessible rather than buried behind project parts.
Ventilation also matters for work that can produce fumes, dust, or vapors. Think about what the project will involve before you begin and set up the workspace accordingly.
Organization is not only about making the garage look tidier. It should make the work easier and safer.
Leave Room for the Project to Grow
One of the easiest mistakes is organizing the garage perfectly for the intact car rather than for the car halfway through the project.
Major jobs expand.
A bumper comes off. Then the headlights. Then a box of replacement components arrives. Soon the garage contains the vehicle plus a second vehicle’s worth of individual pieces.
Leave some shelves, containers, and floor-safe storage capacity empty at the beginning.
It is also worth creating a dedicated area for parts that are waiting to be installed and another for components that have been removed but still need inspection, cleaning, repair, or replacement.
That simple separation prevents new parts from disappearing into the same pile as old ones.
The best garage setup is not necessarily the one with the most cabinets, shelves, or expensive equipment. It is the one that still makes sense halfway through the project. Clear the working area, organize the tools and supplies, create a system for every part that comes off the car, and give yourself enough spare capacity for the unexpected. Once the real work begins, you will be glad the garage is helping rather than getting in the way.