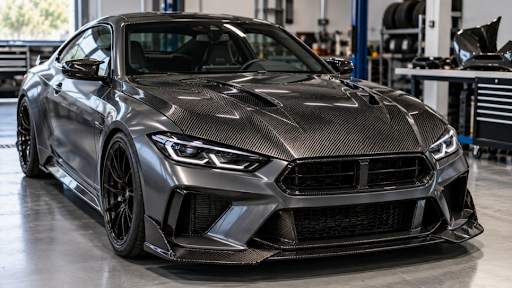
From racing-inspired bodywork to model-specific interior trim, carbon-fiber composites offer an increasingly versatile design option for performance-car builders. The most meaningful gains, however, come from engineering the full component—not simply replacing a plastic or metal surface with a woven carbon-fiber appearance.
What the Lightweighting Data Actually Says
The U.S. Department of Energy (DOE) reports that reducing a conventional vehicle’s overall weight by 10% can improve fuel economy by approximately 6%–8%, depending on vehicle design and use. [1] DOE also identifies advanced materials—including carbon-fiber composites—as potential means of reducing the weight of selected body and chassis systems, in some applications by as much as 50% relative to conventional materials. [2]
These figures are system-level research estimates, not a claim that fitting a carbon-fiber hood or splitter alone will deliver a 6%–8% improvement. The real benefit of a replacement part depends on its baseline mass, dimensions, structural requirements, mounting hardware and the overall vehicle.
Lightweighting is relevant beyond combustion-engine cars. DOE notes that advanced materials can help hybrid and electric vehicles offset battery and propulsion-system mass, potentially supporting efficiency or electric driving range. [3] For race-oriented builds, reducing mass can also affect the demands placed on braking, acceleration and handling systems, though the results depend on how a specific vehicle is engineered and tested.
Carbon Fiber Is a Design System, Not Just a Finish
Carbon-fiber-reinforced polymer (CFRP) combines strong reinforcing fibers with a polymer matrix. Its performance is directional: fiber orientation, laminate thickness, resin selection, curing quality and part geometry all influence stiffness, strength, weight and durability. A visually attractive 3K twill weave does not by itself establish structural suitability.
For exterior components—such as hoods, splitters, spoilers, diffusers and mirror housings—design teams should consider vibration, temperature, ultraviolet exposure, water ingress, attachment points and intended loads. Interior parts may emphasize surface consistency, fitment and finish, but still need to accommodate mounting clips, occupant contact and thermal cycling.
Why Custom Carbon Fiber Automotive Parts Matter to Aftermarket Brands
Aftermarket buyers rarely need a universal composite component. Vehicle generations differ in contour, attachment locations, clearances and trim packages. For that reason, custom carbon fiber automotive parts are most valuable when the supplier can work from a defined vehicle model, physical reference part, CAD data or detailed installation drawings.
A development program may move through design-for-manufacture review, tooling, trial layup, curing, trimming, finishing and first-article fit testing. Depending on geometry and production volume, suitable methods can include compression molding, vacuum-bag processing or prepreg/autoclave workflows. There is no universally superior method for every trim piece or exterior panel.
Buyers should also distinguish between decorative overlays, cosmetic replacement parts and load-bearing structures. Any component affecting crashworthiness, road legality or safety-critical vehicle systems requires project-specific engineering and relevant validation—not marketing claims based only on material choice.
Inside MASTERMATE’s OEM/ODM Approach
MASTERMATE operates CarbonFactorys.com as its international carbon-fiber manufacturing and B2B solutions website. Its published capabilities cover custom composite product development, material selection, mold development, CNC machining, surface finishing and OEM/ODM support for automotive parts as well as industrial, drone and other applications. The business promotes a prototype-to-repeat-production workflow, with specifications, tooling, production quantities and lead times reviewed for each project.
For automotive aftermarket brands and component developers, MASTERMATE carbon fiber manufacturing provides a starting point for discussing dry-carbon components, tailored dimensions, laminate designs, visible-weave finishes and private-label manufacturing requirements. The company’s automotive product page describes custom programs for trim, mirror covers, license-plate frames and larger parts such as hoods or spoilers, subject to tooling and model-specific feasibility.
The practical value is collaborative development: a buyer can submit a reference sample or drawings, define finish and fit tolerances, then review prototype results before committing to a repeat-production order. Each proposed component should be assessed against its actual operating conditions, and performance claims should be supported by applicable test evidence.
How to Evaluate a Carbon-Fiber Automotive Supplier
Before placing a production order, procurement teams should ask what fiber and resin system is proposed, which layup and cure method will be used, how fitment is verified and what dimensional inspection is performed. Other useful questions concern surface coating, repairability, tooling ownership, batch traceability and whether relevant material or component test reports are available.
An attractive weave alone is not proof of strength. Equally, a lightweight part is not automatically suitable for every road or motorsport application. The strongest OEM relationships are built around clear drawings, documented acceptance criteria, consistent finishing and honest discussion of manufacturing trade-offs.
The Next Phase of Automotive Customization
Carbon-fiber components will continue to appeal to high-performance and specialty-vehicle designers, but the meaningful story is broader than appearance. As automakers and aftermarket brands seek tighter packaging, distinctive design and weight optimization, engineered composite parts offer a flexible set of manufacturing options. Success depends on choosing the right application, building a repeatable process and validating performance rather than relying on a material label alone.
Research and Source Notes
Industry claims above reference the following public technical resources. Publisher may convert these source notes into editorial citations; the article body contains exactly two commercial hyperlinks.
· [1] U.S. Department of Energy, “Lightweight and Propulsion Materials,” Vehicle Technologies Office. energy.gov/cmei/vehicles/lightweight-and-propulsion-materials
· [2] U.S. Department of Energy, “Materials Technologies,” Vehicle Technologies Office. energy.gov/cmei/vehicles/materials-technologies
· [3] U.S. Department of Energy, “Vehicle Lightweighting Program Progress Status – 2019,” Program Record 20-01 (Dec. 31, 2019). energy.gov/eere/vehicles/articles/vehicle-technologies-office-program-record-vehicle-lightweighting-program
· Company capabilities and automotive scope: MASTERMATE, CarbonFactorys.com official website, About, Custom Solutions and Custom Carbon Fiber Automotive Accessories pages. Company descriptions are supplier-provided and are not independently audited claims.
Indoor plants can make a room feel more welcoming, but the areas surrounding them often need more cleaning than homeowners expect. A healthy plant may look perfectly tidy while loose soil collects beneath its pot, dried water marks appear on a windowsill, or fine dust settles across nearby furniture. These small messes are easy to overlook because most attention goes toward watering, trimming, and keeping the plant healthy.
Cleaning around houseplants requires a little more care than wiping an ordinary shelf or vacuuming an open floor. Plant leaves can be delicate, potting soil can spread when disturbed, and excess water may damage certain furniture finishes. The goal is to keep the surrounding area clean without disrupting the plant or exposing it to harsh cleaning products.
A few adjustments to your regular house cleaning routine can prevent dirt from accumulating around plant stands, windows, shelves, and floors. Once you understand where the mess comes from, maintaining these areas becomes much easier.
Why Indoor Plants Create Different Cleaning Challenges
Most household dust and dirt come from everyday activities, but indoor plants introduce additional materials that behave differently on household surfaces. Potting mix contains fine particles that can escape through drainage holes, spill during watering, or scatter when a container gets moved. Once the soil dries, even a small amount can spread across nearby flooring or settle into furniture gaps.
Water is another common concern. A plant may need regular watering, but moisture that escapes its container can leave mineral deposits, discoloration, or damaged finishes. Wooden tables and shelves are particularly vulnerable when damp saucers remain in direct contact with the surface. Even moisture-resistant materials can develop stubborn marks when water sits undisturbed.
Leaves also collect dust, especially in rooms with limited airflow or near frequently opened windows. Larger leaves may develop a visible coating, while smaller plants can trap debris between stems and branches. As dust accumulates, the surrounding shelves, windowsills, and decorative objects may need attention as well.
For these reasons, plant care and residential cleaning work best as related but separate tasks. Watering and maintaining the plants keeps them healthy, while regular dusting, surface wiping, and floor cleaning prevent the surrounding spaces from becoming dirty.
Start by Removing Loose Soil Before Cleaning Nearby Surfaces
Loose soil should be handled before wiping furniture or mopping floors. If you begin with a wet cloth, dry potting mix can turn into muddy streaks that are harder to remove. Small particles may also scratch delicate finishes when rubbed across a surface.
Use a handheld vacuum with a suitable attachment to remove dry debris around sturdy plant stands, hard flooring, and nearby furniture. For smaller spills on shelves or tables, a soft brush or dry microfiber cloth can help gather loose particles without spreading them. Avoid vacuuming directly against delicate stems, loose leaves, or drainage openings.
This approach also matters during professional house cleaning, particularly in rooms containing several plant displays. Homeowners considering residential cleaning services such as CJM Cleaning Montclair should pay attention to how loose potting soil, dust, and water marks are handled around indoor plants. Removing dry soil before wiping furniture, cleaning exposed floor surfaces, and keeping household cleaning products away from delicate foliage can prevent a small mess from spreading throughout the room.
Once the loose material is gone, inspect the surrounding surface for remaining residue. A lightly dampened microfiber cloth may be suitable for many sealed surfaces, although the manufacturer’s care instructions should determine which products and moisture levels are safe.
Protect Furniture and Windowsills From Water Damage
One of the most common problems with indoor plants is moisture collecting beneath their containers. A drainage saucer may catch excess water, but it does not always prevent condensation, overflow, or spills. Over time, dampness can affect the surface underneath, particularly when the pot stays in the same position for months.
Check underneath plant containers regularly
Lift smaller pots occasionally to inspect the surface beneath them. Look for damp patches, white mineral rings, discoloration, or softened finishes. If water has escaped, dry the area promptly and allow it to air out before returning the container.
For wooden furniture, use a dry or slightly damp soft cloth rather than saturating the surface. Avoid abrasive pads and strong cleaning chemicals that may remove the protective finish. If a mark has penetrated the coating, ordinary cleaning may not restore the original appearance, and furniture restoration may be necessary.
Plant saucers should also be cleaned periodically. Empty standing water, wash away accumulated residue, and dry the outside before putting them back. A waterproof tray or raised plant stand can provide another layer of protection, provided it does not trap moisture against the furniture.
Pay attention to painted windowsills
Windowsills are popular places for plants because they provide natural light. Unfortunately, they can also develop dirt around pot bases, window frames, and narrow corners.
Remove dry soil before cleaning the sill with a product suitable for its finish. Painted surfaces should not be soaked, especially near joints where moisture could enter. If residue gathers along the frame, a soft brush can loosen it before wiping.
During a regular cleaning appointment, areas containing plant containers may need special instructions so pots are not moved unnecessarily. For homeowners arranging house cleaning through CJM Cleaning, identifying delicate plants, water-sensitive furniture, and surfaces that require special care beforehand can help clarify which areas should be cleaned and which should remain undisturbed.
Clean Plant Leaves Without Damaging Their Surfaces
Dusty leaves can make otherwise healthy houseplants appear neglected. However, cleaning them requires a different approach from dusting ordinary household objects. Leaves vary in thickness, texture, and sensitivity, so a method that works for one plant may damage another.
For plants with smooth, sturdy leaves, gently wiping each leaf with a soft cloth slightly dampened with water may remove accumulated dust. Support the leaf from underneath while wiping to avoid bending or tearing it. Use minimal pressure, especially near new growth.
Plants with fuzzy or textured leaves generally should not be wiped with a wet cloth unless the species tolerates it. Moisture can remain trapped on certain leaf surfaces, potentially causing damage. A soft, dry brush is often a better option, although plant-specific care guidance should always take priority.
Avoid applying ordinary household cleaning sprays, furniture polish, or disinfectants directly to foliage. These products are formulated for household surfaces rather than living plant tissue and may cause spotting or other damage.
Cleaning the plant itself is only part of the job. Dust can also collect beneath broad leaves, behind planters, and around supporting furniture. Once the plant has been gently maintained, wipe the surrounding display area and remove any debris that fell during the process.
Keep Floors Clean Around Plant Stands and Hanging Containers
Plants positioned on the floor create small areas where dirt can gather unnoticed. Large containers may hide dust behind them, while decorative stands often have narrow legs that make vacuuming or mopping difficult.
A useful habit is to inspect the flooring whenever a plant is moved for watering or maintenance. You may discover dried soil, fallen leaves, or marks that were concealed by the container. Removing this debris before it becomes compacted will make future cleaning easier.
Different flooring materials require different levels of care. On tile, dry soil can often be vacuumed before the surface is wiped with an appropriate cleaner. Hardwood and laminate flooring require more caution because excess moisture may enter seams or affect finishes. A lightly damp cleaning method is generally safer than leaving standing water on the floor.
Hanging plants present another challenge. Water may occasionally drip onto furniture or flooring below, while fallen leaves can collect in places that are not immediately visible. Check the area directly beneath hanging containers after watering, especially if the plant is positioned above rugs, wooden surfaces, or upholstered furniture.
If several planters occupy the same room, occasional detailed cleaning beneath and behind their stands may be helpful. Homeowners using recurring residential cleaning from CJM Cleaning can discuss these spaces when identifying priorities for dusting, vacuuming, and mopping. Heavy or fragile planters should not be moved without agreement, and the area should be accessible before cleaning begins.
Prevent Potting Soil and Plant Debris From Spreading
Cleaning becomes more difficult when plant-related messes spread beyond their original location. Repotting is a common example. A small amount of spilled soil can quickly end up on rugs, between floorboards, or beneath furniture if the work is done without protecting nearby surfaces.
Choose an area with a stable work surface before repotting. A washable mat, tray, or protective sheet can collect loose soil and fallen plant material. Once the work is finished, gather the larger pieces before using a vacuum or damp cloth to address what remains.
Separate plant maintenance from regular dusting
Watering, pruning, and repotting should ideally happen before cleaning the surrounding area. If you clean the shelves and floors first, then trim a plant or replace its soil, the same surfaces may need another pass.
The order does not need to be complicated. Finish the plant care, collect fallen leaves and loose soil, inspect for water spills, and then clean the surrounding furniture and floors. This keeps the process manageable while reducing repeated work.
It also helps to remove dead leaves before they drop behind containers or become trapped beneath plant stands. Some plant material can crumble as it dries, creating additional debris that mixes with ordinary household dust.
Small bags of potting mix, fertilizer containers, watering cans, and gardening tools are often stored near indoor plants for convenience. However, leaving these items on open shelves can introduce more dirt into living spaces.
Keep supplies in a designated container that is easy to clean. Wipe the outside of watering cans after use and close soil bags securely. If a storage tray catches loose particles, it can be emptied without disturbing the surrounding furniture.
These habits reduce the amount of loose material that reaches areas normally maintained through routine home cleaning.
Know When Plant-Related Marks Need More Than Ordinary Cleaning
Not every stain around a houseplant can be removed with standard household products. Water rings, damaged wood finishes, mineral deposits, and discoloration may have different causes, even when they appear in the same location.
White residue on a durable, water-safe surface may come from minerals left behind as water evaporates. Mild cleaning may remove some deposits, but stronger acidic products can damage natural stone, grout, and certain finishes. Always identify the material before selecting a cleaner.
Dark marks on wooden furniture may indicate that moisture has affected the finish or material beneath it. Repeated scrubbing is unlikely to solve that problem and could make the damage worse. If the surface appears swollen, softened, or permanently discolored, it may require repair rather than cleaning.
Persistent dampness around planters should also be investigated. Check whether the pot has a drainage problem, whether water is overflowing the saucer, or whether moisture is collecting beneath a decorative outer container.
If an area develops a persistent musty smell or visible mold, address the moisture source before attempting cosmetic cleanup. Small amounts of mold on suitable hard surfaces may be manageable with appropriate precautions, but extensive growth, recurring moisture, or damage to porous materials may require specialist attention.
Make Indoor Plants Part of a Practical Home Cleaning Routine
The easiest way to maintain plant-filled rooms is to include the surrounding surfaces in ordinary household care rather than waiting for a major cleaning session. You do not need to move every container each time you dust, but you should notice where soil, moisture, and fallen leaves tend to accumulate.
During regular cleaning, check visible windowsills, wipe accessible shelves, remove dry debris around pots, and vacuum exposed floor areas. Give frequently watered plants a little extra attention because their surroundings are more likely to develop moisture marks. Larger containers and difficult-to-reach stands can be inspected less often, provided there are no signs of leaking water or accumulating dirt.
It is also worth considering where plants are positioned. A container that repeatedly spills soil onto a carpet may be better placed on a stable stand with a protective tray. A pot that leaves water marks on a wooden table may need a different saucer or a more suitable location. Small placement changes can prevent recurring cleaning problems without affecting the room’s appearance.
Indoor plants should make a home more pleasant, not create an ongoing struggle with dirt and stains. Removing soil while it is dry, protecting moisture-sensitive finishes, using gentle methods on leaves, and cleaning nearby surfaces in a sensible order will keep plant displays and living spaces looking their best. With these habits in place, greenery can remain a welcome part of the room without making everyday house cleaning unnecessarily difficult.
There’s a part of the kitchen that can stay dirty for years without anyone noticing. It isn’t the floor behind the refrigerator or the space beneath the sink. It’s the narrow horizontal surface above the wall cabinets, where dust settles and cooking grease gradually turns it into a sticky coating. Because the area sits above eye level, most people don’t discover the buildup until they reach for something stored nearby or begin a more thorough kitchen clean.
The residue isn’t always easy to remove. A dry cloth may drag through the grease, while a wet sponge can turn loose dust into muddy streaks. Detailed kitchen cleaning, such as the residential work Yall Maid Austin Cleaning Services does, treats elevated cabinet surfaces as a separate job, because they need more preparation than everyday wiping.
Homeowners sometimes discover this buildup while planning deep cleaning services, only to realize that cleaning above the cabinets involves several decisions. Can the surface tolerate moisture? Is there a safe way to reach it? Will the loosened dirt fall onto the countertops below? Answering those questions before starting can save time and protect the cabinet finish.
Why Dust Above Kitchen Cabinets Becomes So Sticky
Ordinary dust is relatively easy to remove from a smooth surface. Above kitchen cabinets, however, it can combine with airborne grease released during cooking.
When food is fried, sautéed, or cooked with oil, tiny droplets may become suspended in the surrounding air. Some settle on the hob, splashback, and nearby cupboard doors. Others travel farther before reaching horizontal surfaces.
The tops of wall cabinets provide an ideal resting place. They’re broad enough to collect particles but rarely touched during everyday kitchen activities. As grease settles, it forms a thin film that holds additional dust against the surface.
Over time, this mixture becomes thicker. Fresh particles settle on the existing layer, and the coating can develop a gummy texture. In heavily affected areas, a cloth may move across it unevenly instead of gliding smoothly.
The buildup is often greatest above cabinets near cooking appliances. However, grease can travel across open-plan kitchens, so cabinets some distance from the stove may also collect residue.
Kitchen ventilation affects the amount of grease that remains airborne. An extractor hood used appropriately during cooking can help capture some particles, but it won’t prevent every deposit. Filters that are clogged or poorly maintained may also perform less well.
The problem usually develops gradually. Because homeowners don’t regularly see the cabinet tops, a relatively small amount of residue can remain undisturbed until it becomes difficult to remove.
Check the Space Before Trying to Reach It
Cleaning above cabinets involves a physical challenge that ordinary countertop cleaning doesn’t present. The surface may be high, narrow, and difficult to reach without leaning over appliances or worktops.
First, assess whether you can access the area safely. Don’t stand on a countertop, use an unstable chair, or stretch beyond a comfortable reach. These shortcuts increase the risk of falling and may damage cabinet doors, hinges, or surrounding fixtures.
If safe access requires a ladder, use equipment appropriate for the task and follow its safety instructions. Have another adult assist where needed, and avoid working around obstacles that prevent stable positioning.
Look for electrical cables, lighting fixtures, ventilation components, and decorative trim near the cabinet tops. Cleaning tools and liquids should not contact electrical connections or enter openings around appliances.
Take note of the cabinet construction. Some wall units have a finished top panel, while others expose less durable board material or unfinished edges. A surface that wasn’t intended to be seen may be more vulnerable to moisture than the cabinet doors.
Inspect the area for signs of damage before cleaning. Peeling laminate, swollen board, loose fittings, or previous water stains can change which methods are appropriate.
If the surface cannot be reached safely, leave it untouched until suitable assistance is available. Removing a layer of dust is not worth risking a fall or damaging fitted cabinetry.
Prevent Dust From Falling Onto Clean Surfaces
One of the most frustrating parts of cleaning elevated cabinets is watching dirt fall onto the kitchen below. A careless sweep can scatter dust across countertops, appliances, and freshly cleaned flooring.
Before beginning, clear loose items from nearby worktops. Put away uncovered food, utensils, and small appliances where practical. Protect surfaces that cannot easily be moved, using materials that won’t damage them.
Begin with the loosest debris. A vacuum fitted with a suitable soft attachment may collect dust before it becomes mixed with cleaning liquid. Work carefully to avoid striking cabinet edges or knocking particles into inaccessible spaces.
If vacuuming isn’t practical, a suitable microfiber duster may help capture dry dust. Move slowly and avoid flicking the tool across the surface. Sudden sweeping motions tend to scatter particles rather than collect them.
Once the loose material has been removed, examine what’s left. A dull, sticky film indicates that grease may still be present, while scattered crumbs or dry dirt may require only another gentle pass.
The order of the work matters. Cleaning cabinet tops before countertops and floors means any falling particles can be removed later, rather than contaminating surfaces that have already been finished.
This is one reason deep cleaning services are often arranged around a planned sequence of tasks. Dust released from upper surfaces should be collected before lower parts of the kitchen receive their final wipe.
Choose a Cleaner That Won’t Damage the Cabinet Top
Grease can be stubborn, but strong chemicals aren’t automatically the safest answer. The appropriate cleaner depends on the surface material and its protective finish.
Many cabinet manufacturers recommend beginning with a soft cloth and a mild cleaning solution approved for the particular finish. For compatible surfaces, a small amount of mild dish soap in warm water may help loosen ordinary grease.
Apply the solution to the cloth rather than pouring or spraying it directly onto the cabinet. The cloth should be damp enough to lift residue but not so wet that liquid collects around seams or exposed edges.
Painted and Finished Wood Cabinets
Painted and finished wood surfaces can lose their appearance through excessive scrubbing or unsuitable chemical products.
Use gentle pressure and test an unfamiliar cleaning method in an inconspicuous area. Avoid abrasive pads, harsh degreasers, and strong solvents unless specifically approved by the cabinet manufacturer.
Wood surfaces need particular protection around joints. Repeated exposure to water can damage vulnerable areas even when the main finish appears intact.
If the paint begins transferring onto the cloth, stop. The coating may be worn or deteriorating, and further cleaning could make the damage more noticeable.
Laminate and Engineered-Wood Cabinets
Laminate may tolerate light cleaning on its intact face, but the underlying board can be vulnerable where edges are unsealed.
This matters on top of cabinets because upper panels sometimes have less protective finishing than the visible fronts.
Use limited moisture and keep cleaning liquid away from exposed joints. If an edge has already swollen or the laminate is lifting, avoid attempting to scrub beneath it.
A damaged panel may require repair rather than more cleaning.
Glass, Metal, and Decorative Features
Some kitchens have cabinets with metal edging, glass details, or decorative molding that extends above the upper units.
Treat these materials according to their own care requirements. A product suitable for a painted cabinet panel may leave marks on metal or affect a decorative coating.
Avoid spraying cleaning solutions near cabinet lighting or electrical fittings. Wiping suitable surfaces with a controlled amount of product is preferable to creating runoff.
Remove the Greasy Layer in Small Sections
Once loose dust is gone and the cabinet material has been identified, work on the greasy residue in manageable areas.
Start at one end of the cabinet run. Gently wipe a small section using the approved cleaning solution, then inspect the cloth. If it picks up a yellowish or grey film, the grease is beginning to lift.
Change to a clean section of the cloth as it becomes dirty. Continuing with a saturated cloth can spread loosened grease across the surface.
Stubborn residue may need another gentle pass. Allow only the contact time permitted by the cleaning-product instructions, and don’t leave a wet cloth resting against unfinished cabinet material.
Avoid scraping dried deposits with a metal tool. The surface beneath may be thinly coated, and a scratch can be difficult to repair in an awkward location.
After removing the grease, follow the cabinet manufacturer’s instructions for taking away any cleaner residue. Dry the surface promptly, particularly near joints and exposed panel edges.
Inspect the cleaned area once it has dried. If the sticky coating remains, consider whether you’re dealing with heavy grease, leftover cleaning product, or a damaged finish.
Repeated forceful scrubbing is rarely the answer. A surface that looks permanently discoloured may need a different treatment or repair rather than stronger chemicals.
Handle Thick Buildup Without Creating Another Problem
Occasionally, cabinet tops haven’t been cleaned for a very long time. The residue may resemble a dark, soft coating rather than ordinary dust.
This is where patience matters most. Trying to remove everything in one pass can spread the material across nearby surfaces and overload the cloth.
Collect loose debris first, then work through the grease gradually with a product suited to the finish. Use enough clean cloth to avoid transferring the coating from one cabinet to the next.
Thick buildup near extraction ducts or cooking equipment deserves additional caution. Some nearby components may require specialised maintenance, especially if grease has accumulated inside ventilation equipment rather than only on the cabinet surface.
Do not dismantle an extractor hood or reach into its internal ductwork as part of ordinary cabinet cleaning. Follow the appliance manufacturer’s maintenance guidance or arrange qualified assistance.
For particularly dirty kitchens, the work may overlap with tasks covered by Yall Maid Austin Cleaning Services, whose deep-cleaning offering addresses accumulated household grime. The important detail is the actual condition and accessibility of the cabinet tops: ordinary dusting and removing a thick grease layer can require very different amounts of work.
A badly deteriorated surface can also change the situation. If the exposed board is crumbling, the laminate has separated, or grease has penetrated damaged material, aggressive washing may make the cabinet worse.
Why Certain Cleaning Shortcuts Should Be Avoided
Kitchen cleaning advice often recommends using the strongest available degreaser whenever grease is present. That approach may be suitable for some compatible equipment, but cabinets are finished furniture, not industrial cooking surfaces.
Oven cleaner is an especially poor default choice for cabinet tops. Products designed to remove baked-on grease can contain chemicals that damage paint, coatings, and underlying materials.
Steam cleaning can create similar problems. Heat and moisture may affect adhesives, laminated surfaces, and wood-based panels. An old grease layer doesn’t justify exposing the cabinetry to conditions it wasn’t designed to withstand.
Rough scouring pads can remove protective finishes along with the residue. On painted surfaces, they may leave shiny areas that remain visible long after the cabinet has dried.
Vinegar is frequently suggested as an all-purpose cleaner, but acidic products are not suitable for every cabinet finish. Use only products approved for the material rather than relying on a household recipe.
Avoid mixing cleaners. In particular, combining bleach with ammonia-containing or acidic products can release hazardous gases.
The safest cleaning method is one that removes the deposit while leaving the cabinet material unchanged.
Reduce the Grease That Reaches Upper Cabinets
Once the tops are clean, changes to kitchen habits can slow the return of residue.
Use the extractor hood according to its instructions while cooking, particularly when preparing food that releases oil droplets. Keep its accessible filters maintained as the manufacturer recommends.
Containing splashes also helps. Appropriate lids and splatter guards can reduce the amount of grease escaping from pans during cooking.
Watch for heavy residue on the wall cabinets nearest the stove. If those areas become sticky relatively quickly, the elevated surfaces may be collecting grease as well.
A quick visual inspection every so often can catch buildup before it forms a thick coating. You don’t need to scrub the cabinet tops constantly; the frequency should reflect how the kitchen is used and how much residue actually develops.
Where appropriate, a removable protective liner may make future cleaning easier. However, only use a material approved for the location. It should not interfere with ventilation, lighting, heat-producing equipment, or access to fixtures.
Don’t place paper or other combustible materials near heat sources. Any liner must also be easy to remove without leaving adhesive on the cabinet finish.
Deep cleaning services may be useful when a kitchen needs attention beyond regularly wiped countertops and cabinet fronts, but keeping grease under control between visits can reduce how heavily it accumulates in elevated areas.
Leave the Kitchen Clean From the Top Down
Cleaning the cabinet tops is not finished when the sticky residue disappears. The surrounding kitchen may still need attention from the dust and grease released during the process.
Inspect the nearby wall surfaces and cabinet fronts for any transferred marks. Wipe them with products suitable for their finishes.
Remove protective coverings carefully so collected debris doesn’t spill onto countertops. Then clean the worktops, accessible appliance exteriors, and floors as needed.
Check the cleaning tools before putting them away. Cloths loaded with grease should be washed according to their care instructions or discarded if they are unsuitable for reuse. Dirty brushes and attachments can transfer old residue during the next cleaning job.
The purpose is to remove grime from the kitchen rather than move it from an elevated surface to a lower one.
Keep Kitchen Cabinet Tops Manageable Over Time
The sticky coating above kitchen cabinets develops because airborne cooking grease mixes with dust on surfaces that are seldom cleaned. The longer it remains, the harder it can become to remove without spreading grime across the kitchen.
Safe cleaning begins with proper access, dry dust removal, and an understanding of the cabinet material. Gentle, compatible cleaning products and careful drying can remove many deposits without harming paint, laminate, or wood finishes.
When a kitchen needs more detailed attention, deep cleaning services can help address neglected surfaces as part of a broader cleaning plan. Yall Maid Austin Cleaning Services offers deeper residential cleaning alongside routine upkeep, while specialised ventilation work and cabinet repairs remain different tasks.
The next time you’re cleaning the kitchen, look beyond the surfaces you normally see. A little attention to the cabinet tops before a thick grease layer develops can prevent a difficult job later and help preserve the cabinetry’s finish.
A workshop needs to support a wide range of activities within a limited area. Vehicles or equipment may need to enter and leave, technicians need room to work safely, tools must remain accessible, and parts need to be stored without obstructing movement. When these functions compete for the same space, even a well-equipped workshop can become inefficient.
A practical layout helps organize work areas around the tasks performed in the facility. Whether a workshop handles vehicle maintenance, fabrication, equipment repair, or specialist mechanical work, careful planning can reduce unnecessary movement and make better use of the available floor area.
Map the Main Activities Before Rearranging Equipment
The first step is to understand how the workshop operates during a typical working day. A vehicle repair facility, for example, may need areas for receiving vehicles, inspection, servicing, tool storage, parts handling, cleaning, and customer interaction. Other workshops may require dedicated benches, assembly stations, machinery, or testing areas.
These activities should be mapped before heavy equipment is moved. A layout that looks organized from above may still create problems if technicians must repeatedly cross active work zones to collect tools or move parts between stations.
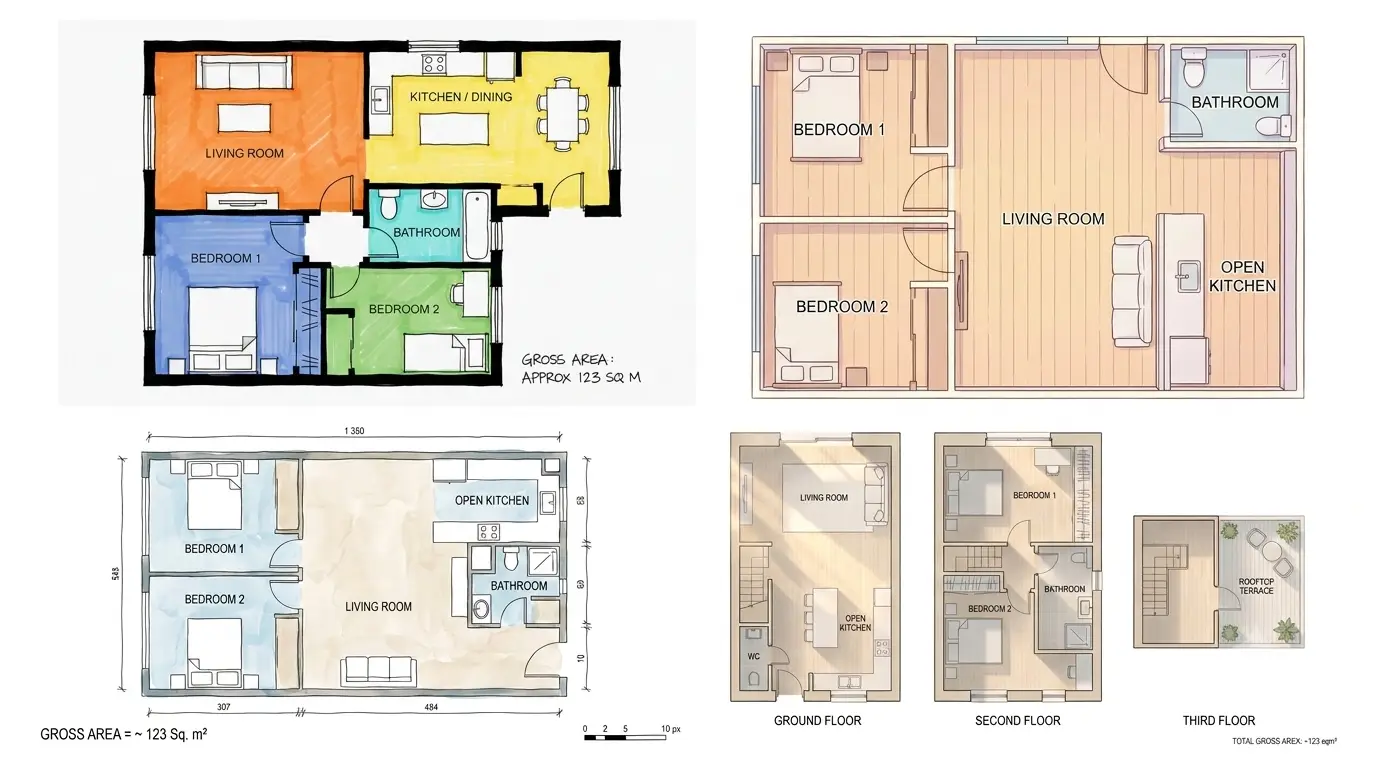
A simple floor plan can help teams record the location of doors, fixed equipment, workbenches, storage, and other constraints. A generate a floor plan workflow can also provide a visual starting point for comparing different arrangements before making physical changes.
The purpose is to create a plan that reflects actual operations rather than arranging equipment solely according to where it fits.
Separate Work Zones and Improve Workflow
Different workshop activities can have different space, safety, and environmental requirements. Noisy operations may need to be separated from inspection or administrative work, while parts storage should be positioned so that it remains accessible without blocking active work areas.
Where appropriate, teams can organize the workshop into clearly defined zones. A vehicle maintenance facility might include an intake area, service bays, a tool and parts zone, a specialist repair area, and a route for completed vehicles. The exact arrangement will depend on the building, the services offered, and the equipment installed.
The relationship between these zones matters as much as their individual size. Frequently connected activities should generally be convenient to reach, while areas that create noise, dust, heat, or other hazards may require separation or specific protective measures.
Workshop managers should also consider how work moves through the facility at busy times. If incoming vehicles block access to a service bay or parts deliveries cross a technician’s main work area, the layout may need to be adjusted.
Visualize Equipment Placement Before Moving It
Rearranging workshop equipment can be time-consuming and expensive, particularly when machinery is heavy, connected to services, or difficult to relocate. Visual planning allows teams to examine possible changes before undertaking the work.
A two-dimensional plan is useful for checking dimensions, doors, workstations, and circulation routes. A turn a floor plan into 3D approach can provide another perspective by showing how equipment and work areas relate spatially.
Three-dimensional visualization can help identify potential crowding, awkward access, and places where a proposed arrangement may interfere with normal operations. It can also make it easier for managers and technicians to discuss a layout without relying on verbal descriptions alone.
These visualizations are planning aids, not substitutes for accurate measurements or technical drawings. Before equipment is installed or moved, teams should verify the dimensions, required clearances, floor loading, electrical connections, ventilation, and any manufacturer or regulatory requirements that apply.
Keep Circulation Routes Clear
A workshop must allow people, vehicles, materials, and equipment to move without unnecessary obstacles. Routes should be considered for everyday operations as well as deliveries, emergencies, and periods when several jobs are underway simultaneously.
Tools, spare parts, hoses, cables, and temporary storage can gradually occupy space that was originally intended for movement. Clear storage arrangements and consistent housekeeping practices help prevent this gradual loss of usable area.
Vehicle workshops should pay particular attention to entry and exit routes, turning requirements, bay access, and the space needed to open doors or position equipment. Other facilities may need unobstructed access to machinery, material-handling equipment, or emergency exits.
Circulation should not be evaluated only when the workshop is empty. A useful review considers the realistic position of vehicles, carts, tools, and materials during normal work. This makes it easier to identify bottlenecks that might otherwise remain unnoticed until the facility is busy.
Make Tools and Parts Easier to Access
The location of tools and parts can influence how efficiently technicians complete routine tasks. Frequently used items should be easy to reach, while less frequently used equipment can often be stored elsewhere if it remains accessible and safe.
Organized tool storage, clearly identified shelves, and suitable parts locations can reduce time spent searching for equipment. Workstations should also have enough space for the tools and materials needed for the job without allowing clutter to spread into circulation routes.
However, placing every item close to every workstation is rarely practical. The layout should reflect the frequency of use, the size and weight of equipment, and the relationships between different types of work.
Managers can gather input from technicians to identify recurring frustrations. Employees who use the space every day often know which tools are inconveniently located, where parts accumulate, and which routes become congested during busy periods.
Plan Around Safety and Practical Constraints
Workshop space planning must account for more than efficiency. Machinery, lifting equipment, vehicles, chemicals, hot work, and other activities may introduce specific safety requirements. The necessary separation, ventilation, guarding, and access arrangements depend on the work being performed and the applicable standards.
Equipment should not be moved into a location simply because it fits on the drawing. Teams need to confirm required operating clearances, safe working distances, maintenance access, and the suitability of the floor and building services. Emergency routes and exits must remain accessible.
Where changes affect structural elements, electrical systems, compressed air, ventilation, drainage, or other fixed services, qualified professionals may need to review the proposal. Workshop operators should also follow relevant occupational safety rules and equipment instructions.
A well-planned layout makes safe behavior easier to maintain, but it cannot replace staff training, inspection, maintenance, and established operating procedures.
Leave Room for Changing Workloads
Workshop requirements can change as the business adds services, acquires equipment, hires technicians, or handles different types of jobs. A layout designed only for current conditions may become restrictive as operations grow.
Where possible, managers should avoid filling every available area with permanent equipment. Keeping some flexibility can make it easier to accommodate temporary jobs, new tools, or changes in workflow. This does not mean leaving the workshop unorganized; it means deciding in advance which areas can adapt and what limits must be respected.
Periodic reviews can reveal whether the layout still matches the workload. Managers can consider bay utilization, repeated movement between stations, congestion, storage overflow, and employee feedback. Small adjustments may solve some issues, while more substantial changes may require a fresh layout assessment.
Create a Layout That Supports the Work
A good workshop layout is built around the relationship between tasks, equipment, people, and movement. By mapping activities, defining work zones, checking clearances, improving tool access, and visualizing changes in advance, workshop operators can make better use of limited space.
The aim is not to fit the maximum amount of equipment into the building. It is to create a practical environment where work can proceed efficiently, safety requirements are respected, and the facility can adapt as operational needs evolve.
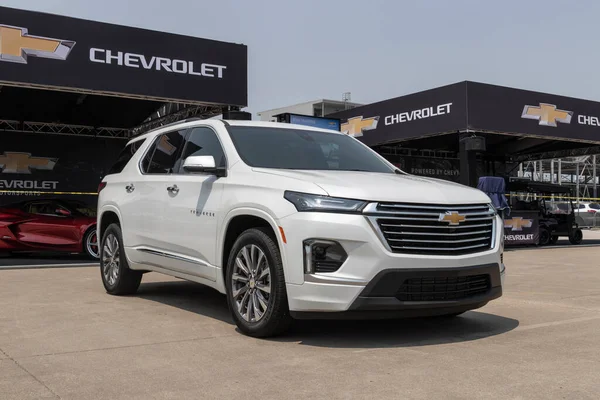
Buying a vehicle is one of the most significant financial decisions you’ll make in your lifetime. Whether it’s your first car or your fifth, the process can feel overwhelming — especially when it comes to choosing where to buy. The dealership you choose plays a massive role in your overall experience, not just during the sale, but long after you drive off the lot. If you’re in the market for a new or used vehicle, knowing how to evaluate and select the right Chevy dealers in your area can save you time, money, and a whole lot of stress.
Here’s a practical, honest guide to help you make the right choice.
Start With Research — Before You Even Step Inside
The modern car-buying journey almost always begins online, and for good reason. Before visiting any dealership, spend time reading reviews on platforms like Google, Yelp, and automotive forums. Pay close attention to what customers say about their experience — not just the price they paid, but how they were treated throughout the process.
Look for patterns. A few negative reviews are normal for any business, but if you see repeated complaints about pushy salespeople, hidden fees, or poor after-sale service, consider that a red flag. On the flip side, consistent praise about transparency, professionalism, and communication is a strong sign you’re looking at a reputable dealer.
Evaluate Their Inventory
A good dealership should have a wide selection of vehicles to suit different budgets, needs, and preferences. When browsing Chevy dealers, check whether their online inventory is up to date and accurate. Nothing is more frustrating than showing up excited about a specific vehicle, only to find it’s already been sold.
Look for dealers who clearly list pricing, mileage, features, and vehicle history reports for used cars. Transparency in inventory listings is often a reflection of how honest the dealership will be with you in person.
Assess the Sales Experience
From the moment you walk through the door — or even when you first call or email — pay attention to how you’re treated. Are they responsive? Do they listen to your needs, or do they immediately start pushing you toward a specific vehicle? A quality dealership will take the time to understand what you’re looking for before making any recommendations.
Trustworthy Chevy dealers prioritize the customer’s needs over commission. Salespeople at reputable dealerships ask questions, provide honest answers, and never make you feel pressured to make a decision before you’re ready. If you feel rushed or uncomfortable, trust your gut and walk away.
Understand the Financing Process
One of the most common areas where buyers feel confused or misled is financing. A dealer with integrity will walk you through all of your financing options clearly, explain interest rates, loan terms, and monthly payments without rushing, and ensure you fully understand what you’re signing.
Ask about promotions, manufacturer incentives, or financing deals that might apply to you. Be cautious of dealers who try to focus entirely on your monthly payment rather than the total cost of the vehicle. This tactic can obscure the true price you’re paying over the life of the loan.
Check the Service Department
Your relationship with a dealership doesn’t end once you drive off the lot. Maintenance, repairs, and warranty work will bring you back regularly, so it’s worth checking out the service department before you commit to buying. Ask about wait times, certified technicians, and whether they offer loaner vehicles or shuttle services.
A dealership with a strong, well-reviewed service department is an investment in your vehicle’s long-term health — and your own peace of mind.
Location and Convenience Matter Too
While it’s tempting to drive across the state for a great deal, consider the practical side. Choosing from Chevy dealers in your local area means easier access for service appointments, recall fixes, and any issues that may arise post-purchase. Proximity matters more than most buyers initially realize.
Final Thoughts
Choosing the right dealership is just as important as choosing the right vehicle. Take your time, do your research, and never feel pressured to rush the process. The best Chevy dealers are ones who earn your trust through honesty, transparency, and genuine customer care — before, during, and after the sale. When you find a dealership like that, buying a car becomes far less stressful and a whole lot more enjoyable.
When future medical expenses remain uncertain, evaluate a settlement offer by comparing its value with your expected treatment costs, potential lost income, and the long-term effects of your injuries. Accepting an offer too early may leave you paying out of pocket for future care. Reviewing medical opinions, documenting expenses, and understanding the legal consequences of settling can help you make a more informed decision.
Hackensack, New Jersey, is a major city in Bergen County, situated near communities such as Teaneck, Englewood, and Paramus. With busy local roads, access to major highways, and nearby medical facilities, residents involved in car accidents may face unexpected treatment costs, follow-up appointments, and lengthy recovery periods. These financial and medical uncertainties can make settlement decisions particularly challenging.
Speaking with a Hackensack car accident attorney can help you assess an insurance offer, understand your legal rights, and determine whether the proposed compensation accounts for your potential future losses. This article explains how to estimate future medical expenses, evaluate additional damages, understand settlement risks, and seek professional guidance before accepting an offer.
Calculate the Likely Cost of Future Treatment
Before accepting an offer, ask your doctor about the treatment you may need over the coming months or years. Depending on your injuries, future expenses could include physical therapy, medication, surgery, specialist visits, or rehabilitation.
Request written estimates where possible. If your condition is still developing, your doctor may explain which treatments are likely and which remain uncertain. These details can help you estimate a reasonable range of future costs rather than relying on guesswork. Remember that recovery may take longer than expected, especially with serious injuries or complications.
Consider More Than Medical Bills
A settlement should account for more than the expenses already paid. Depending on the circumstances, your claim may include future medical costs, lost wages, reduced earning capacity, pain and suffering, and limitations on everyday activities.
For example, a shoulder injury might require additional treatment and prevent you from returning to physically demanding work. An offer that covers current hospital bills but ignores these potential losses may not reflect the full impact of the accident. Keep receipts, pay records, medical reports, and documentation of how the injury affects your daily life.
Understand the Risks of Settling Too Soon
Most personal injury settlements require the injured person to sign a release of claims. Once the settlement is finalized, you generally cannot reopen the same claim simply because treatment becomes more expensive than expected.
New Jersey’s N.J.S.A. 2A:14-2 generally establishes a two-year statute of limitations for personal injury actions, subject to exceptions. Although this deadline matters when protecting your right to bring a claim, it does not mean you should rush into accepting an offer.
Consider whether your condition has stabilized enough for doctors to estimate your future needs. If important medical questions remain unanswered, obtaining additional medical guidance before settling may be worthwhile.
Review the Offer With Qualified Professionals
An attorney can assess the proposed settlement, explain the release terms, and identify losses that may have been overlooked. Depending on the case, medical specialists or a life-care planner may help estimate the cost of long-term treatment.
Ask the insurance company for a clear breakdown of the offer and compare it with your documented losses. Also consider health insurance reimbursement claims, medical liens, and other amounts that could reduce the money you ultimately receive.
Do not judge an offer solely by its total dollar amount. What matters is whether it reasonably addresses your needs and the risks you would assume by accepting it.
Key Summary
Estimate future medical expenses using medical opinions and written treatment projections.
Consider lost income, reduced earning capacity, and the injury’s effect on daily life.
Understand that signing a settlement release generally prevents you from seeking additional compensation later for the same claim.
Review legal deadlines without allowing them to pressure you into an uninformed decision.
Seek professional guidance when your recovery and future treatment costs remain uncertain.
Managing high-speed race telemetry streams, coordinating multi-tier pit crew communications, and credentialing media personnel across international motorsports events requires a resilient mobile communication framework backed by a dedicated virtual number platform. Motorsports journalists, race engineers, and team managers know that following motorsports, or European endurance series, demands rapid access to trackside web portals, telemetry portals, and media accreditation systems. Protecting sensitive team operational data and private cellular lines while coordinating across global tracks has become a critical standard for racing professionals.
Every major racing sanctioning body, credential management portal, and sports broadcasting network mandates instant mobile phone verification during account creation to verify user trust scores and block unauthorized access. However, broadcasting a pit manager’s or journalist’s primary cellular line across dozens of track wifi networks, media registry portals, and vendor platforms creates severe security vulnerabilities, relentless spam calls, and elevated exposure to targeted SIM-swapping attacks. Exposing direct carrier lines on public paddock forms links physical identity directly to public tracking logs that automated bots scan continuously.
Deploying isolated virtual cellular endpoints creates an immediate security firewall between personal mobile hardware and external motorsport registration portals. Race strategists and media crews managing European events or setting up German racing series press accounts can deploy a free german phone number to complete initial OTP SMS verification checks before launching full trackside operations.
Addressing Cybersecurity Vectors and Data Hijacking in Motorsports Operations
Race engineers, paddock PR leads, and motorsports journalists handle dozens of administrative logins daily across timing databases, telemetry software hubs, and team communication consoles. Publicly broadcasting primary cellular numbers across trackside sign-up forms opens direct recovery pathways to SIM-swapping attacks, phone spoofing, and credential harvesting aimed at proprietary performance data. Financial losses stemming from online account hijacking and ad fraud exceed $40B+ globally every year – making phone line isolation an essential security control for racing operations.
When team personnel enter personal SIM numbers into trial software forms or public press registry portals, they create a permanent security vulnerability across their digital footprint. A single security breach on a regional track portal or media registration site can compromise connected team email accounts, cloud storage, and internal pit strategy dashboards. Utilizing isolated virtual numbers shields primary device identifiers while keeping automated administrative notification channels completely open.
Core Benefits of Line Segmentation for Racing Teams and Media
Forward-thinking motorsports managers and technical crews rely on dual-tier cellular management to keep core racing data secure without slowing down trackside workflows:
System Account Isolation: Assign distinct virtual numbers to separate timing platforms, press credential gateways, and team telemetry apps to block cross-site profile tracking.
Persistent Authentication: Secure long-term rental virtual lines for ongoing two-factor authentication (2FA) on core cloud dashboards, domain registrars, and main team communication servers.
Spam Containment: Deploy single-use or short-term virtual numbers for one-off track wifi registrations, software downloads, and public media directory sign-ups to keep primary inboxes clean.
Overcoming Verification Bottlenecks in International Series Testing
Managing media access and engineering data across international racing calendars, from North American ovals to European road courses, requires localized SMS verification across jurisdictions. Advanced security risk engines analyze incoming connection requests by scrutinizing line signatures, connection metrics and carrier routing paths.
High-tier virtual cellular numbers operate directly on physical mobile cellular networks, with 4G/5G speeds and ultra-low 5G latency under 20ms to guarantee rapid, reliable OTP message delivery. This real cellular foundation ensures high deliverability for security verification codes across strict international software portals. Real-time message reception through a centralized web panel or direct API lets media crews and trackside engineers verify international accounts, run automated build scripts, and deploy cloud resources without operational delays.
Scaling Telemetry Data Scraping and Live Timing Intelligence
For racing strategists, data analysts, and fantasy motorsports developers, compiling real-time race analytics requires high-frequency data extraction workflows.
Deploying automated data gathering tools alongside clean cellular IPs maintains over 98% scraping success rates across restrictive timing architectures. Combined with automated SMS reception endpoints, racing intelligence engines can process public timing feeds, monitor pit stop statistics, and evaluate telemetry trends without triggering dynamic rate limits or IP blocks.
Comparison: Physical Carrier SIMs vs. Virtual Mobile Infrastructure
Operational Metric
Traditional Physical SIM
Virtual Mobile Infrastructure
Provisioning Time
Days (Requires physical SIM shipping or store visit)
Instant (Online activation via Dashboard or API)
Global Coverage
Restricted to single carrier SIMs and roaming fees
Over 90 countries with 2+ million virtual numbers online
Data Privacy
Tied directly to physical identity and hardware SIM slot
Private routing with single-client number assignment
Cost Control
Fixed long-term cellular plans and roaming add-ons
Flexible short-term and long-term rental pricing
Latency Performance
Varies by local physical tower proximity
High-speed 4G/5G mobile routing with <20ms latency
Integrating Virtual Mobile Infrastructure into Automated Pit Workflows
Operational efficiency in modern racing management relies heavily on software automation. When cloud software tools or engineering scripts request SMS verification during automated telemetry tests, continuous integration deployment, or multi-account onboarding, handling physical hardware devices creates severe operational delays. Connecting virtual phone numbers directly into technical pipelines via API webhooks allows automated systems to process verification codes instantly.
By leveraging cloud-based SMS reception tools, technical teams construct efficient integration pipelines – routing incoming verification tokens directly into automated deployment scripts or private team communication channels. Because each purchased virtual number is allocated exclusively to a single client, authentication details remain completely private, eliminating data leak risks or mixed verification streams.
Best Practices for Implementing Virtual Phone Systems in Racing Operations
To ensure high deliverability, maximize privacy, and maintain reliable account access when managing virtual mobile numbers across motorsport platforms, apply these operational standards:
Map Risk Categories: Separate temporary service registrations from core racing profiles – use disposable lines for quick trial tests and persistent rental numbers for primary cloud infrastructure.
Maintain Persistent Lines for Core Portals: Keep long-term rental virtual numbers attached to primary developer consoles, main press credential dashboards, and payment portals requiring ongoing multi-factor checks.
Deploy Short-Term Lines for Track Evaluations: Use short-term virtual lines when signing up for temporary timing demos, track wifi access, or public racing forums to keep primary phone lines safe from marketing spam.
Automate Verification via API Webhooks: Connect virtual SMS platforms directly to digital marketing and software tools using webhooks to streamline account verification, speed up build testing, and eliminate manual tasks.
Adopting secure, flexible virtual mobile infrastructure empowers motorsports journalists, race engineers, and team managers to optimize trackside workflows, safeguard team identity, and manage digital operations with complete confidence.
RFK RACING TALLADEGA SUPERSPEEDWAY – EXECUTIVE SUMMARY
Date: October 25, 2026 Series: NASCAR Cup Series Location: Talladega Superspeedway(2.66 mile tri-oval) – Lincoln, AL Format: 500 miles / 188 laps with three stages. Stage 1: Ends at lap 98, Stage 2: Ends at lap 143, Stage 3: Ends at lap 188
RFK RACING RACE SUMMARY: Roush Fenway Keselowski (RFK) Racing wasn’t fueling around in Talladega Sunday. Brad Keselowski was the mastermind of a Stage One strategy that became the talk of the race. Taking advantage of many drivers who were saving fuel and not at full throttle, he blasted to the front at full speed. His RFK teammates Chris Buescher and Ryan Preece followed and together they drafted well ahead of the field, putting several drivers a lap down. The three swapped positions at the front and were able to finish 1-2-3 in the opening segment. Combined the RFK trio lead 88 of the race’s 189 circuits. As the laps wound down Keselowski was in the mix for the race win when, with five laps to go, he and Buescher were both swept up in a multi car crash. Keselowski finished 24th and Buescher 32nd. Preece, was able to avoid that incident and was able to overcome damage in a Stage Two crash to finish 13th.
DRIVER HIGHLIGHTS
Ryan Preece – No. 60 BuildSubmarines.com Ford Mustang Dark Horse
Finish: 13th
Start: 19th
Laps Led: — 23
Stage Results: S1-2nd, S2-18th
Headline takeaway: Picking right up from where he left of at the last superspeedway drafting track, when he won at Daytona in August, Preece led 23 laps on Sunday. Although he sustained damage in a stage two incident, he rallied back, was able to avoid a major multi-car crash in the closing laps, to finish 13th.
Preece Quote: (On the Stage One Strategy) “The key to racing is always being the first one. Whether that be in the shop, on the track, strategy, what ever it may be. You find the advantage before everybody else. I’m pumped that we did that because I’m a racer and I want people to push the shit out of things to be the first one because we all benefit from it. Hopefully that sets the tone for the off season and everything we’re going to work on for next year.
Brad Keselowski – No. 6 Consumer Cellular Ford Mustang Dark Horse
Finish: 24th
Start: 22nd
Laps Led: — 12
Stage Results: S1-3rd, S2-22nd
Headline takeaway: Looking for his seventh career Talladega win Brad Keselowski began the charge that led to a RFK breakaway in Stage One. He went on to lead 12 laps and threatened to win when he was collected a late race crash.
Keselowski Quote: “We nailed the Stage One strategy. I was really proud of the team. The car didn’t drive the best but we kind of fought through it and got caught up in the big one.”
Chris Buescher – No. 17 Kroger/Thomas’ Protein English Muffins/Oscar Mayer Ford Mustang Dark Horse
Finish: 32nd
Start: 5th
Laps Led: — 53
Stage Results: S1-1st, S2-6th
Headline takeaway: Chris Buescher collected stage points in each of the race’s first two segments, including winning Stage One. He led a race high 53 laps, and was a race winning contender when, with just five laps to go, he was collected in a multi car crash that robbed him of what would’ve been a much better finish.
Buescher Quote: “Good day. Good car. Lots of points up on the board. We led a lot of laps and that’s just how these things go. We did out best to check up and got through some of it but just had a car come across the nose and ended our day.” (On the Stage One Strategy) “I’m proud of everybody for doing something. Doing something different and shaking it up because it was not fun at first. Hats off to everybody at RFK that was a good time.
Point Standings:
Buescher: 16th
Preece: 15th
Keselowski: 19th
Next Up:
The next event on the NASCAR Cup Series schedule is November 1 at Martinsville Speedway (Half-Mile oval – Martinsville, VA). The race begins at 2:00 p.m. EDT with live coverage provided by NBC Sports and the Motor Racing Network.
About RFK Racing
RFK Racing, in its 39th season in 2026, features an ownership lineup pairing one of the sport’s most iconic names, Jack Roush, along with NASCAR Champion, Brad Keselowski, and Fenway Sports Group owner John Henry. Roush initially founded the team in 1988 and it has since become one of the most successful racing operations in the world, propelling him to be the first NASCAR owner to amass three hundred wins and capturing eight championships, including back-to-back NASCAR Cup titles in 2003 and 2004. Keselowski, a former owner in the NASCAR Truck Series, is the 2012 NASCAR Cup Series Champion. In 2007, Roush partnered with Henry, who also owns Major League Baseball’s Boston Red Sox and English Premier League’s Liverpool F.C., to form Roush Fenway Racing. Off the track, RFK is a leader and proven winner in NASCAR marketing solutions, having produced multiple award-winning social media, digital content and experiential marketing campaigns. Visit https://www.rfkracing.com/ and follow the team on all social platforms @rfkracing.
Strong Day For Austin Dillon and the No. 3 Get Bioethanol Chevrolet Team at Talladega Superspeedway
Finish: 11th Start: 12th Points: 25th
“That was a good finish this afternoon at Talladega Superspeedway for the No. 3 Get Bioethanol Chevrolet. Obviously we wish it would have been better, but the team needed that. Everyone worked throughout the race to dial in the balance of our car and it was there at the end. We made a strategy call to pit before the end of Stage 2 which gave us some much needed track position. Throughout the race I could run the top or bottom, but I struggled in the middle, that part of the track felt hard. We’ll take this and build on it and look to continue to end the season strong.” -Austin Dillon
Austin Hill and the No. 33 United Rentals Chevrolet Team Show Speed and Contend for the Win at Talladega Superspeedway
Finish: 14th Start: 2nd Points: 32nd
“We were close. Our United Rentals Chevrolet was good and we worked all day to put ourselves in a position at the end. Made moves when we had to, pushed and stayed in line when we needed to. The car had speed and I’m proud of the work the guys put in to qualify on the front row and have a shot at the win. Just lost power coming to the checkered.” -Austin Hill
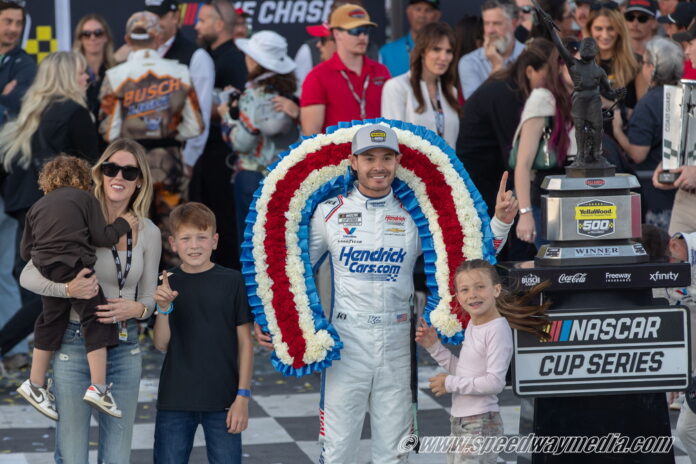
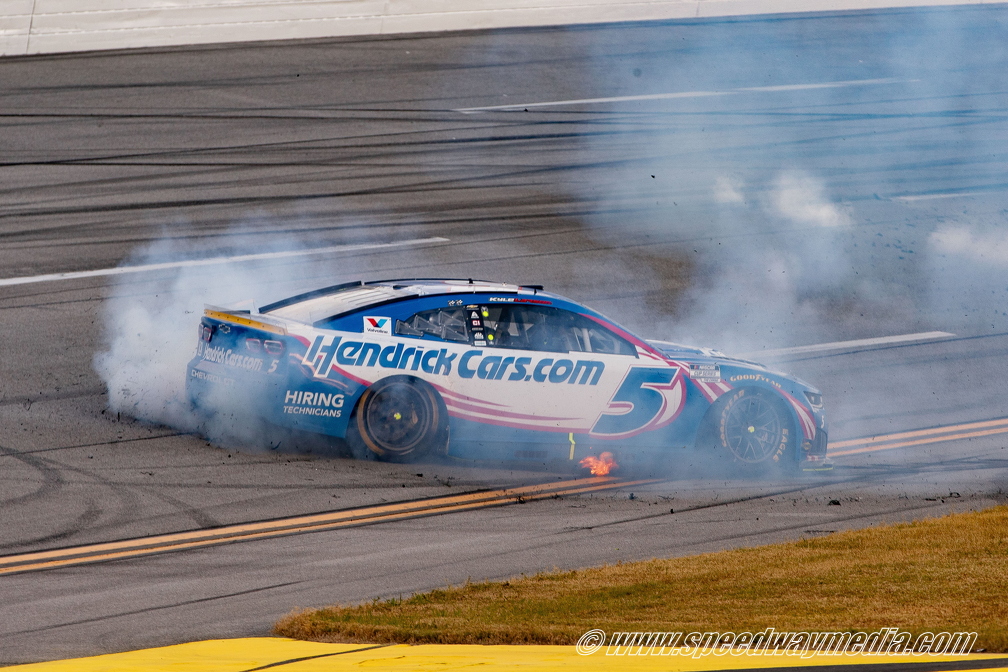
Kyle Larson took a major step closer towards achieving his third NASCAR Cup Series championship by notching a thrilling, overtime victory in the Yellawood 500 at Talladega Superspeedway on Sunday, October 25.
The reigning two-time NASCAR Cup Series champion from Elk Grove, California, led four times for 23 of 189 over-scheduled laps in an event where he qualified in 10th place and executed a smooth, methodical event amid the draft with his fellow competitors, Chase rivals and teammates from Hendrick Motorsports and Chevrolet affiliates. After notching a pair of top-five results throughout the first two stage periods and dodging a late multi-car accident in the second stage period that involved a handful of Chase contenders, Larson was shuffled from the front to the back amid the draft for a majority of the final stage period before he got shuffled just outside the top-20 mark after battling upfront within the final 15-lap mark.
As the laps dwindled, Larson weaved his way through the preferred drafting lanes to motor back towards the front and was racing in second place when he was ahead of a heavy multi-car wreck with five laps remaining that eliminated numerous Chase contenders and sent Joey Logano upside-down. Amid the chaos that sent the event into overtime, Larson was drafted to the lead by Austin Hill and the former maintained it at the start of the final lap before he got shuffled back to 11th place through the backstretch. With the front-runners scrambling to maintain momentum through the tri-oval, Larson seized upon a draft and a run from the inside lane to storm his way to his first-ever win on a superspeedway venue and be on the cusp of his 2026 championship hopes.
With on-track qualifying determining the starting lineup on Saturday, October 24, Chase Briscoe notched his first pole of the 2026 Cup season and the 10th of his career with a pole-winning lap at 186.065 mph in 51.466 seconds. Austin Hill qualified in second place with a lap of 185.949 mph in 51.498 seconds.
Prior to the event, Cole Custer and Ricky Stenhouse Jr. dropped to the rear of the field due to unapproved adjustments that were made to their respective entries. Ty Dillon was also sent to the tail end of the field due to unapproved adjustments that were made to his entry following inspection, in which Dillon was also assessed a drive-through penalty through pit road after taking the green flag.
During the pace laps and when the field drove through pit road, Carson Hocevar stopped in his pit box to have his entry assessed for any damage that a part from Bubba Wallace’s entry appeared to be left in front of Hocevar’s entry. Once Hocevar’s entry was assessed, he blended back on the track and for his 26th-starting spot.
When the green flag waved and the event commenced, pole-sitter Chase Briscoe and Austin Hill dueled for the lead through the first two turns and in front of two-stacked lanes. As the field fanned out to a three-wide formation through the backstretch and Turns 3 and 4, Hill managed to motor ahead from the inside lane throughout the tri-oval and lead the first lap.
For the second lap, Hill led the latter lap as he had three-stacked lanes trailing from behind. As Hill went on early defensive mode, he primarily stuck to the outside lane towards the outside wall to have teammate Austin Dillon lined up behind him. Meanwhile, Alex Bowman led the middle lane while Chris Buescher led the inside lane. With all but one of 40 starters separated by less than two seconds, Denny Hamlin, Chase Elliott, and Austin Cindric were racing as the highest Chase contenders in the top-10, along with Buescher, as Hill led through the fifth lap mark.
On the seventh lap, the leaderboard shuffled up as Ryan Preece drafted his way into the lead while Hill dropped to fifth place. For the following lap, Josh Berry charged his way to the front as he led the latter lap over Preece. By then, nearly the entire field were lined up in two-stacked lanes from the outside and middle lanes while Ty Gibbs tried to charge his way to the front despite being the lone competitor on the inside lane. With Gibbs able to blend in behind Berry, Berry led the Lap 10 mark over Preece.
Through the first 15 laps and with the on-track shuffling continuing to ensue, Cody Ware was scored the leader ahead of Hill, Preece, Brad Keselowski and Austin Dillon while Gibbs, Buescher, Elliott, Austin Cindric and Casey Mears were racing in the top 10 over Alex Bowman, Daniel Dye, Daniel Suarez, Joey Gase, Shane van Gisbergen, Gray Gaulding, Denny Hamlin, Ross Chastain, Cole Custer and Kyle Larson, respectively. Behind, Noah Gragson, Connor Zilisch, Christopher Bell, Erik Jones, Bubba Wallace, William Byron, Joey Logano, Zane Smith, Berry and Chase Briscoe were mired in the top 30, respectively, as all but one of 40 starters were separated by nearly three seconds of one another. Meanwhile, Briscoe, Hocevar, Tyler Reddick and Ryan Blaney were scored the lowest-running Chasers in 30th, 31st, 35th and 36th, respectively, while Ty Dillon, who served his opening lap drive-through penalty, was pinned a lap down in 40th place.
At the Lap 25 mark, two stacked single-file lines of competitors had formed as Dye shuffled his way to the lead, followed by Ware, Hill, Austin Dillon, Preece, Mears, Joey Gase, Keselowski, Buescher and Gray Gaulding, respectively, while 39 of 40 starters were separated by more than two seconds of one another. By then, Preece, Buescher, and Cindric were the three-highest Chase contenders racing within the top-15 mark, while a multitude of Chasers that included Larson, Elliott, Gibbs, Reddick, Briscoe, Byron, Hamlin, Bell, Wallace, Suarez, Hocevar, and Logano were mired within the top-30 mark, respectively. The lowest-running Chaser on the track was Blaney, who was mired in 39th place. As more Chasers, including Wallace, Hocevar, Bell, Hamlin, Logano, and Briscoe, drifted towards the rear of the field, with all competitors trying to save as much fuel as possible throughout the first stage period, Gaulding, who led the previous five laps, continued to lead on Lap 30.
On Lap 31, Roush Fenway Keselowski (RFK) Racing’s trio led by Preece and including Keselowski and Buescher rocketed away from the field led by Gaulding, with the three RFK competitors posting lap times within 50 seconds while the rest of the field posted laps between the 52 and 53-second range. By then, the stacked field led by Gaulding opted to reduce their pace to preserve fuel while the three RFK competitors were ahead of the pack by more than 17 seconds at the Lap 35 mark.
The gap between the RFK trio and the field grew up to 22 seconds two laps later, with the latter trio also posting lap times that were two seconds faster, while Suarez led the pack in fourth place. As Gibbs, Mears, Custer, Gaulding, Cindric, Dye and van Gisbergen were mired in the top-10 mark, RFK’s Preece, Keselowski and Buescher led by 29 seconds by Lap 40 before the latter’s group advantage grew up by nearly 40 seconds just past the Lap 45 mark as they also started to reel in on the tail end of the pack that fanned out to three-wide formation.
Then on Lap 50, green flag pit stops commenced within the pack as a first wave of competitors led by Austin Dillon and including Elliott, Zilisch, Allmendinger, Cole Custer, van Gisbergen, Hill, Casey Mears, Cody Ware and Hocevar, with Hocevar getting penalized for speeding on pit road. The following lap, another wave of competitors that included Larson, Bowman, Suarez, McDowell, Stenhouse, Byron, Dye, Gase and Chastain pitted. RFK’s Preece, Keselowski and Buescher pitted from the top-three spots on Lap 51. By the time the latter three blended back on the track, they were mired within a stack of competitors while the top-16 competitors led by Bell, the latter group of which have yet to pit, were out in front by Lap 55.
Then on Lap 56, trouble struck for Bell, when he veered dead left towards the inside wall while trying to slow his No. 20 DeWalt Toyota Camry XSE entry and peel off the track to pit with his Toyota teammates. The spin caused Bell to hit the inside wall as he sustained damage to his right-front and right-rear areas. Amid his incident, Bell managed to nurse his damaged entry to his pit stall without drawing a caution, but he dropped out of the lead lap category. Bell would then be penalized for having too many pit crew members over the pit wall as he had smoke coming out from his damaged entry.
For the following lap, Noah Gragson, who was trying to pit with his Ford teammates, nearly collided into both Cindric and Todd Gilliland as he slid his entry while trying to enter pit road and drove through the frontstretch’s tri-oval grass. Amid the pit stops, Buescher cycled to the lead as he, Preece and Keselowski were ahead of the field by 40 seconds nearing the Lap 60 mark.
Through the Lap 70 mark, RFK Racing’s Buescher, Preece and Keselowski led the rest of the field by 33 seconds, with Blaney leading a stacked field in fourth place. By then, Gilliland, Logano, Cindric, Reddick, Wallace and Erik Jones were scored in the top-10 mark ahead of Larson, Briscoe, Byron, McDowell and Hamlin, respectively. Behind, Elliott, Gibbs, Hocevar and Suarez were mired within the top-32 mark while Bell was eight laps down in 40th place.
Five laps later, RFK Racing’s advantage dropped a second, though the latter group led fourth-place Blaney by 32 seconds. Behind, Larson, Byron, Briscoe, Logano, Cindric, Reddick, Wallace, Elliott and Elliott were the next closest Chasers behind Blaney as all raced within the top-16 mark. RFK’s advantage dropped another three seconds down to 29 seconds throughout the next five laps (leading up to Lap 80) as Larson was in fourth place ahead of Byron and Blaney. By then, RFK’s Buescher retained the lead over Preece and Keselowski as the latter three continued to lead by 25 seconds over Larson and the field at the Lap 85 mark.
On Lap 90, the shuffling within the pack ensued as Chasers Larson, Byron, Blaney, Briscoe, Logano, Cindric and Reddick were racing within the top-11 mark while Wallace was shoved out of the draft. Meanwhile, RFK Racing’s Buescher, Preece and Keselowski retained the lead by 22 seconds before the advantage slightly shrunk down to 20 seconds at the event’s halfway mark on Lap 94.
When the first stage period concluded on Lap 98, RFK Racing’s Buescher, Preece and Keselowski claimed the top-three spots, with Buescher nabbing his first Cup stage victory of the 2026 season. Trailing the group 17 seconds behind was Larson, who secured fourth place, as Byron, Herbst, Briscoe, Blaney, Logano and Cindric were scored in the top 10, respectively. With eight of 16 Chase contenders (Buescher, Preece, Larson, Byron, Briscoe, Blaney, Logano and Cindric) securing the event’s first round of stage points, the remaining Chasers that include Reddick, Hamlin, Elliott, Wallace, Suarez, Gibbs, Hocevar and Bell were scored in 11th, 15th, 16th, 18th, 29th, 30th, 33rd and 40th, respectively, with Bell scored nine laps behind. In addition, 26 of 40 starters were scored on the lead lap.
A lap after the first stage period concluded, Larson, Byron, Reddick and McDowell pitted for fuel. Once pit road became accessible for the field prior to the Lap 100 mark, Buescher led the field to pit road for service, but Herbst managed to exit pit road first ahead of Logano, Buescher, Keselowski, Briscoe, Preece, Jones, Blaney, Cindric and van Gisbergen, respectively. Meanwhile, Berry, Larson and Byron, the latter two of whom had pitted a lap prior, remained on the track and cycled to the top of the leaderboard. Numerous names that included Larson returned to pit road to top off their entries with fuel prior to the start of the second stage period.
The second stage period started on Lap 103 as Herbst and Logano occupied the front row. At the start, Herbst led a long line of competitors with the field scattered through the first two turns and the backstretch before Logano made a move to Herbst’s outside and assumed the lead through Turns 3 and 4. As Logano led the next lap, RFK Racing’s Keselowski, Buescher and Preece along with Erik Jones and Blaney followed suit while the field tried to settle in a stacked pack. Meanwhile, Logano retained the lead at the Lap 105 mark before Jones led for the first time four laps later.
At the Lap 115 mark, Keselowski and Logano dueled in front of two-stacked lanes for the lead, with Jones, Blaney, Herbst, Buescher, Preece, Wallace, van Gisbergen and Larson scored in the top 10, respectively. By then, 27 of 40 staters were scored on the lead lap as Hamlin, Briscoe, Zilisch, Byron, Elliott, John Hunter Nemechek, Reddick, Bowman, Hill and Cindric were mired in the top-20 mark over Gilliland, McDowell, Allmendinger, Stenhouse, Austin Dillon, Berry and Custer. Meanwhile, Suarez, Gibbs and Hocevar were mired a lap down while racing within the top-30 mark while Bell continued to race at the tail end of the field and nine laps down in 40th place.
Ten laps later, Keselowski and Logano continued to duel in front of a lead lap group of 27 competitors that were separated by two seconds of one another. As the field started to fan out to three lanes with shuffling ensuing, Buescher battled Logano for the lead with drafting help from teammate Preece as Blaney was also up in the mix towards the front while Keselowski dropped to sixth place. As Buescher continued to lead the Lap 130 mark, Larson started to ignite a charge from a third drafted lane while being pushed by Wallace before he veered to the left and made his move to the inside of Logano for the lead on Lap 131.
Then on Lap 131, the caution flew when Blaney, who checked up and got misaligned with teammate Logano while pushing the latter at the front from the outside lane through the backstretch, received a hard push by Wallace when he briefly lifted off the throttle, with Wallace being pushed by Elliott. The contact ignited a check-up and caused Wallace to turn Blaney and get sideways against the outside wall as a multi-car wreck ensued. The carnage involved a multitude of Chase contenders that included Reddick, Elliott, Gibbs, Preece, Suarez and Hamlin. Among others involved included Gragson, Chastain, Nemechek and Gaulding, who was at full throttle and nearly weaved through the carnage before he slid sideways and spun exiting the backstretch. At the moment of caution, Larson assumed the lead from Logano as Buescher, Keselowski, van Gisbergen, Zilisch, Cindric, Briscoe, Byron and Jones were scored in the top 10, respectively.
During the latter caution period and following the carnage, some led by Buescher and including Keselowski, van Gisbergen, Zilisch, Jones, Herbst, Hill, Hamlin, Gilliland, Berry, McDowell, Bowman, Stenhouse, Custer, Austin Dillon, Preece, Wallace and Gibbs pitted while the rest led by Larson remained on the track. By then, Blaney, Elliott, Nemechek and Reddick were knocked out of contention.
The event’s next restart on Lap 138 featured Larson and Logano dueling for the lead in front of Briscoe, Cindric and a stacked filed through the first two turns and the backstretch as Logano had the edge from the outside lane while being pushed by teammate Cindric. On the inside lane, Larson had Briscoe pushing the latter while Buescher and Byron followed suit. Meanwhile, Logano, who opted to remain on the outside lane in front of teammate Cindric, managed to lead the next four laps amid his side-by-side duel with Larson.
When the second stage period concluded on Lap 143, Logano beat Larson by 0.012 seconds to claim his seventh Cup stage victory of the 2026 season. Larson settled in second ahead of Briscoe, Cindric, Byron, Buescher, Zilisch, van Gisbergen, Jones and Hill, respectively. With six Chase contenders (Logano, Larson, Briscoe, Cindric, Byron and Buescher) racking up the event’s second round of stage points, the remaining Chasers on the track that include Hamlin, Preece, Wallace, Hocevar, Suarez, Gibbs and Bell were mired in 17th, 18th, 19th, 24th, 28th, 29th and 35th, respectively.
During the event’s second stage break period, a majority of the field led by Logano and including Larson, Briscoe, Cindric, Byron, Preece, Hamlin and Wallace pitted while the rest led by Buescher remained on the track. Among others who remained on the track behind Buescher included Jones, Gilliland, Herbst, Bowman, McDowell, Custer, Keselowski and Austin Dillon as Zilisch was the first competitor to exit pit road first.
With 40 laps remaining, the final stage period commenced as Buescher and Jones occupied the front row. At the start, the latter two dueled in front of a stacked field that began to fan out three lanes deep. With Buescher leading the next lap, the next 13 competitors racing just behind Buescher were non-Chase contenders as Gilliland, Jones, Bowman and Herbst were mixing up the competition within the top-five mark. Custer would then navigate his way into the top-five mark for the next lap as Buescher maintained a steady lead. As the field fanned out to four-stacked lanes, Jones, who assumed the lead with 36 laps remaining was leading as Bowman, Stenhouse, Austin Dillon, Buescher, Custer, Hill, Larson, McDowell and Hocevar were scored in the top 10, respectively, with 35 laps remaining.
Then with 34 laps remaining, Larson navigated his way back atop the leaderboard. As Larson retained the lead with 30 laps remaining, teammate Byron followed suit in second ahead of Hill, Jones, Bowman, Stenhouse, Austin Dillon, Hamlin, Berry and Keselowski while Briscoe was mired in 13th place behind Herbst and van Gisbergen. Meanwhile, Cindric, Preece, Logano, Buescher, Hocevar and Wallace were mired in 16th, 18th, 19th, 20th, 23rd and 24th, respectively, with Hocevar getting shoved out of the draft.
Down to the final 25 laps, Larson continued to lead Byron, Hill, Jones, Stenhouse, Bowman, Hamlin, Austin Dillon, Keselowski, Berry and the field of 23 competitors racing within a second of one another. Stenouse would duel with Larson for the lead two laps later before the former led a lap for himself during the next lap. By then, Hamlin drafted his way up to fourth place as he drafted Stenhouse and Byron, who was scored in third place, continued to push teammate Larson from the inside lane. Amid the battles and shuffling at the front, Stenhouse had a slight advantage over Larson as the event reached its final 20-lap mark.
Stenhouse received the upper advantage over Hamlin, Logano, Larson, Keselowski, Hocevar, Byron, van Gisbergen, Briscoe and Hill with 15 laps remaining before Larson and Byron got shuffled back to 13th and 16th, respectively, during the next lap. By then, Logano cycled his way back to the lead as Larson got shuffled out of the top-20 mark during the next two laps. With Larson trying to navigate his way back into the top-20 mark, Byron was mired in 15th in between Buescher and Preece and Hamlin, Logano, Hocevar, Briscoe and Cindric were in the top-eight mark as both Stenhouse and Logano battled for the lead with 10 laps remaining.
As the laps dwindled, the field fanned out to three lanes as Larson tried to muscle his way to the front from the inside lane. Initially having no help to motor quickly to the front, Gilliland then moved in front of Larson, which allowed the inside lane to slowly move back to the front as Stenhouse and Logano led the field. With six laps remaining, the inside lane prevailed as Gilliland started to challenge for the lead, with Gilliland being pushed by Larson. By then, Logano was pinned behind the lapped competitor of Chastain while Stenhouse started to get shuffled from the lead.
Then with five laps remaining, the caution flew for a harrowing accident through the tri-oval when Logano, who was racing in the top five and still pinned behind Chastain, got sideways off the front nose of Hocevar. The contact caused Logano to veer back to the right, hit the outside wall and as he got hit by Briscoe, roll over and slide across the frontstretch, including the start/finish line, on his roof as multiple competitors were collected. Among others who were involved included Cindric, Keselowski, Suarez, Allmendinger, Buescher, Briscoe, Berry, Stenhouse, Bowman, Hocevar, Zilisch and van Gisbergen.
Notable competitors who took hard hits during the incident were Erik Jones, who hit the outside wall head-on after he got clipped by Hocevar, and Herbst, who barely got clipped by Jones, hit the outside wall on the right side hard before he veered dead straight towards the inside wall and pounded the left side at full speed. Following the carnage, all competitors involved, including Logano, exited their respective entries, with Logano’s upside-down No. 22 Shell/Pennzoil Ford Mustang Dark Horse entry getting rolled back over before the driver climbed out. The carnage placed the event in a red flag period for 13 minutes and 25 seconds.
When the red flag lifted and the event restarted in overtime, Gilliland was leading ahead of Larson, Hill, Byron, Stenhouse, Austin Dillon, Hamlin, McDowell, Preece and Custer, respectively. At the start, Gilliland and Larson dueled for the lead through the first two turns until Larson, who restarted on the outside lane, was shoved ahead by Hill entering the backstretch. Larson then moved to the left to keep Hill behind him amid the draft as Stenhouse launched his attack from the outside lane. Amid two-stacked lanes, Larson retained the lead for a full cycle in his No. 5 HendrickCars.com Chevrolet Camaro ZL1 entry.
When the white flag waved and the final lap started, Larson remained in the lead ahead of Hill, Stenhouse, Gilliland, Hamlin, McDowell, Byron and the field. Then after shoving Larson with a brief advantage through the first two turns, Hill made a move beneath Larson entering the backstretch. Hill’s move allowed Stenhouse to motor ahead with the lead as he was pushed by Hamlin and Hill led the inside lane ahead of Gilliland while Larson started to drift back with no drafting help as the latter was scored in 11th place. Through the backstretch, Hill, Hamlin and Gilliland rubbed fenders, but they kept racing straight entering Turns 3 and 4.
Through Turns 3 and 4, Stenhouse held a steady lead over Hill, Gilliland and the field before Hill, who tried to reel in Stenhouse, dropped below the apron as he dropped off the pace. Through the tri-oval, Byron and Custer reeled in Stenhouse as Gilliland, who also tried to reel in, started to lose momentum with no drafting help. Meanwhile, Larson, who reeled back into the top-10 mark as he was scored in eighth place through Turns 3 and 4 before he moved into fifth place entering the tri-oval, went low and overtook Gilliland, Custer, Byron and Stenhouse. With the checkered flag waving, Larson managed to edge teammate Byron by 0.041 seconds to score the victory at Talladega.
With the victory, Larson notched his 35th NASCAR Cup Series career victory in his 436th series’ start, his third of the 2026 season, his first at Talladega Superspeedway and his first on a superspeedway, drafting venue. Larson’s Talladega victory was also the fifth of the 2026 Cup season for Hendrick Motorsports, the organization’s 15th overall win at Talladega and the ninth of this season for Chevrolet.
Prior to Talladega, Larson held a five-point advantage after he finished 34th last weekend at Phoenix Raceway due to a late-race accident. With the Talladega victory along with netting 16 stage points from the first two stages, Larson grew his lead up to 73 points. With two-scheduled events remaining to the 2026 season, he took a major step closer towards clinching his third Cup Series championship.
Photo by John Knittel for SpeedwayMedia.com.
“I got really lucky with how everything worked out there,” Larson said on the frontstretch on NBC. “[Today was] Definitely the best speedway race I’ve ever had because of [the Chevrolet teamwork]. I was pissed at myself off of [Turn] 2. I’m like hands off the wheel, just made and then all of a sudden, like I don’t know. Everything just opened up off of [Turn] 4, so they almost crashed into [Turn] 3 and [I was] just able to keep my momentum up. Unbelievable way to get my first speedway win. What a day. Holy [expletive]. Points are great. [Expletive] yeah.”
“It just helped with so many Chevrolets up [at the front],” Larson added. “I can’t really say enough about that. I felt like Dale [Earnhardt] Jr. out there with half the field kind of helping me. I hope you fans enjoyed it. That was a great little green white checkered there. Man, what can I say? Thanks to my team, [crew chief] Cliff Daniels, my spotter, Tyler Monn, for staying patient with me through this speedway stuff that I struggle at really bad. Thanks to my fans for also staying patient with me to get a speedway win.”
Byron, who finished in fifth place during both stage periods and made a late overtake on Stenhouse through the tri-oval, ended up settling in second place behind teammate Larson by 0.094 seconds. Byron’s runner-up result generated mixed emotions for the Charlotte native, with the driver happy for Larson, but disappointed on falling short of achieving his first victory of this season.
“Damn, second sucks,” Byron said. “It’s good that Kyle [Larson] won. We worked really well together all day. If I couldn’t win, I wanted him to win and at the end there, we weren’t really connected together…It’s been a rough year in that sense, but proud of the fight. It’s fun to come to these places and be able to have chances to make decisions at the end. [I] Thought I made the right [move] and then out of nowhere, I’m like, ‘OK, here comes somebody on the bottom,’ and it was [Larson]. Happy for those guys and yeah, sucks to finish second, but it’s a good day.”
Ricky Stenhouse Jr., a two-time Talladega Cup winner, settled in third place while Ross Chastain and Cole Custer finished in the top five. Carson Hocevar rallied to finish sixth while Todd Gilliland, Denny Hamlin, Alex Bowman and Michael McDowell completed the top 10 in the final running order.
Hamlin’s eighth-place result was enough for the Virginia veteran to jump to second place in the Chase standings amid issues for his teammates Christopher Bell and Chase Briscoe. With a 73-point disadvantage, however, Hamlin was not shy about being realistic about what Larson needs to do to win the 2026 title.
“Truthfully, [Larson’s team]’ve done a lot of things right and a lot of things have really gone right, and we’ve not done that,” Hamlin said. “We got a big old gap. As long as [Larson] can keep his four tires on it the next two weeks, then he’ll be champion again.”
With four Chase contenders (Larson, Byron, Hocevar and Hamlin) finishing in the top 10, the remaining Chasers that include Ryan Preece, Ty Gibbs, Daniel Suarez, Bubba Wallace, Austin Cindric, Chris Buescher, Chase Briscoe, Joey Logano, Christopher Bell, Chase Elliott, Tyler Reddick and Ryan Blaney finished 13th, 17th, 18th, 22nd, 27th, 32nd, 33rd, 34th, 35th, 36th, 37th and 38th, respectively.
The eighth Cup Series Chase event of the 2026 season at Talladega saw 41 lead changes among 15 leaders, and four cautions over 18 laps. In addition, only 14 of 40 starters finished on the lead lap.
Results:
Kyle Larson, 23 laps led
William Byron
Ricky Stenhouse Jr., nine laps led
Ross Chastain
Cole Custer
Carson Hocevar
Todd Gilliland, six laps led
Denny Hamlin
Alex Bowman
Michael McDowell
Austin Dillon
Josh Berry, eight laps led
Ryan Preece, 23 laps led
Austin Hill, six laps led
Ty Dillon, one lap down
Cody Ware, one lap down, nine laps led
Ty Gibbs, one lap down
Daniel Suarez, one lap down
Zane Smith, two laps down
Noah Gragson, three laps down
Joey Gase, three laps down
Bubba Wallace, four laps down
Gray Gaulding, four laps down, five laps led
Brad Keselowski – OUT, Accident, 12 laps led
Daniel Dye, five laps down, one lap led
Riley Herbst – OUT, Accident, two laps led
Austin Cindric – OUT, Accident
Erik Jones – OUT, Accident, six laps led
Connor Zilisch – OUT, Accident
Shane van Gisbergen – OUT, Accident
AJ Allmendinger – OUT, Accident
Chris Buescher – OUT, Accident, 53 laps led, Stage 1 winner
After the eighth Chase event of the 2026 NASCAR Cup Series season, Kyle Larson leads the Chase standings by 73 points over Denny Hamlin, 74 over Christopher Bell, 77 over Chase Briscoe, and 94 over Joey Logano. The rest of the 16-car Chase field is displayed below.
Kyle Larson
Denny Hamlin -73
Christopher Bell -74
Chase Briscoe -77
Joey Logano -94
Ryan Blaney -107
Tyler Reddick -126
Ty Gibbs -183
Austin Cindric -188
Carson Hocevar -198
William Byron -214
Chase Elliott -218
Bubba Wallace -218
Daniel Suarez -240
Ryan Preece -249
Chris Buescher -253
Next on the 2026 NASCAR Cup Series’ Chase schedule is the Xfinity 500 at Martinsville Speedway in Ridgeway, Virginia. The event is scheduled to occur next Sunday, November 1, and air at 2 p.m. ET on NBC, MRN Radio, SiriusXM, and HBO MAX.