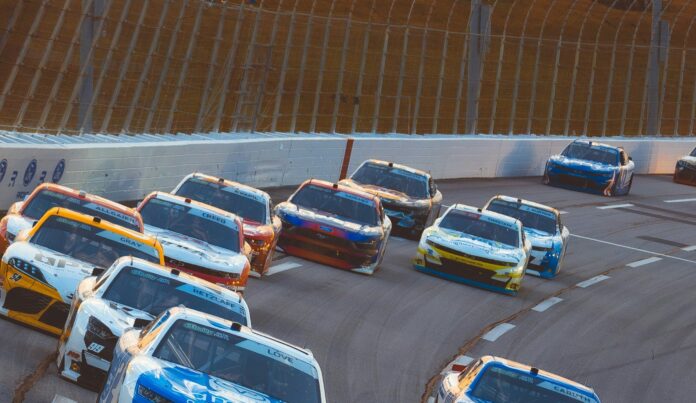

When motor racing enthusiasts tune into F1, NASCAR or Le Mans, the action often centres on outright speed, tight overtakes and crossing the finish line first. But beyond the thunder of the engines, racing serves as motor vehicles’ most punishing test lab, where extreme environmental conditions force engineers to come up with sophisticated technologies to keep their drivers safe.
Most modern, standard production vehicles are a collection of technological advancements forged on the track that then trickle down into consumer cars that are available for the general public to buy. From structural components, through to electronic controls, nearly every advanced automotive safety feature was born on the racetrack.
Safety Structures: From Roll Cages to Crumple Zones
In the early days of motorsports, when driving at speed was a very dangerous activity, race cars became focused on building strong safety shells. The carbon fibre monocoque chassis on a modern F1 car is capable of withstanding incredibly large impacts and, along with its survival cell, protect the drivers within even the worst crashes.
This design principle changes every passenger car that followed; now all commuter cars are built with engineered crumple zones along with a safety cage made of high-strength steel. During a frontal- or side-impact, the external structure of the car is designed to deform and absorb the energy of an impact, protecting the passenger compartment.
Stopping Power Under Pressure
Stopping power can be as important, or even more important than acceleration. Disc brakes came to appear more widely on production cars after Jaguar used them on the race track in the 1953 Le Mans, a strategy that led to victory for the team. Many years later, anti-lock brake systems (ABS) which was perfected first on aircraft, became widely available on passenger cars.
Since then these mechanical stopping systems have evolved into what is now known as Advanced Driver Assistance Systems (ADAS). Some systems use radar systems to actively scan the road and brake for the driver when an emergency situation is detected in which a driver does react fast enough to avoid a collision.
However, these systems have their limitations as serious accidents can still occur in dense urban environments when distracted drivers miss their blind spots. Victims often seek guidance from a San Francisco Bicycle Accident Attorney to resolve complex liability disputes and secure fair compensation.
Telematics and Active Vehicle Control
The ability of a vehicle to maintain contact with the pavement is critical to driver safety. Modern traction control and electronic stability control all have their roots in high-performance racing telematics, which enable individual wheel speeds to be measured and adjusted hundreds of times per second for optimum traction.
Tire technology was also perfected on the racetrack with specialized tire compounds and water-dispersing tread patterns enabling consumer cars to grip the road when the weather abruptly changes.
Endnote
The pipeline from the pit stop to the public road is not an immediate one; however, it has an important role to play in ensuring safety when entering a vehicle equipped with ABS, electronic stability control, and a secure structure.
Restoring a classic car is about much more than rebuilding an engine or applying a flawless coat of paint. While major mechanical work often takes centre stage, it’s the finer details that truly bring a restoration to life.
Whether you’re returning a cherished vehicle to its former glory or completing a concours-standard rebuild, paying attention to the finishing touches can make all the difference. Overlooking seemingly minor components can affect not only the appearance of your classic but also its authenticity, value, and overall quality.
Here are some of the most commonly forgotten aspects of a classic car restoration and why they’re worth including in your project.
Chrome Trim and Exterior Details
Fresh paintwork may grab the headlines, but it’s often the exterior trim that gives a classic car its character.
Items such as bumpers, badges, grilles, window surrounds and decorative moldings can become scratched, pitted or tarnished after decades of use. Reinstalling worn trim against newly painted bodywork can make even an otherwise excellent restoration feel unfinished.
Refurbishing or replacing these components restores the crisp lines and bright accents that manufacturers originally intended, helping the vehicle look complete from every angle.
Replace Aging Rubber Seals
Rubber components naturally deteriorate over time, even if a vehicle has spent years in storage.
Door seals, window rubbers, bonnet seals and boot gaskets often become brittle, cracked or compressed with age. Aside from spoiling the appearance of your restoration, damaged seals can allow water into the cabin, create wind noise and lead to corrosion problems later on.
Installing new seals improves weather protection while also giving doors, windows and panels a cleaner, tighter fit.
Don’t Forget the Wheels’ Finishing Touches
Restored or refurbished wheels can transform the look of a classic vehicle, but it’s easy to overlook the smaller details that complete the job.
Components worth checking include:
Wheel nuts or bolts
Centre caps
Valve stems
Trim rings
Hubcaps
Using period-correct hardware helps maintain originality and creates a more authentic finished appearance.
Give the Engine Bay the Same Attention
Many restoration projects focus heavily on rebuilding the engine itself while leaving the surrounding engine bay looking tired.
Old hoses, faded wiring, rusty brackets, worn reservoirs and mismatched clips can distract from an otherwise beautifully restored engine.
Cleaning, repainting or replacing these supporting components creates a tidy, factory-inspired finish that reflects the effort invested throughout the rest of the vehicle.
Use the Correct Fasteners
Bolts, screws and clips might seem insignificant, but they’re often among the first details experienced enthusiasts notice.
Years of repairs frequently leave classic cars fitted with modern fixings that weren’t originally supplied by the manufacturer. Swapping these for period-appropriate fasteners helps preserve authenticity and demonstrates a high standard of workmanship.
It’s a subtle detail, but one that can elevate the overall quality of a restoration.
Finish the Interior Properly
Large interior components such as seats, carpets and dashboards usually receive plenty of attention, but smaller fittings are sometimes left untouched.
Items including:
Gear knobs
Pedal rubbers
Window winders
Interior handles
Switchgear
Seat belt fittings
can show years of wear even when the rest of the cabin has been restored.
Refreshing these finishing touches creates a more consistent interior and helps recreate the feel of the car when it first left the factory.
Restore the Lighting
Working lights are essential, but appearance matters too.
Over time, indicator lenses can fade, chrome surrounds can corrode and headlamp bezels may become dull or damaged. Refurbishing these components improves both safety and presentation while preserving the vehicle’s period styling.
Even small improvements to lighting can noticeably enhance the front and rear profile of a classic car.
Complete the Look with the Right Number Plates
One of the easiest details to overlook is also one of the most visible: the number plate.
After investing countless hours restoring a vehicle to period specification, fitting a modern-looking registration plate can undermine the authenticity of the finished project.
Many owners choose classic-style number plates that complement the age and character of their vehicle. Selecting the correct materials, lettering style and finish helps recreate the appearance the car would have had when it was originally on the road.
As one of the first features people notice, a period-correct number plate provides the perfect finishing touch and ties the entire restoration together.
Preserve the Vehicle’s History
A restoration isn’t just about replacing parts. It’s also about preserving the story behind the vehicle.
Keeping organized documentation can significantly enhance both the provenance and future value of a classic car. Useful records include:
Previous service history
Restoration photographs
Parts invoices
Original handbooks
Ownership records
MOT certificates and supporting paperwork
Building a comprehensive history file demonstrates the care that has gone into the project and provides reassurance for future owners.
The Details Define the Restoration
The difference between a good restoration and an exceptional one often comes down to the smallest details.
While rebuilding the engine, repairing the bodywork and repainting the vehicle form the foundation of any project, it’s the finishing touches that create a truly authentic result. Restored trim, fresh seals, correct hardware, refurbished lighting and period-appropriate classic number plates all contribute to a vehicle that looks as though it has stepped straight out of its era.
Taking the time to focus on these often-overlooked elements not only improves the appearance of your classic but also protects its value and celebrates its heritage. For many enthusiasts, it’s these final details that turn a restoration into something genuinely special.
Whether visiting to attend the Kentucky Derby, a business meeting, a special event, or to enjoy a vacation, booking a rental car is one of the most convenient modes of transportation. Both local and international companies offer a wide range of auto rental options, including economy cars, compact cars, minivans, SUVs, pickup trucks, and luxury vehicles, for every budget and travel need. The vehicle rental companies operate at different locations throughout the city. The rental price may vary depending on the time of booking, season, and availability of the rental vehicle.
Best Auto Rental Service Providers in Louisville
Several rental companies operate throughout Louisville, offering different types of vehicles for every budget. The following are the most popular vehicle rental services in the city:
Alamo
Avis
Budget
Dollar
Enterprise Rent-A-Car
Hertz
National
Payless
Sixt
Turo
Thrifty
Types of Auto Rental Services Available in Louisville
Rental companies in Louisville offer a wide range of vehicles to cater to different travel needs, group sizes, and budgets. Types of vehicles available are:
Economy Car
These are the most fuel-efficient choices ideal for solo travelers, students, and budget travelers.
Models
Toyota Corolla, Hyundai Elantra, Volkswagen Jetta, and Ford Focus
Passenger Capacity
4
Average Daily Rental Rates
$42
Compact Car
These vehicles are usually larger than economy cars, offering more legroom.
Models
Nissan Versa, Ford Focus, Chevrolet Spark, Honda Fit, or Kia Soul
Passenger Capacity
4-5
Average Daily Rental Rates
$50
Midsize Car
Business travelers and small families often prefer to book midsize cars.
Models
Chevrolet Malibu, Ford Fusion, and similar sedans
Passenger Capacity
5
Average Daily Rental Rates
$60
Standard Car
They offer more cabin space and are ideal for long highway drives. Small groups typically prefer the standard cars.
Models
Volkswagen Passat, Kia Optima/K5, Chrysler 200
Passenger Capacity
5
Average Daily Rental Rates
$70
Full-size Car
The cars are designed for families with children and longer vacations.
Models
Chevrolet Malibu, Toyota Camry, and Chrysler 300
Passenger Capacity
5
Average Daily Rental Rates
$75
Crossover
They combine the features of sedans and SUVs. Small families and guests on weekend trips mostly choose a crossover.
Models
Hyundai Kona, Chevrolet Trax, Kia Niro, Nissan Rogue, Chevrolet Equinox, Toyota RAV4, Ford Escape, and Hyundai Tucson
Passenger Capacity
5
Average Daily Rental Rates
$70
SUVs
People who need extra passenger space, higher ground clearance, and larger cargo areas rent SUVs for their trip.
Models
Hyundai Kona, Buick Encore, Chevrolet Trax, Toyota Corolla Cross
Passenger Capacity
5-8
Average Daily Rental Rates
$60 to $120
Minivans
These vehicles are ideal for large families, groups, and airport transfers.
Models
Chrysler Pacifica, Honda Odyssey, Dodge Grand Caravan, Toyota Sienna, and Kia Sedona
Passenger Capacity
7-8
Average Daily Rental Rates
$110
Premium Cars
These vehicles are mostly preferred by corporate travelers for their business trips.
Models
BMW X7, Chevrolet Corvette
Passenger Capacity
5
Average Daily Rental Rates
$90
Luxury Vehicles
Luxury cars feature a premium interior and top-tier comfort. Guests rent these vehicles for VIP transportation or special events, such as weddings or anniversaries.
Models
BMW 3/5 Series, Mercedes-Benz C/E-Class, Audi A4/A6, Cadillac CT5, Genesis G80
Passenger Capacity
4-5
Average Daily Rental Rates
$150
Electric Vehicles
EVs are becoming more popular among renters because they have zero direct emissions. Eco-conscious travelers book EVs.
Models
Tesla Model 3/Model Y, Hyundai Ioniq 5, Kia EV6, Polestar 2, Ford Mustang Mach-E
Passenger Capacity
4-5
Average Daily Rental Rates
$80
Convertibles
These open-air style vehicles are designed to enjoy the pleasant weather, scenic drives, and weekend getaways.
Models
Ford Mustang Convertible, Chevrolet Camaro Convertible, Mazda Miata RF, Mini Cooper Convertible, BMW 4 Series
Passenger Capacity
2-4
Average Daily Rental Rates
$120
Specialty Vehicles
The vehicle range includes sports cars for fun driving and rugged 4×4 vehicles for off-road adventures.
Models
Dodge Challenger, Jeep Wrangler 4×4, Ford Bronco, Aston Martin, Lamborghini, Ferrari, Rolls-Royce
Passenger Capacity
Depends on the selected vehicle
Average Daily Rental Rates
$150 to $500
Note: These are the estimated rental prices and may change depending on the time of booking, holiday season, and vehicle availability. Therefore, book the vehicle at least 2 to 3 weeks in advance.
Places to Hire the Rental Cars
The Louisville Muhammad Ali International Airport (SDF) is the most convenient rental car location, making it easy to pick up and drop off rental vehicles immediately after landing. The other nearby auto rental Louisville KY, places include:
Downtown Louisville
Highlands
St. Matthews
Buechel/Bardstown Rd
Jeffersonville
Okolona
New Albany
Hurstbourne
Valley Station
Jeffersontown
Smart Tips to Hire the Best Auto Rental Services in Louisville
Smart planning and choosing the right rental vehicle make the trip more comfortable. Here are some quick tips to hire the best rental services in Louisville:
Try to book the rental car in advance, especially during the holiday season and special events.
Compare rental car prices with different providers to get the best deal.
Select the right vehicle based on the number of passengers, luggage, and travel plan.
Read the rental car agreement carefully to avoid any unexpected charges at the end of the trip.
Compare the rental car location with the airport, as the airport may involve extra fees.
Check if the personal auto insurance or credit card benefits are included in the rental car.
Read the customer reviews to make a practical choice.
Wrapping Up!
Louisville offers access to several popular car rental services catering to different travel needs and budgets. Travelers can choose from economy cars for solo travel to luxury models for special events. Booking early, comparing rental prices, reviewing the rental agreement, and choosing platforms like ZadCars help to secure the best rental vehicles.
Planning to rent a car in Darwin can open up far more than a city break. Darwin is a great base for a Northern Territory road trip, with easy access to swimming holes, cultural sites, and famous parks. With car hire, you are not tied to public transport or tour schedules. You can build a route that suits your time, budget, and travel style, whether you want short local drives or a longer adventure into the Top End.
Quick Overview of Renting a Car in Darwin
Renting a car in Darwin is simple if you know the basics. You can pick up your vehicle in the city or at Darwin International Airport—a popular choice for travelers who want to start driving right after landing, especially for trips outside the city.
Before booking, check your rental company’s pickup requirements. Most require a valid driver’s license; international visitors may also need an international driving permit and a passport. Review vehicle options, seasonal demand, and return locations early—especially during the busy dry season. Finally, consider why driving in Darwin appeals to so many travelers.
Why Rent a Car in Darwin for Your Australian Adventure
Darwin is ideal for travelers seeking flexibility. Renting a car lets you explore at your own pace, stopping at markets, reserves, or swimming spots as you wish.
The city is also a great starting point for road trips to places like Berry Springs, Litchfield National Park, and Katherine Gorge—much easier than relying on limited public transport.
Darwin’s tropical climate means the dry season is best for sightseeing and road trips. However, the wet season offers lower rental rates. If you decide to rent a car in Darwin, your best time to visit depends on your budget, route, and how much flexibility you want.
Essential Things to Know Before You Begin
Before your car rental, plan beyond the booking. Darwin is easy to navigate, but longer drives require preparation. Seasonal changes affect comfort, prices, and routes.
The dry season brings higher demand; the wet season offers lower rates but can mean challenging road conditions, especially outside the city. Planning is essential.
Book early for the dry season.
Check road conditions before long trips.
Fill up before heading to remote areas.
Fuel is readily available in Darwin and on major highways.
Allow extra time for scenic stops and changing weather.
Understanding the Requirements for Car Hire in Darwin
Car hire in Darwin requires a valid driver’s license, which the rental company will verify at pickup. Additional drivers must also show their licenses.
Overseas visitors may need extra documents, such as an international driving permit and a passport, depending on their license. The following sections cover age, license, and insurance options.
Age Restrictions and Licence Essentials
A valid driver’s license is required for both the main and any additional drivers. If sharing driving, ensure all drivers bring the correct documents.
Minimum driver age varies by provider, so check before booking. Focusing only on price can lead to surprises if age restrictions limit vehicle options.
Provisional drivers should verify license requirements in advance, as policies differ. Matching your license details to the booking ensures a smooth pickup.
International Driver’s Permit and Tourist Guidelines
If you’re a tourist, license requirements depend on where your license was issued. Most international visitors can drive with their home country license or may need an international driver’s permit and passport. Confirm requirements before you travel.
This is especially important if you plan to pick up a vehicle immediately at Darwin Airport. Missing documents can delay your pickup and disrupt your trip, particularly if you’re heading straight to a park or regional destination.
To avoid stress, keep all key documents—license, passport, and any required permits—ready and accessible. Preparation ensures a smooth process after your flight.
Insurance Options and Registration Details
Insurance options are worth reviewing before you accept the keys. Many travelers only look at the daily rate, but cover choices can affect both peace of mind and the final price. This is especially helpful if you are planning longer drives outside Darwin.
Ask what is included with the rental vehicle and what counts as an extra cost. You do not need to overcomplicate it, but you should know what support is available if plans change or something goes wrong on the road.
Check which insurance options are included in the base rate.
Ask whether roadside assistance is part of the booking.
Confirm if extra drivers affect the cover.
Review any added cost before signing the agreement.
Key Driving Rules and Safety Tips in Darwin
Driving on NT roads can feel relaxed, but you must stay alert. In Darwin, city traffic quickly shifts to open highways, so adjust your driving as needed. Knowing local basics makes travel smoother.
Road and weather conditions can impact your plans, especially outside the city. Watch speed limits, drive to conditions, and prepare before heading to national parks or regional routes. The next sections cover key local rules for visitors.
Local Road Laws Tourists Should Follow
Drivers in the Top End must follow local road laws—obey speed limits, stay alert in built-up areas, and slow down in school zones. Vacationing doesn’t change these rules.
NT Police enforce traffic laws throughout Darwin and beyond, with penalties like fines or demerit points. Don’t assume remote roads mean fewer checks; careless driving still has consequences.
Adjust your driving between city streets and highways. One mistake can affect your trip, so treat every drive with care to enjoy your journey and avoid setbacks.
Blood Alcohol Limits and Mobile Phone Use
When renting a car in Darwin, safe driving habits are as important as paperwork. Always follow the blood alcohol limit—don’t guess. If you plan to drink, don’t drive.
Avoid using your phone while driving; even a glance can distract you, especially on unfamiliar roads.
Use hazard lights only when necessary. Stay focused, pull over safely for directions, and avoid risky decisions after long travel days.
Child Restraints, Seatbelt Regulations, and Random Testing
If you’re traveling with family, in-car safety is essential. Seatbelts and child restraints aren’t minor details—they’re crucial for any trip, especially outside the city.
Random safety checks can happen, so always follow the rules and be prepared. Simple tips make a big difference over long distances:
Ensure everyone wears a seatbelt.
Arrange child restraints before pickup if needed.
Keep documents accessible for checks.
Schedule rest breaks on long drives.
Choosing the Best Vehicle for Exploring Darwin
The best car rental in Darwin depends on your destination and travel group. A short city visit requires a different vehicle than a family road trip. That’s why choosing the right car matters.
Darwin rental fleets offer compact cars, sedans, SUVs, utes, and minibuses—each suited to specific needs, from airport pickups to exploring the Top End. Here’s how each type matches various routes and travel styles.
Types of Cars Suited for Darwin’s Terrain
Not every rental vehicle suits every route. If your plans stay around the city, a compact car or sedan may be enough. For bigger groups or longer outings, an SUV or minibus can make the drive easier and more comfortable.
For most major visitor areas, standard vehicles work well. Main touring routes to places like Kakadu are accessible on sealed roads, while rough roads and remote tracks are a different story. Before leaving Darwin, check Road Report NT and match your car rental choice to your route.
Vehicle type
Best use
Compact car
City driving, errands, easy parking
Sedan
Airport pickups, suburb travel, day trips
SUV
Longer drives, extra space, weekend outings
Family SUV/7-seater
Family travel with strollers, bags, and picnic gear
Minibus
Group trips to parks or work sites
Ute
Carrying equipment for practical local use
Family-Friendly Options vs Off-road Capable Vehicles
Family-friendly vehicles are ideal for visitors in Darwin. A 7-seater or spacious SUV offers room for kids, luggage, and gear without compromising city driving. This balance suits destinations like Litchfield.
Many travelers think they need an off-road vehicle for every Northern Territory trip, but most attractions are accessible by standard cars on sealed roads, making regular rentals practical.
For remote areas, plan ahead: bring extra water and check road conditions before you go. Choose your vehicle based on the roads you’ll travel, not just the idea of an outback adventure.
Beginner’s Guide: How to Rent a Car in Darwin
If you’re arranging car hire in Darwin for the first time, keep it simple. Choose your dates, pickup location, and a vehicle that suits your needs. City pickups are ideal for local stays; airport pickups are best if you want to drive immediately.
Compare rental options beyond just price. Consider vehicle size, pickup convenience, booking flexibility, and what’s included in the rate. Once you clarify these basics, the process is straightforward.
What You’ll Need to Get Started
Getting started is easier when you have your documents ready before pickup. Most travelers only need a few essentials, but forgetting one item can cause delays. Your hire company will confirm the exact list during booking.
Consider insurance and payment options early so you’re not making decisions at the desk with your bags.
Valid driver’s license for each listed driver
Credit card for booking or pickup
Passport and permit details for international visitors
Clear understanding of insurance options
Step-by-Step Guide to Renting a Car in Darwin
Once you know what you need, booking is straightforward. Most rental companies offer pickup in the city center or near Darwin International Airport for flexible arrival options.
A smooth rental experience involves four steps: compare options, reserve early, review terms, and inspect the vehicle before departure. Here’s how to handle each step confidently and avoid surprises.
Step 1: Compare Rental Companies and Prices
Start with a smart price comparison. The cheapest car hire isn’t always the best—it should fit your travel needs, pickup location, and vehicle type.
Timing is key: prices drop and availability rises during the wet season, while the dry season is busier. Compare early for more options and to avoid limited inventory.
Compare city vs. airport pickup rates
Check booking flexibility and cancellation policies
Consider vehicle size, not just price
Review included extras before booking
Book early for better selection during peak seasons
Step 2: Reserve Your Car Online or at Darwin Airport
Book your rental car as soon as your travel dates are confirmed. Online booking lets you compare vehicles, review pickup details, and check terms at your convenience.
Darwin Airport pickup is popular—most travelers prefer to land, collect their car, and head straight to their hotel or first stop. This saves time, especially with a tight schedule.
Airport pickups may be available right away, but this depends on timing and fleet availability. During the dry season, booking early increases your chances of getting your preferred vehicle.
Step 3: Review Terms, Insurance, and Pick-Up Procedures
Review the booking terms before your pickup to confirm what’s included, spot any extra fees, and understand available support—saving you hassle later. Check insurance options in advance for peace of mind, especially if driving long distances or unfamiliar routes.
Watch for extra fees in your booking
Know what roadside assistance is included
Review insurance options before arrival
Make sure pickup instructions are clear
Step 4: Inspect Your Vehicle and Understand Your Route
When you pick up the car, inspect it before leaving. Note its condition and record any issues to avoid confusion when returning it.
Plan your route, not just your destination. In the Northern Territory, knowing fuel stops and service station locations is essential, especially outside Darwin.
If traveling on regional roads, check Road Report NT before leaving town. A little planning increases confidence and makes your trip more relaxed.
Top Destinations Near Darwin to Explore by Car
One of the best reasons to drive from Darwin is the easy access to top destinations. You can explore city attractions, swimming spots, wildlife areas, and major national parks at your own pace.
Highlights include Litchfield National Park and Katherine Gorge, while shorter drives offer local reserves and favorites. For trip ideas, start with the routes and experiences below.
Must-Visit National Parks and Scenic Drives
Darwin is an ideal base for exploring the Northern Territory’s top drives. Litchfield National Park is closer and easier to reach, while Kakadu National Park offers a bigger adventure with major sites along sealed roads. Both are best enjoyed with your own car.
Scenic drives let you combine famous parks with smaller stops at your own pace:
Litchfield National Park: waterfalls and safe swimming
Kakadu National Park: must-see sites and lookouts
Adelaide River: classic regional stop
Stuart Highway: longer southern journeys
Berry Springs: easy day trip from Darwin
Unique Wildlife Experiences and Remote Outback Stops
Driving around Darwin offers more than just major attractions. You’ll find unique wildlife, wetlands, and quieter local stops like Fogg Dam Conservation Reserve—perfect for birdwatchers and nature lovers.
Travelers often include places like Humpty Doo, Mary River National Park, and Edith Falls in a broader Northern Territory trip. These remote spots add character and reveal more of the region’s charm.
Outback roads require extra attention compared to city driving, but the payoff is variety. One day you might visit a market or garden; the next, a gorge or billabong. This mix makes Darwin an ideal base for exploring by car.
Conclusion
Renting a car in Darwin lets you explore Australia’s stunning landscapes and vibrant culture at your own pace. Visit national parks, encounter unique wildlife, and discover hidden gems across the region. Remember to follow essential driving laws and safety tips for a smooth journey. Whether it’s a family vacation or an adventurous road trip, choosing the right vehicle is key. Ready to start your adventure? Contact us for expert help booking your ideal rental car. Enjoy your travels in the beautiful Northern Territory!
Weather is one of the few variables in Formula 1 that no team can control. A perfectly tuned car, a flawless strategy, or a pole-position start can evaporate when rain falls or temperatures shift unexpectedly. From tire management to aerodynamic stability, environmental conditions dictate every Grand Prix.
To manage these challenges, the FIA, Race Control, and official tire supplier Pirelli work alongside teams to ensure races remain competitive and safe, balancing driver safety against pure racing entertainment.
Why Weather Redefines F1 Performance
According to research from iGaming analysis website CryptoRollx, the average casual online bettor often overlooks or misinterprets weather variables, focusing primarily on headline metrics such as team form, star drivers, and recent race results. However, experienced motorsport followers understand that weather often reshapes a race more dramatically than statistics alone.
Unlike traditional sports where weather primarily affects player comfort or ball movement, F1 cars operate inside hyper-sensitive engineering windows. Subtle atmospheric shifts instantly alter tire grip, braking efficiency, aerodynamic balance, and power unit output. Understanding these variables provides a far clearer picture of how a race will unfold than driver standings or raw practice pace alone.
Track Temperature vs. Ambient Temperature
While basic broadcasts report ambient air temperature, engineers focus heavily on track surface temperature. Direct sunlight can push asphalt temperatures 15°C to 20°C above the surrounding air.
High Track Temps: Accelerate thermal degradation, cooking the tire rubber from the inside out and shortening stint lengths.
Low Track Temps: Prevent tires from reaching their optimal thermal window, triggering “graining”, a phenomenon where cold surface rubber tears away and clings to the tire, drastically reducing grip.
Air Density, Altitude, and Aerodynamics
Atmospheric pressure deeply impacts car behavior. At high-altitude circuits like the Autódromo Hermanos Rodríguez in Mexico City, thinner air reduces overall aerodynamic downforce while forcing teams to open up cooling ducts to prevent engine and brake overheating. Down at sea level, changes in humidity and air density subtly alter drag and engine combustion efficiency.
The Pirelli Tire Spectrum
Pirelli develops specialized slick and wet compounds engineered for specific thermal and moisture thresholds:
Slick Compounds (C0 to C6): Pirelli utilizes a seven-compound dry range spanning from the ultra-durable C0 to the hyper-soft, high-grip C6. Teams select three consecutive compounds per race weekend based on track surface roughness and expected temperatures.
Intermediate Tires (Green Sidewall): Designed for damp, drying, or lightly saturated tracks. Deciding the exact “crossover point”, when an Intermediate becomes faster than a slick, can win or lose a race, as demonstrated by Jenson Button’s iconic wet-to-dry strategy calls at Canada 2011.
Full Wet Tires (Blue Sidewall): Featuring heavy tread grooves designed to evacuate massive volumes of water to prevent hydroplaning. However, intense spray from modern ground-effect cars often forces Race Control to throw a red flag due to near-zero visibility before the tire’s water-clearing capacity is even fully tested.
Rain and Micro-Climate Strategy
Rain instantly transforms a race by erasing established rubber and constantly evolving the racing line.
The Crossover Decision: Teams must constantly choose between an undercut (pitting early for wet or dry tires to set fast sector times) or an overcut (staying out on track hoping conditions rapidly change). A classic example occurred at Sochi in 2021, where Lando Norris lost a late lead by delaying his switch to intermediates during a sudden downpour while Lewis Hamilton pitted at the precise crossover window.
Wind: The Hidden Aerodynamic Disruptor
When casual bettors do check the weather, they almost exclusively look for rain. However, wind speed and direction are often far more impactful across sports—disrupting passing and kicking in football, altering aerodynamics in motorsport, or throwing off ball trajectories in golf and tennis. Understanding these less obvious variables can provide a more complete picture of how weather may influence performance.
Crosswinds: Unbalance the car mid-corner, causing sudden snaps of oversteer at high speeds.
Headwinds & Tailwinds: Shift braking points by several meters and dramatically alter top speeds on long straights. High-speed, wind-exposed venues like Silverstone and Barcelona frequently see drivers suffer unexplained off-track moments due to sudden gusts changing downforce levels in a fraction of a second.
Race Control and Safety Interventions
Race Control monitors severe weather to maintain sporting fairness and safety:
DRS Restrictions: DRS is immediately disabled during rain to prevent high-speed rear-end loss and is only re-enabled once a clear, dry racing line emerges.
Start Procedures: Heavy standing water or severe spray can trigger rolling starts behind the Safety Car or red-flag suspensions until conditions improve.
Advanced Meteorology on the Pit Wall
Teams deploy short-range weather radar, dedicated trackside meteorologists, and real-time telemetry to predict precipitation down to the minute and track sector. Modern strategy relies heavily on predictive algorithms that simulate live pit-stop windows against radar projections, proving that reading the skies is just as vital as building a fast race car.
Conclusion
Success in Formula 1 depends on much more than building the fastest car. Teams must constantly interpret changing weather conditions, understand how Pirelli tires respond to different temperatures, adapt to evolving track surfaces, and react quickly to decisions from the FIA and Race Control.
Whether the challenge comes from heavy rain, rising track temperatures, or an unexpected shift in wind direction, weather remains one of the most influential and fascinating factors in determining the outcome of every Grand Prix.
A car crash at a confusing intersection isn’t always about who ran the light. Sometimes the road itself is the problem: a blind curve near Rancho California Road, a signal that changes too fast by Highway 79, a construction zone missing its warning signs. When a crash happens because Temecula built or maintained a road poorly, California law lets you name the city as a defendant.
Winning that claim is harder than suing another driver, though. Cities get legal protections drivers don’t, and proving negligence against a government body takes real digging. If something about the road felt off, it’s worth learning how these claims work before you decide to find a car accident lawyer in Temecula.
Temecula’s Growth Outpaced Some of Its Older Roads
Temecula has grown a lot over the last twenty years, and more people means more cars on the road. Streets that were fine for a small town, like parts of Ynez Road and Pechanga Parkway, now handle way more traffic than they were built for. Some traffic lights still run on timing set before the nearby stores and neighborhoods were even there. Old Town gets crowded on weekends, and the side streets near Front Street back up fast. None of this proves the city did something wrong on its own. But it helps explain why so many crashes keep happening at the same few intersections.
Why the City Gets a Head Start in Court
California gives cities a kind of legal cover called design immunity. Under Government Code section 830.6, if Temecula’s engineers approved a road design the right way, and another engineer could have signed off on that same plan, the city usually can’t be blamed even if the road turns out to be dangerous. This rule keeps cities from getting sued every time a road looks bad looking back. It also means you can’t just point at a rough intersection and expect a judge to take the case. The city already got its engineers to approve the plan once. You have to show that approval doesn’t make sense anymore.
Road Conditions That Point to Negligence
Some situations chip away at that immunity and open the door to a real claim.
Outdated signals – A light timed for old traffic counts, never adjusted despite years of complaints.
Missing signage – A stop sign knocked down or never replaced after repeated requests to public works.
Construction gaps – A work zone missing cones or flaggers during an active road project.
Drainage problems – A low point that floods every winter and causes hydroplaning near Temecula Creek.
Blocked sightlines – Overgrown landscaping or a poorly placed sign hiding a driver’s view at a stop-controlled corner.
Can the City Really Be Held Responsible?
Yes, but only if you can show the city already knew about the problem and didn’t fix it. Lawyers call this notice, and it’s the key to most cases like this. Past crash reports at the same spot help a lot. So do complaints from neighbors, city council meeting notes about that road, and repair requests that never got handled. One crash by itself usually isn’t enough. A pile of past crashes is. And so is a note from an engineer who flagged the same problem months before your crash.
If you’re not sure whether your crash fits this pattern, you’re not alone. That’s usually when people start looking to find a car accident attorney in Temecula who can pull the records and figure it out for you.
Evidence That Strengthens a Government Claim
Building this kind of case takes documentation, not guesswork.
Accident history – Prior crash reports at the same location, pulled through public records requests.
Engineering studies – Traffic studies or safety audits the city commissioned but never acted on.
Photos and measurements – Sightline distances, signal timing, and skid marks documented soon after the crash.
Expert testimony – A traffic engineer who can explain what a reasonable design should have looked like.
The Deadline Works Differently Against a City
Most personal injury cases in California follow a two-year statute of limitations under Code of Civil Procedure section 335.1. Claims against a public entity like Temecula don’t get that long.
Government Code section 911.2 requires a formal claim filed with the city within six months of the crash, well before that two-year clock runs out. Miss that window, and you likely lose the right to sue the city at all. Waiting costs people cases they otherwise would have won.
Get Your Road Conditions Documented Before They Change
A crash caused by bad road design is a case you can win, but you have to move fast and keep good records. Cones disappear. Potholes get fixed. Sometimes the city even changes a light’s timing just days after a crash. Take pictures of the scene, write down the exact location, and note anything about the road that seemed dangerous before it’s gone. Then get someone started on the government claim before that six-month deadline passes.
The final night of the two-night show concluded Saturday night for the 305 Nationals with the United Rebel Sprint Series at the Belleville High Banks in Belleville, Kansas, which saw a 30-lap feature for the main event. A 10-lap increase from Friday night.
Already having won the previous night’s prelim feature, Joey Danley was looking to go back-to-back and become the first driver since 2019, when Jake Bubak did it most recently. Danley was able to do so after starting in the fourth position in the main event by passing then race leader, Justin Fifield, off Turn 4 on the last lap to claim the win.
“I was thinking about a second place run too when I had a run on him (Justin Fifield) off Turn 2 once, and I could tell he didn’t know I was up there, so I stood on the brake,” Danley said in his post-race victory lane interview. “I figured there went the win, but his car must’ve been going away a little bit, his car wasn’t quite as running the wall. He just let me get one more run on him. Thank god for 30 laps.
“I lost one like that two years ago, and I guess I got redemption tonight.”
There were 39 Sprint Cars entered at the time of check-in.
Feature Recap – 30 Laps
Justin Fifield started on the pole for the feature with Jacob Gomola on the outside pole. Kaylee Bryson jumped down to the bottom of Turns 1 and 2 trying to make a run on the leader, Fifield. Bryson slid up to the third position right behind Gomola. However, she was challenged and battled side-by-side with Danley, almost making contact with each other. Danley had the high side and eventually passed her for second off Turn 2 with 26 laps to go.
Knowing Danley had a lot of ground to make up, four seconds behind race leader Fifield, he had to chase him down lap-by-lap. At the halfway mark with 15 laps to go, it was Fifield with the lead, Danley second, Garrett Benson, Jeremy Huish, and Gomola the top five.
With 10 laps to go, Danley cut Fifield’s lead down to 1.6 seconds as Fifield got into lap traffic. However, Danley was able to breathe a sigh of relief when the caution came out two laps later with eight laps to go. When the field got ready to go back racing, the top five were Fifield, Danley, Benson, Huish, and Bubak.
Danley lost momentum for a brief period, but gathered it back up and made a last-lap pass on Fifield off Turn 4 to take the win by just a mere margin of 0.077 seconds at the start/finish line.
Heat Race Recaps – Top Four Transfer – 8 Laps A Piece
Similar to Friday night, there were five qualifying sessions to rubber the track in. Bubak was fastest in Q1, Fifield fastest in Q2, Danley in Q3, Stuart Snyder in Q4, and Steven Richardson in Q5.
Heat 1 – Huish was your pole sitter for the first heat. Gomola, who started on the outside pole, remained side-by-side with the leader of Huish. Gomola finally got the better of Huish off Turn 2 with five laps to go. Gomola won the heat with Huish, Bubak, and Joe Bob Lee the top four.
Heat 2 – Benson was the top starter for the second heat with Wichita, Kansas native Jeremy Campbell on the outside pole. Fifield was strong early and attempted to challenge Benson for the lead, but was unsuccessful in doing so. Benson stormed away with the heat win and was followed by Fifield, Campbell, and Owen Carlson getting the transfer spots.
Heat 3 – Jon Freeman out of Salina, Kansas had the top spot with the third heat. The drivers were already three-wide down the backstretch with Freeman, Ty Williams, and Danley. Danley made his car work on the bottom and took the lead with Williams behind him. Danley won with Williams, Freeman, and Kyle Jones taking the top four.
This was a much different outing for Jones, who won the Saturday night feature the past two years, as he failed to make the show Friday night by not advancing out of the B-feature.
Heat 4 – Brandon Bosma had the No. 1 starting spot for the fourth heat. Bosma had a tremendous start, as everyone was jumbled up at the start/finish line. The caution was thrown, and this would be a complete restart. As soon as Bosma was getting ready to take the white flag as the leader, his engine expired, causing a caution with one lap to go.
The heat went back green with two laps to go. Bryant Wiedeman was the leader, and Stuart Snyder was second. Snyder threw a last-lap attempt on Wiedeman in the last turn, but Wiedeman got the better of him. For the transfers, it was Wiedeman, Snyder, Whit Gastineau, and Danny Nekolite.
Heat 5 – 2024 USAC Silver Crown at-track winner, Bryson, was on the pole for the fifth and final heat race. Bryson briefly left the door open for Steven Richardson on the backstretch, and the two nearly made contact with each other. Despite the close call, she powered away with the heat victory. Richardson was second, Trefer Waller third, and Ryker Pace fourth.
Winning the one and only B-feature was Tyler Drueke. He was followed by Bosma, Braxton Weger, and Trevor Serbus rounding out the final transfer spots. Drueke won in a last-lap pass off Turn 4, passing Bosma.
For those that may have missed the race, you can check out the highlights below.
Official Race Results Following Night 2 For The 305 Nationals at the Belleville High Banks
Max Reaves capped off a dominant run by outdueling a series of late-race competitions through a 10-lap shootout to win the Sunbelt Rentals 150 at Flat Rock Speedway in Ash Township, Michigan, on Saturday, August 1.
The 16-year-old Reaves from Trinity, North Carolina, motored his way from qualifying in third place to assume the lead for the first time on Lap 14. Leading three times for a race-high 130 of 150-scheduled laps, Reaves was challenged by championship rival Tristan McKee and Isaac Kitzmiller at the start of a 10-lap shootout, where the latter two took brief turns upfront amid on-track contacts and hard duels with Reaves. Amid the battles, Reaves prevailed by assuming the lead for good for the final time with seven laps remaining and muscling away to both add another victory to his ARCA Menards Series East column this season and maintain his lead in the championship battle.
With on-track qualifying that occurred on Saturday, August 1, Carson Brown qualified on the pole position with a pole-winning lap at 75.326 mph in 11.948 seconds. Tristan McKee started on the front row with the second-fastest lap at 74.3 mph in 12.113 seconds.
When the green flag waved and the event commenced, Carson Brown dueled with Tristan McKee for nearly a full lap before the former motored ahead through Turns 3 and 4. As Brown led the first lap, title contenders Max Reaves and McKee battled dead even for the runner-up spot in front of Isaac Kitzmiller while the rest of the 21-car field trailed behind.
By the fifth lap mark, the leaders caught the tail end of the field and started to lap the competitors racing at the rear. Amid the lapped traffic, Brown, who was getting intimidated and bumped by Reaves through the turns, maintained his early, steady advantage. Then on Lap 14, Reaves seized an opportunity through Turns 3 and 4 by going beneath Brown and dueling alongside the latter through the frontstretch. After leading his first lap on Lap 14, Reaves motored his No. 18 Cook Out Toyota Camry entry ahead of Brown through the first two turns. While Reaves had both lanes under his control with the lead, McKee followed suit in the runner-up spot while Brown slipped to third place in front of Kitzmiller.
On Lap 40, the event’s first caution flew due to Jeff Maczink spinning through the first two turns. Maczink’s incident occurred as he was racing beneath Toby Blanton through the frontstretch and briefly drove through the grass while kicking up some dirt in the process before he then came back across the racing surface and spun. The incident occurred in front of the leaders, led by Reaves.
As the event resumed on Lap 52, McKee launched ahead of Reaves from the outside lane, and he spent the following lap gaining a slight advantage over Reaves from his lane before he motored ahead and moved in front of Reaves through the backstretch. Reaves, though, would reassume the lead just past the Lap 55 mark. Despite getting hit and nearly turned by the lapped competitor of Alex Malycke through the first two turns, Reaves maintained his steady advantage over McKee.
At the event’s halfway mark on Lap 75, Reaves continued to lead ahead of McKee, Kitzmiller, Matt Kemp and Quinn Davis while Brown, Jackson McLerran, Esteban Rodriguez, Austin Vaughn and Craig Pellegrini Jr. were in the top 10 ahead of Blaine Donahue, Brian Barbarow, Maczink, Alex Clubb, Rita Goulet, Nate Moeller, Alex Malycke, Toby Blanton, Dan Boys and Michael Clayton, respectively.
Down to the final 60 laps, Reaves, who was leading by nearly half of the circuit and was mired in lapped traffic, retained the lead over McKee. Reaves proceeded to lead the next 10 laps over McKee while Kitzmiller, Kemp and Davis remained in the top five, respectively. Seconds later, Brown pitted and had both the hood and rear cover of his No. 28 Grizzly Coolers Chevrolet SS entry lifted up due to a fuel pump issue. With Brown out of contention, Reaves continued to lead until the caution flew with 46 laps remaining due to Jeff MacZink getting loose and spinning through the first two turns for a second time of the event.
The next restart with 38 laps remaining featured Reaves motoring away from McKee and the field from the inside lane. As Reaves led, Kitzmiller challenged McKee for the runner-up spot through half of the circuit. Despite contact ensuing, McKee fended off Kitzmiller for the runner-up spot. While Kemp and Davis trailed in the top five, Reaves extended his late advantage. Despite catching up to the tail end of the field, he maintained a steady gap both with 30 laps remaining and with 20 laps remaining. The caution then flew with 17 laps remaining due to MacZink and Blaine Donahue spinning simultaneously amid contact through the first two turns. This marked MacZink’s third incident of the event, all of which occurred through the first two turns.
For the restart that followed with 10 laps remaining, Reaves led through the first two turns while McKee drove right to the rear bumper of McKee. With McKee glued to the rear of Reaves through the backstretch, he then got Reaves loose entering the third turn. This allowed McKee to muscle ahead and lead the next lap, where McKee used the inside lane to motor ahead of Reaves. McKee maintained his steady lead over a side-by-side duel between Reaves and Kitzmiller through the backstretch before Reaves ran into the rear of McKee. This caused McKee to slide sideways entering the third turn and allowed Kitzmiller to storm to the lead with eight laps remaining.
Through Turns 3 and 4, Reaves bumped and moved Kitzmiller up the track. As the latter led the following lap (7 to go), Reaves got beneath Kitzmiller through the first two turns and returned atop the leaderboard. Kitzmiller then spent the next two laps making contact with Reaves and tried to get beneath him to motor ahead through the turns and straightaways, but Reaves motored ahead with five laps remaining as McKee bumped, got beneath and overtook Kitzmiller for the runner-up spot.
For the event’s remainder, final five laps, Reaves maintained a steady gap over McKee and cycled back to the frontstretch amid lapped traffic to achieve his second ARCA Menards Series East victory of the 2026 season, his fourth between the ARCA Menards Series & ARCA Menards Series East divisions and his second in a row at Flat Rock Speedway.
“My guys brought me such a good car, so we had to win this one,” Reaves said on FloRacing. “[I] Wanted to back it up from last year. There was a lot of good competition here this year. They all ran a good race, so I just gotta thank all my guys. This Cook Out Camry was so fast. I gotta thank Coach [Joe] Gibbs for the opportunity…I like this track. I’m learning to like it a lot, so I like these little tracks like this.”
With the victory, Reaves slightly extended his lead in the ARCA Menards Series East driver’s standings from three to seven over Tristan McKee. As the series looks ahead to its final two scheduled events of this season at Iowa Speedway and Bristol Motor Speedway, respectively, Reaves is not yet ready to crown himself a champion until the season’s conclusion.
“It’s never over till it’s over,” Reaves said. “I don’t want to say anything yet, but I’m very confident in me and my guys, so we’ll see.”
Tristan McKee, who led five laps at Flat Rock and led the series’ standings prior to last weekend’s event at Lucas Oil Indianapolis Raceway Park, settled in second place for his fifth top-five result of this season. Isaac Kitzmiller, the reigning ARCA Menards Series East champion who led two laps at Flat Rock, finished in third place for his fifth top-five result of this season. The latter is 14 points behind the series’ lead.
Matt Kemp and Quinn Davis finished in the top five. Esteban Rodriguez, Austin Vaughn, Jackson McLerran, Craig Pellegrini Jr. and Blaine Donahue completed the top 10 on the track. Meanwhile, Carson Brown, the pole winner who led the first 13 laps, ended up in 18th place.
The 2026 Sunbelt Rentals 150 at Flat Rock Speedway generated six lead changes for four different leaders, three cautions for 29 laps and four of 21 starters finishing on the lead lap.
Results
Max Reaves, 130 laps led
Tristan McKee, five laps led
Isaac Kitzmiller, two laps led
Matt Kemp
Quinn Davis, one lap down
Esteban Rodriguez, two laps down
Austin Vaughn, three laps down
Jackson McLerran, four laps down
Craig Pellegrini Jr., four laps down
Blaine Donahue, four laps down
Brian Barbarow, five laps down
Jeff MacZink, six laps down
Alex Clubb, eight laps down
Nate Moeller, 12 laps down
Rita Goulet, 12 laps down
Alex Malycke, 15 laps down
Toby Blanton, 19 laps down
Carson Brown, 27 laps down
Dan Boys, 110 laps down
Michael Clayton, 119 laps down
The 2026 ARCA Menards Series East season resumes next Friday, August 7, at Iowa Speedway in Newton, Iowa, for the JR&CO 150, which will also be a combined event with the ARCA Menards Series. The event’s broadcast time is slated to commence at 7 p.m. ET on FS1.
MILLVILLE, N.J. (August 2, 2026) – Luke Powers earned his first Formula Regional Americas Championship (FR Americas) win in Race 1 at New Jersey Motorsports Park on Saturday afternoon.
Notes of Interest:
A first-time winner in FR Americas, Luke Powers earned his first victory in a single-seater racecar with the Race 1 win at NJMP. A successful karter from New Castle Motorsports Park, Powers first joined the Racing America Formula Ladder through a scholarship for the Radford Racing School F4 U.S. Karts to Cars School. After his first laps in a single-seater car at the school, Powers engaged in an extensive testing program before joining F4 U.S. Championship the following season. This year, he’s competing as a rookie in FR Americas with Toney Driver Development.
Alejandro (“Alex”) Bobadilla scored his first FR Americas podium with a second-place result. Bobadilla has been racking up the victories in the F4 NACAM Championship, but the Race 1 podium marked his first at the Formula Regional level.
Christian Bogle recorded his fourth podium of 2026 with a third-place result.
Evagoras Papasavvas (No. 71 Crosslink Motorsports Ligier JS F3) entered the weekend as the championship points leader, but an early mechanical issue led to his retirement from the event and left him unclassified in the final results.
The drama was in overdrive from the second the lights were activated at NJMP, as an issue for Kekai Hauanio (No. 29 N-E-Where Transport / Crosslink Motorsports Ligier JS F3) triggered an aborted start. As a result, the field resumed their positions behind the safety car for one last formation lap before attempting a two-by-two rolling start. Second-place starter Brady Golan (No. 40 Toney Driver Development Ligier JS F3) got the jump on polesitter Evagoras Papasavvas (No. 71 Crosslink Motorsports Ligier JS F3) to clear the field before they even reached the start/finish line.
Able to get his car fired after the issue on the starting grid, Hauanio maintained his position to line up fifth in the rolling start. Showing impressive speed during the opening laps, he challenged Golan for the lead, but wasn’t able to get the pass completed. Then, a one-lap shootout to finish the race left Hauanio facing pressure of his own. Luke Powers (No. 5 Toney Driver Development Ligier JS F3) took advantage of an early restart to climb to third from his sixth-place starting position and maintained the position for the majority of the race. The one-lap dash to the checkered flag brought Powers to Hauanio’s gearbox and allowed him to make the pass driving around the outside in Turn 1 on the restart.
Hauanio’s last-lap pressure continued as Cooper Shipman (No. 10 Driven Dynamix / Kiwi Motorsport Ligier JS F3) looked for a way around. The two raced side by side for most of the lap, but the aggressive battle and contact between the two in Turn 10 opened the door just long enough for Alejandro Bobadilla (No. 8 Crosslink Motorsports Ligier JS F3) to sneak by and claim the third position.
Following the race, the Stewards reviewed a series of reports, resulting in impactful decisions:
The Stewards received a protest from Crosslink Motorsports on behalf of Papasavvas stating that Golan jumped the initial two-by-two rolling start. Reviewing the footage, they found that Golan accelerated before the No. 71 car accelerated, and before they reached the first start zone sign. As a result, Golan was issued a five-second time penalty, which dropped him to fourth in the final results.
Hauanio was issued a 10-second time penalty after the Stewards ruled that he was predominately responsible for a collision with Shipman during the final lap of the race. As a result, he dropped to 12th in the official running order.
As a result of the penalties, Powers was promoted to the race win, while Bobadilla rose to second and Christian Bogle (No. 7 Pelican Energy Consultants / Toney Driver Development Ligier JS F3) was scored third.
Whitney Strickland (No. 21 TF Companies / Hillenburg Motorsports Ligier JS F3) drove a clean race to extend his points lead in the Masters Cup Championship with his eighth win of the season. Behind him, Anthony Autiello (No. 07 Hope For The Warriors / Momentum Motorsports Ligier JS F3) finished second, while Kevin Janzen (No. 24 US Power Group / Data Center Solutions / Crosslink Motorsports Ligier JS F3) rounded out the podium.
FR Americas will contest a doubleheader today with races at 9:30 a.m. and 1:40 p.m. ET, respectively. Live timing and scoring will be available on the Race Monitor app with additional news and updates posted on the series’ Facebook, Instagram and Twitter.
The ninth and final round of the 2026 Indiana Sprint Week concluded tonight at Tri-State Speedway after a week-long worth of races, which started back on July 23 on the Dirt Track at IMS. Kyle Cummins entered as the championship points leader by seven points over Justin Grant and was looking to lock the title up. In addition to a driver winning the title, they would have a $25,000 payday at the end of the night.
When all was said and done, Grant notched another victory in his win column in the ninth round of the ISW Series. Grant received a mix of cheers and boos as he celebrated in victory lane following an incident in the heat race with Robert Ballou.
“I knew we had a really good Nos Energy Drink No. 4,” Grant said in his victory lane interview to Flo Racing. “We weren’t very good all night long and try to keep my nose clean there early. I knew I had a good enough racecar to pick through guys and noticed everyone was getting freerer, and it was coming to me. I figured, ‘well, okay. Let things widen up here, and we’ll be good to drive by them.’ Once I got Kyle (Cummins) and Mitchel (Moles) put away early, I felt like I was going to be okay to get by Brady (Bacon) and Harley (Burns) there. It seems like a good thing getting them behind you.
“Everybody that is mad here booing about the heat race between Robert (Ballou) and I. I hate he got upside down there, but I felt like I was clear up alongside him off Turn 2 and all the way down the backstretch. Parked it on the first infield tire and felt like he had a whole racetrack above him, and tried to get to the first infield tire through the side of my racecar. I don’t know what else I could’ve done there other than disappearing out of his way. You got to go in the heat races, and they won’t see that way, and Robert might not either. I’m sorry he got tore up there, I just don’t know what else I could’ve done. I haven’t said anything to him yet, but I’ll catch up with him later and hopefully we can kind of work that out and figure out who was upset, and who was in the wrong there. It’s a shame when someone gets tore up.
“I, of all people, didn’t want him to get tore up there because I needed him to transfer, so we can keep one guy out and get me on the front row. It wasn’t in my best interest to do that, and I certainly didn’t want to do it.”
33 National Sprint Cars were on the entry list for Saturday night’s finale of ISW Week.
Feature Recap – 30 Laps
Brady Bacon and Harley Burns were the front-row starters for the feature. Burns got the advantage over Bacon on the backstretch, but the first caution of the night flew for Colin Parker, who was stopped sideways off Turn 4. This prompted a complete restart for the main. Once again, Burns was to the point with the lead. Unfortunately, just as the field went green, another yellow came out for a car stopped off Turn 2, which was for Carson Short.
The third yellow flew as the field went back to green once more for two cars stopped in the middle of Turns 1 and 2. They were for Mike Larrison and Aric Gentry.
The field tried again, and this time, Bacon took the lead from Burns off the restart, but Burns threw a slider on Bacon and retook the lead on Lap 1. With 25 laps to go, Cummins slipped to fifth. This is important as he needs a fifth or better to clinch the ISW Championship at the end of the feature. The fourth yellow flew with 22 laps to go for Chet Williams, who was stopped on the frontstretch by the wall.
Coming to the restart, it was Burns, Bacon, Chase Stockon, Mitchel Moles, and Cummins in the top five. Unfortunately for Stockon, he brought out the caution as he slowed with 21 laps to go and went off the track. Burns brought the field back to green once more with Bacon and Moles the top three. Bacon closed in on race leader Burns rapidly at the halfway mark to the point they were side-by-side with each other on the backstretch. With 13 laps to go, Grant passed Bacon for second, and eventually passed Burns for the lead off Turn 2 with 12 laps to go.
The caution came out with nine laps to go for Jadon Rogers, who came to a stop in Turn 3. Going back to green, it was Grant, Bacon, Moles, Cummins, and Burns. Cummins had a four-point advantage over Grant at this moment in the race. Grant would lead the final laps unchallenged and went on to secure the victory, but it was Cummins who would wind up with the 2026 ISW Championship.
“Thank the lord Jesus Christ, I did some praying there before hot laps and before the feature there,” Cummins told Flo Racing on the frontstretch. “I told him, whatever his will is, if it’s meant to be, it’s meant to be, and if it’s not, we’ll just live with it and go on. It calmed me down a little bit. I tell you what, every time we had the restart, I felt great. Once the guys got out and (Mitchel) Moles got by on the bottom, I wasn’t great on the bottom. I found that top line a little bit, and I was like, oh, I can hustle here, and Justin (Grant) comes hustling by all of us.
“I was like, oh boy, if he wins and I finish fourth or fifth, I don’t know what the math is, but it’s not good. With the pressure of Jadon (Rogers) there behind me and it was three-wide for a while, and my car was only good plugged up in the fence. I got tight a couple of times, I was racing for my life. I wanted to win (Indiana) Sprint Week, and I was like, I don’t know how many more years I’m going to be able to do it. This was the best-case scenario. We had a great week. If I didn’t do it now, I probably wouldn’t ever get it done again. That put a little extra pressure on me. Thank you to everyone who has helped out on this team and all my sponsors.”
Heat Race Recaps – Top Five Transfer – 10 Laps A Piece
There was a brief rain delay early in the evening prior to hot laps and qualifying, but as soon as the rain passed through, Moles paced both the hot laps and qualifying session time. Moles had a time of 12.656 seconds in hot laps and then backed it up in qualifying with a pace of 12.862 seconds.
Heat 1 – C.J Leary was on the pole. Moles passed Leary for the top spot, and Leary slipped to third. Moles would wind up winning the heat with Burns, Rogers, Leary, and Logan Seavey being the transfers.
Heat 2 – Short started first for the second heat. Hayden Reinbold passed Short for the lead with eight laps to go using the bottom lane off Turn 2. Reinbold went on to win the heat race with Bacon, Kevin Thomas Jr, Williams, and Short moving on.
Heat 3 – Larrison sat on the top spot in the third heat. Red flag conditions were brought out immediately for Friday night winner Ballou, who went upside down in Turn 3. Ballou made contact with Grant that sent him up and over. Thankfully, he was okay and exited the car under his own power. Following the stoppage, the field went back green with nine laps to go.
Stockon later made the pass on Larrison with five laps to go for the lead and the ultimate heat victory. Larrison, Charles Davis Jr, Grant, and Hunter Schuerenberg made up the five transfers out of this heat.
Heat 4 – Cale Coons had the pole for this heat, but he was passed by Cummins in the opening stages before a caution with six laps to go for Jake Swanson spinning around at the entrance of Turn 3 following contact from Kendall Ruble. Cummins won the heat with Eli Wilhelmus, Gentry, Coons, and Swanson the final transfer spots
Official Race Results Following Tri-State Speedway
Justin Grant
Brady Bacon
Kyle Cummins
Mitchel Moles
Kevin Thomas Jr
Harley Burns
Logan Seavey
Jake Swanson
Hayden Reinbold
Dalton Stevens
Jadon Rogers
Eli Wilhelmus
Briggs Danner, won semi-feature
Carson Short
Kendall Ruble
Cale Coons
Charles Davis Jr
C.J. Leary
Mike Larrison
Aric Gentry
Chase Stockon
Chet Williams
Colin Parker
Hunter Schuerenberg
Cummins won the 2026 ISW Championship by seven points over Grant. He also continues to lead the overall USAC National Sprint Car Championship by 124 points over Grant as well.