Plenty of race fans assume you need a big balance to bet on the Cup Series. You do not. The truth is you can follow a full Sunday of racing with a stake smaller than the cost of a round at the track bar, provided you pick a site that welcomes small players and you know where the hidden floors sit. This guide walks through the real starting numbers, the payment methods that let you go lowest, and how to make a modest bankroll last a whole season of racing.
Why the minimum deposit matters more than the welcome offer
The banner offer is the loudest thing on any betting site, but for a fan starting small it is rarely the number that matters. What matters is the minimum you have to put in before you can place a single bet, because that figure sets the floor on your whole approach. A site that demands 20 dollars to open the door is asking you to commit far more than a fan who just wants a couple of dollars on the next road course.
Deposit minimums exist for two dull reasons. Processing a payment costs the operator a small fee, so tiny deposits can be unprofitable to handle, and low floors attract bonus-hunters who grab an offer and vanish. The result is a spread that runs from as little as 5 dollars at the friendliest books to 20 or more elsewhere. If keeping your stake small is the point, that spread is the single most important thing to check before you sign up. A rundown of betting sites with a low minimum deposit is the quickest way to see which books genuinely welcome a modest balance rather than only pretending to.
What the floor looks like by payment method
The brand is only half the story. The same operator will often let you deposit less by card than by bank transfer, and some methods are locked out of the welcome offer entirely. The pattern below is typical across US and international sportsbooks.
Payment method
Typical minimum
Speed
Worth knowing
Debit card
5 to 10 dollars
Instant
The default, usually the lowest floor
PayPal
5 to 10 dollars
Instant
Fast payouts too, sometimes excluded from offers
Apple / Google Pay
5 to 10 dollars
Instant
Convenient on mobile, growing fast
Bank transfer
10 to 20 dollars
Slow, days
Higher floor, slowest to clear
Prepaid card
5 to 10 dollars
Instant
Good for capping spend, no payouts back to it
If the lowest possible entry is what you are after, a debit card or a mobile wallet almost always beats a bank transfer on both the minimum and the speed.
A worked example: a fiver across a race weekend
Say you deposit 5 dollars before a Cup race. At a dollar a bet you have five wagers to spread across the weekend, which comfortably covers qualifying and the race itself. Back a mid-pack driver to finish top ten at 2.50 with a single dollar and a winner returns 2.50, so 1.50 profit. It will not fund your season, but it turns a routine Sunday into something you are invested in, at a cost you will not miss.
The discipline of a small balance is a feature, not a limitation. If there is 5 dollars in the account, 5 dollars is the most you can lose that weekend. No topping up after a late caution wrecks your pick, no chasing, no Monday regret. Set the amount, enjoy the race, and let the balance run down when it does.
Making a small bankroll last the season
If you want your starting deposit to stretch across a long racing calendar, treat it like a season pass rather than a lottery ticket. Three habits do most of the work:
Stake the same small amount each time rather than doubling up after a loss.
Skip the weeks where you have no strong read. You do not have to bet every race.
Hold your bigger bets back for the events that come around rarely, like the Daytona 500 or a playoff cutoff race.
That last point matters more than it looks. The races worth saving your stake for are the marquee ones, not a mid-summer short-track night you have no feel for. A disciplined small-stakes run through the regular season leaves you with the bankroll to enjoy the moments that actually matter. And when you do pick your spots, it pays to know exactly what you are backing. Our guide to the main NASCAR betting markets breaks down race-winner, top-finish, and head-to-head bets so a small stake goes on the right thing.
Look past the floor to the everyday prices
A low minimum gets you in the door, but the day-to-day odds decide whether staying is worth it. A book that happily takes your 5 dollars but prices a routine race-winner market meanly is doing you no favors. Before you settle, check three things beyond the deposit figure.
First, the withdrawal minimum. Some sites let you deposit 5 dollars but will not let you withdraw until you have 10 or more, so know that number before you are stuck. Second, the everyday odds on a normal race, not just the sign-up offer, because that is where the real cost or value lives. Third, whether your chosen payment method is barred from any promotion you plan to claim, or you may deposit and find nothing unlocks. It also helps to understand the wider picture of where motorsport betting value tends to sit, so a low deposit goes on a book that prices racing seriously.
Turn the deposit limit into your budget
The most useful setting on any regulated betting account is the deposit limit, and it is the small-stakes fan’s best friend. Rather than relying on willpower, you cap how much you can pay in per day, week or month, and the site enforces it. Fix it at 20 dollars a month and that is the ceiling, however tempting a playoff accumulator looks after a dramatic finish.
For a fan who bets for fun, this removes the one real danger of small-stakes betting, which is not the fiver you meant to spend but the top-ups that follow a frustrating result. Set the limit once, when you are calm, and it quietly does the discipline for you every week after. Pair it with a prepaid card that already caps your spend and overspending becomes almost impossible.
Frequently asked questions
What is the lowest I can realistically deposit? At the friendliest books it is 5 dollars, usually by debit card or a mobile wallet. Bank transfers tend to demand more, often 10 to 20.
Can I withdraw straight after a small deposit? Often yes, but watch the withdrawal minimum, which can sit higher than the deposit floor. You may need to build the balance up a little first.
Do small deposits still trigger the welcome offer? Not always. Many offers require a minimum qualifying deposit, frequently 10 dollars, so a 5 dollar starter might not unlock the bonus. Read the terms first.
Is betting small amounts on racing actually worth it? For entertainment, absolutely. A dollar on a driver adds to the whole afternoon at a cost you will not notice. As a way to make money it is no different to larger stakes, so treat it as fun.
The takeaway
You do not need a big balance to enjoy a bet on the race. Pick a payment method with a low floor, keep the deposit small on purpose, and judge a book on its everyday prices rather than its headline offer. A fiver, spent sensibly, buys a whole season of skin in the game.
Technical support carries a unique kind of pressure that other business functions don’t: when it fails, the customer isn’t just unhappy — their product or service has literally stopped working for them. That urgency is exactly why so many companies choose to outsource technical support rather than try to build and staff a round-the-clock troubleshooting operation entirely in-house. Understanding what genuinely changes when you make that switch — not just in cost, but in structure and capability — is worth walking through before making the decision.
The Tiered Structure Behind Technical Support
Most technical support operations are organized into tiers, and understanding this structure explains a lot about why outsourcing works well here specifically.
Tier 1 handles common, well-documented issues — password resets, basic configuration questions, straightforward troubleshooting that follows a known script. High volume, relatively low complexity.
Tier 2 deals with more complex problems that require deeper product knowledge — issues that don’t resolve through standard troubleshooting and need someone who actually understands how the underlying system works.
Tier 3 involves the hardest cases, often requiring direct access to engineering teams or specialized technical expertise to diagnose and resolve.
A well-structured outsourcing partnership doesn’t just hand off the easy Tier 1 tickets and keep everything else internal. It builds trained teams capable of handling Tier 1 and Tier 2 requests end-to-end, escalating only genuinely complex Tier 3 issues back to internal engineering — which is a fundamentally different value proposition than simply adding cheap headcount to answer basic questions.
Why Building This Internally Is Harder Than It Looks
Assembling an internal technical support team that can operate at this level requires solving several problems simultaneously. You need people with genuine technical aptitude, which is a narrower talent pool than general customer service hiring. You need round-the-clock coverage, which means either multiple shifts in one location or a distributed team across time zones — both of which are significant operational undertakings. And you need continuous product training, since technical support quality degrades quickly if agents fall behind on product updates and new features.
Most companies underestimate how much ongoing investment this requires. It’s not a team you build once and leave alone — it’s a function that needs continuous training, quality monitoring, and adjustment as the product itself evolves.
What 24/7 Coverage Actually Requires
Offering genuine round-the-clock technical support isn’t simply a staffing multiplication problem. It requires either operating across multiple time zones with a distributed workforce, or running overnight shifts that are notoriously difficult to staff and retain talent for internally. Technical issues don’t wait for business hours — a system outage at 2 AM for a customer on the other side of the world needs the same quality of response as one at 2 PM locally, and building that coverage internally means either accepting quality gaps during off-hours or investing heavily in shift coverage most companies aren’t prepared to manage well.
An outsourcing partner with an already-distributed global workforce solves this structurally, rather than forcing a company to solve a workforce-scheduling problem it wasn’t built to handle.
Multilingual Reach Changes the Calculation Further
For companies serving international customers, technical support adds a language dimension on top of everything else. Recruiting technical support specialists fluent in a dozen or more languages — not just conversationally fluent, but capable of walking someone through a technical troubleshooting process accurately in that language — is a significant hiring challenge for most internal teams. Partners with established multilingual technical support capabilities across dozens of languages solve this without requiring a company to build region-specific hiring pipelines from scratch.
The Role of AI-Driven Diagnostics
Modern technical support outsourcing increasingly incorporates AI-driven diagnostic tools that help identify issues faster and route tickets more accurately before a human agent even engages. This isn’t about replacing technical agents — it’s about giving them better information faster, so troubleshooting starts from an informed position rather than a blank slate. Combined with human expertise, this reduces resolution time without sacrificing the judgment that complex technical issues genuinely require.
What Compliance and Reliability Standards Should Look Like
Technical support often touches system access, account credentials, and sometimes sensitive operational data — meaning security and process reliability matter as much as troubleshooting skill. Look for partners who can demonstrate adherence to recognized standards: ISO 9001 certification for consistent, quality-managed processes, and ISO 27001 certification for protecting sensitive data throughout the support lifecycle. These aren’t just credentialing exercises — they reflect whether a provider has actually built the operational discipline to handle technical support reliably at scale, rather than assembling a team informally and hoping for the best.
Scaling From Startup to Enterprise Needs
One of the more practical advantages of outsourcing technical support is the flexibility to scale team size to match actual need — whether that’s a handful of specialists for an early-stage startup or a team of hundreds for an enterprise operation running global infrastructure. Internal hiring struggles to match this kind of flexibility in either direction: scaling up quickly requires a recruiting pipeline most companies don’t maintain, and scaling down means difficult layoff decisions that outsourced arrangements avoid entirely.
Questions Worth Asking Before Choosing a Partner
A few specific questions tend to reveal whether a technical support outsourcing partner is genuinely equipped for the work: Can they demonstrate experience handling Tier 2 issues independently, or do they primarily route everything beyond basic troubleshooting back to your team? What does their language coverage actually look like for your specific target markets? What security certifications can they show, and how do those translate into actual data handling practices? And how do they structure escalation to your internal engineering team when a genuinely novel Tier 3 issue arises?
Final Thoughts
Outsourcing technical support isn’t simply about finding a cheaper way to answer the same volume of tickets. Done properly, it gives companies access to tiered technical expertise, genuine 24/7 global coverage, multilingual capability, and AI-assisted diagnostics that would take considerable time and investment to build internally — while maintaining the security and process discipline that technical work with sensitive systems demands. Companies that treat the switch as building a genuine extension of their engineering and support function, rather than just outsourcing tickets to the lowest bidder, tend to see the difference clearly in resolution times, customer retention, and how rarely a technical issue turns into a lasting trust problem.
Gilbert, Arizona has quietly transformed into one of the most vibrant and fast-growing communities in the Southwest. With its upscale dining scene, proximity to Scottsdale’s resort corridor, and a steady stream of corporate events and private celebrations, the demand for premium transportation has never been higher. Whether you’re visiting for a weekend getaway, attending a high-profile business meeting, or simply want to experience the open desert roads in something extraordinary, renting a luxury vehicle in this region is an experience worth planning carefully. Knowing what to expect before you book can make the difference between a seamless, memorable drive and a frustrating ordeal.
Why Gilbert Is a Prime Destination for Exotic Car Rentals
Gilbert’s road infrastructure, combined with its scenic desert surroundings and access to major Arizona highways, makes it an ideal location for driving high-performance vehicles. The town’s wide, well-maintained streets and relatively low traffic congestion compared to central Phoenix give drivers the space and confidence to truly enjoy a luxury or exotic car. Add to that the year-round sunshine and mild winters, and you have near-perfect driving conditions for most of the calendar year.
The local culture also plays a role. Gilbert attracts affluent residents, destination weddings, corporate retreats, and sports enthusiasts who frequently seek premium experiences. This has created a thriving market for exotic and luxury vehicle rentals that goes well beyond the standard airport car rental counter. Clients here expect more — and the best providers in the area deliver accordingly.
Key Factors to Evaluate When Choosing a Luxury Rental Provider
Fleet Quality and Vehicle Selection
Not all luxury rental companies are created equal. The most important starting point is the fleet itself. A reputable provider should offer a curated selection of vehicles that spans multiple categories — from sleek sports cars and grand tourers to high-end SUVs and convertibles. Brands like Lamborghini, Ferrari, Rolls-Royce, Bentley, and Porsche represent the upper tier of what a quality exotic rental company should have available. Before committing to a reservation, review the fleet carefully and confirm that the specific vehicle you want is actually available on your desired dates.
Transparency in Pricing and Policies
Luxury car rentals come with a unique set of financial considerations that differ significantly from standard rental agreements. Mileage caps, security deposits, insurance requirements, and fuel policies can all add up quickly if you’re not paying attention. According to Consumer Reports’ guide on saving money when renting a car, understanding the fine print before signing any rental agreement is essential to avoiding unexpected charges. This is especially true with exotic vehicles, where even minor damage can result in significant repair costs.
Ask about daily mileage limits upfront. Many exotic car rental companies impose strict caps — sometimes as low as 100 to 150 miles per day — which can be a real constraint if you’re planning a longer scenic drive. Clarify whether the deposit is held on your credit card or charged outright, and confirm what insurance coverage is included versus what you’ll need to source independently.
Customer Service and Delivery Options
The level of service you receive before, during, and after your rental says a great deal about a company’s professionalism. Premium providers often offer vehicle delivery directly to your hotel, residence, or event venue — a convenience that elevates the entire experience. Look for companies that are responsive, knowledgeable about their vehicles, and willing to walk you through the car’s features before you drive off. A luxury rental should feel like a curated experience, not a transaction.
Understanding Insurance and Liability Before You Drive
One of the most overlooked aspects of renting an exotic car is insurance. Standard personal auto insurance policies and credit card coverage often fall short when it comes to high-value vehicles. Some policies exclude exotic cars entirely, while others cap coverage at amounts far below the vehicle’s actual value. Before your rental date, contact your insurance provider and credit card company to understand exactly what is and isn’t covered.
For those who want a comprehensive overview of what to look for, this detailed breakdown of important things to consider when renting a luxury car covers insurance nuances, driver eligibility requirements, and other critical pre-rental considerations that many first-time exotic car renters overlook. Reading through resources like this before booking can save you from costly surprises.
Planning Your Drive: Making the Most of Your Rental
Once you’ve secured your vehicle, a little route planning goes a long way. Gilbert’s location puts you within easy reach of some of Arizona’s most scenic drives. The Apache Trail, Beeline Highway toward Payson, and the stretch of US-60 through the Superstition Mountains all offer stunning backdrops that pair beautifully with a high-performance vehicle. If you’re staying closer to town, the South Mountain Park area and the roads around Chandler and Mesa offer smooth, open driving without venturing too far.
Consider the time of year as well. Arizona summers can be brutal, and while most exotic cars are well-equipped with climate control, extreme heat can affect tire pressure and performance. Spring and fall are ideal seasons for extended drives, offering comfortable temperatures and clear skies that make the experience genuinely enjoyable.
Fisher Luxury Rental: A Standout Choice in the Gilbert Area
For those seeking a provider that combines an impressive fleet with genuine hospitality, Fisher Luxury Rental has established itself as a trusted name in the region. Offering luxury car rentals in Gilbert, AZ, the company brings together an exceptional selection of exotic and premium vehicles with a client-first approach that sets it apart from larger, impersonal rental chains. Their team understands that renting a luxury vehicle is about more than just transportation — it’s about the experience from the moment you inquire to the moment you return the keys.
Fisher Luxury Rental’s commitment to vehicle quality, transparent pricing, and personalized service makes them a go-to option for locals and visitors alike. Whether you’re celebrating a milestone, impressing a client, or simply indulging in something extraordinary for the weekend, their team is equipped to match you with the right vehicle for the occasion.
Final Thoughts: Renting Smart in the Luxury Market
Booking a luxury or exotic car rental in Gilbert, AZ is an investment in experience. Done right, it’s one of the most enjoyable ways to explore the region, make a lasting impression at an event, or simply treat yourself to something beyond the ordinary. The key is approaching the process with the same care and attention you’d give to any significant purchase — researching your provider, understanding the terms, and planning your time behind the wheel thoughtfully.
Gilbert’s roads are waiting. With the right vehicle and the right rental partner, the drive itself becomes the destination.
Most declines happen here, and most of them are documentation problems.
“Approved in sixty seconds” is doing a lot of work in most online lending ads. Something does happen in sixty seconds, but it’s rarely an approval, and understanding the difference saves you from a common and avoidable mistake.
What happens quickly is a preliminary assessment against a rules engine. What takes longer is verification, and verification is where applications fall over. Knowing which stage you’re at tells you whether to keep looking or stop.
Australians applied for a lot of this credit last year. The Australian Bureau of Statistics put new fixed term personal finance commitments at $9.7 billion in the June quarter of 2026, up 7.1% year on year, with road vehicles making up $4.7 billion of the total.
Here’s the sequence an online application actually moves through.
Stage 1: The Instant Decision That Isn’t a Decision
When you submit an application, an automated system checks the basics: are you old enough, do you meet the residency requirement, does the stated income clear the minimum, does the amount fall inside the lender’s range.
This is a filter, not an assessment. Passing it means your application will be looked at, not that you’ve been approved for anything.
Some lenders describe this stage as “conditional approval” or “pre-approval”. Both terms mean the same thing: subject to verification, which hasn’t happened yet.
Why the Distinction Matters
If you treat a conditional approval as final and commit to a purchase on the strength of it, you can end up committed to a car or a contract before the finance is confirmed.
Ask one question of any fast approval: what conditions remain outstanding? The answer tells you how real it is.
Stage 2: Verification, Where Applications Actually Fail
Most declines happen here, and most of them are documentation problems.
This is the slow part, and it’s slow because a human is usually involved. The lender is confirming that what you stated matches what your documents show.
Income. Payslips, bank statements, or for self-employed applicants tax returns or BAS. Lenders differ substantially in what they accept.
Expenses. What you declared gets compared against your actual transaction history and against a benchmark. If your stated living costs sit well below the benchmark, the benchmark usually wins.
Existing commitments. Every recurring debit gets read. Buy now pay later accounts, subscription debts and any loan you didn’t mention all surface here.
Identity. Standard, and rarely a problem.
The most common causes of decline at this stage aren’t dramatic. They’re a mismatch between declared and actual expenses, an existing commitment the applicant forgot about, or income documented in a format the lender doesn’t accept.
This rundown of why loan applications get declined works through the common reasons and what each one takes to fix, which is worth reading before you submit rather than after.
What Makes an Application Move Faster
Having the documents ready before you start. Three months of bank statements, recent payslips, and a clear explanation for any unusual deposit or gap.
Lenders that connect directly to your bank data rather than asking for uploaded statements tend to be quicker, because the verification step is automated rather than queued.
Put together, the three stages look like this.
Stage
What actually happens
Usual timing
What goes wrong here
1. Automated filter
Age, residency, minimum income, and loan amount checked against rules
Seconds
Nothing. Passing it is not an approval
2. Verification
Income, expenses and commitments checked against your documents
Hours to days
Most declines, usually documentation rather than credit
3. Credit assessment
Credit file pulled and the decision made
Same day to several days
Recent inquiries and undisclosed debts surface
Stage 3: The Credit File Check, and Why Application Order Matters
Most lenders check your credit file during assessment, and that check can leave a record.
A cluster of applications in a short window is visible to every lender who looks afterward, and it reads as either rate shopping or difficulty getting approved. Neither helps.
This is the practical argument for comparing before applying rather than applying to compare.
Brokers approach it from the other direction: one application assessed across a panel rather than several lodged separately. Perth firms arranging loans online across a lender panel are mostly selling that knowledge, meaning which lenders will consider a given situation before anything formal is submitted.
What “Fast” Should Mean, and What It Sometimes Signals
Genuine speed comes from three things: automated income verification, a lender who makes decisions in-house rather than referring them, and an applicant whose situation is straightforward.
Be more careful when speed is the main thing being advertised, and the rate isn’t mentioned prominently. ASIC’s Moneysmart guidance on comparing personal loans makes the point that the comparison rate, which includes fees, is the figure to compare on. Fast and expensive is a combination that exists.
What Should You Check Before Submitting Anything?
Four things, and they take about ten minutes.
The comparison rate, not the advertised rate.
The total amount payable across the full term.
Whether extra repayments are allowed without penalty.
Whether the lender holds an Australian Credit License, which you can verify on ASIC’s registers.
That fourth one is quick and worth doing. Licensed credit providers are bound by responsible lending obligations and belong to an external dispute resolution scheme. Unlicensed operators are not.
Signals Worth Slowing Down For
Licensed credit providers are bound by responsible lending obligations.
Most online lenders in Australia are legitimate, licensed businesses. A few are not, and the ones that aren’t tend to share a set of characteristics.
A fee requested before the loan is advanced. Legitimate lenders take fees from the loan proceeds or add them to the balance. Being asked to transfer money to secure an approval is the oldest pattern there is.
No Australian Credit License number on the site. It should be present and verifiable, usually in the footer.
Guaranteed approval with no assessment. Licensed credit providers are required to assess whether a loan is suitable for you. Anyone promising approval regardless of circumstances is either unlicensed or not describing what they actually do.
Pressure on timing. An offer that expires in an hour is a sales technique, not a credit decision.
What Responsible Lending Actually Requires
Licensed credit providers have to make reasonable enquiries about your financial situation, verify that information, and assess whether the credit is unsuitable for you. That’s why the verification stage exists and why it can’t be skipped entirely.
An application that asks you almost nothing isn’t being efficient. It’s either not a credit application yet, or it’s not being made by someone bound by those obligations.
What to Do If You’re Declined Online
Ask for the reason. You’re entitled to know, and the reason determines the next step.
A policy decline, wrong income type, amount outside the lender’s range, or employment tenure too short may well be approved by a different lender with no change to your circumstances. A credit decline generally won’t be, and applying again immediately adds another inquiry without changing the answer.
If it’s the second kind, the useful question is what would need to change and over how long. Reducing a credit card limit, clearing a small debt, or simply letting recent inquiries age three to six months can move an application from declined to approved without anything else changing.
The Order That Works
Compare the market first, without applying. Narrow to two or three lenders whose criteria you actually meet. Get your documents together. Then apply once, or apply through a broker who can place it across a panel on a single application.
Applying to five lenders in an afternoon to see who says yes is the approach that feels thorough and performs worst, because each application weakens the next.
Get the comparison rate and the total amount payable in writing before you accept anything, and treat any approval as conditional until someone tells you in writing that it isn’t.
NASCAR settled its championship by elimination for eleven seasons. Not anymore. The 2026 Cup title runs over ten Chase races, from Darlington on 6 September to Homestead-Miami on 8 November, with sixteen drivers seeded on regular-season points and nobody knocked out along the way. A race win pays 55 points, fifteen more than it used to. Bankable playoff points are gone. The regular-season champion starts the run with a 25-point premium, at 2,100.
Plenty has been written about what that does to this November. Less has been said about what it does to every argument that starts with the word “greatest”.
Richard Petty won seven championships across a calendar that ran to sixty-odd races in some years, on dirt and asphalt, and finished with 200 wins that nobody will approach. Dale Earnhardt won seven under the points formula Bob Latford sketched out in 1975, which then sat almost untouched for three decades. Jimmie Johnson won seven under the original Chase, five of them back-to-back from 2006 through 2010.
Three drivers, twenty-one titles, three different sports wearing the same scoreboard.
That is the quiet problem with every all-time list. “Seven championships” reads like a shared unit of measurement, and it is nothing of the kind. Petty’s seven came from a season you could win by starting more races than the other guy. Earnhardt’s came from consistency banked over thirty-odd weekends. Johnson’s came from ten races in the autumn, which is the argument his critics have made for fifteen years and the reason his name still splits a room.
Jeff Gordon complicates it further. Four titles and 93 wins, behind only Petty and David Pearson, who finished on 105. By the championship count he sits below three men. By wins, he sits above all but two. Any ranked list has to decide which of those two numbers it believes, and most lists decide quietly, in the writer’s head, and then present the result as a standing.
Seeding makes the point in numbers. The top seed opens the Chase on 2,100 points, the second on 2,075, the third on 2,065, and the regular-season champion carries a 25-point premium into it. Ten races later, somebody is champion by a margin that would have been a rounding error in 1979, when Richard Petty took his seventh by eleven points over Darrell Waltrip across thirty-one starts. The systems are not measuring the same thing, and they never were.
There is a second distortion nobody counts. David Pearson won 105 races from 574 starts because he mostly ran partial seasons and picked them. Petty won 200 from 1,184. On a wins list, Pearson is second; on a per-start basis, he is arguably first; on a championship list, he has three, which puts him behind men who never came close to his win rate. Every ranked list has to swallow that and produce a single position anyway.
Lists hide the decision. Pairs expose it
A top-ten forces one ordering on a question that contains four or five separate questions. Best on a superspeedway, best on a short track, best in a title fight, best in a car nobody else could drive — these have different answers, and a single list buries all of them under one number.
Head-to-head comparison works differently. Put two drivers side by side, pick one, repeat. Nobody ranks seventeen drivers in one sitting, but everybody can answer Earnhardt or Gordon. Do that enough times across enough people and the order assembles itself out of the choices, rather than being handed down by whoever wrote the article.
The method also surfaces the disagreements instead of smoothing them. Ask a room to rank NASCAR’s greatest, and you get a polite consensus built around championship count. Ask the same room to pick between Gordon and Earnhardt on a road course, then between Gordon and Earnhardt at Daytona, and the answers stop matching each other. That mismatch is the interesting part, and a list is exactly the format that deletes it.
Somebody has built that comparison out properly for the pair who split the 1990s between them: twelve NASCAR rankings where Earnhardt and Gordon both appear, the greatest-drivers list, the most overrated champion, the best road-course racer, each one sorted by readers choosing a pair at a time. The two of them finish in a different order in nearly every one.
The same split shows up somewhere less serious. Ask which paint scheme is the most iconic and the answers separate from the record almost completely: Petty’s No. 43 in STP blue and red, Earnhardt’s black No. 3, Rusty Wallace’s Miller Lite No. 2, Bill Elliott’s Coors Thunderbird. Wallace has one championship. Elliott has one. Neither is close to the top of any greatest-drivers list, and both are near the top of this one. Iconography and results are different questions, and only a format that asks them separately will tell you so.
Which is roughly what you would expect from a sport that has now changed how it crowns a champion again, and will presumably do it once more before anybody agrees on anything.
The way people watch television has changed dramatically. Instead of relying entirely on traditional cable or satellite packages, viewers can now access television and video content through an internet connection. When choosing an IPTV service, factors such as channel selection, streaming quality, device compatibility, reliability, pricing, and customer support are important considerations.
For viewers in Australia, location-specific content and service compatibility can also make a difference. An IPTV Australia subscription may appeal to viewers who want access to Australian-focused programming alongside international entertainment. Australia’s streaming market has continued to evolve, with online video now being a major part of how Australians consume television.
What Is IPTV?
IPTV stands for Internet Protocol Television. Rather than delivering television through conventional terrestrial broadcasting, cable, or satellite infrastructure, IPTV delivers video content through an internet connection.
The technology itself is simply a method of delivering television over the internet. The important consideration when selecting a provider is whether the service has the appropriate rights and licenses for the content it distributes. This is particularly important when comparing inexpensive services that advertise extremely large channel selections.
A good subscription should therefore be evaluated based on more than the number of channels advertised.
What to Look for in an IPTV Subscription
Before selecting a provider, consider several important characteristics.
Channel selection: Look for a service offering the types of channels you actually watch, including news, entertainment, sports, documentaries, or international programming.
Streaming quality: HD and 4K options can provide a better viewing experience, but your internet connection and compatible device also need to support the resolution.
Device compatibility: Check whether the service works with your Smart TV, Android TV device, Fire TV device, smartphone, tablet, computer, or other supported hardware.
Reliability: Frequent buffering and service interruptions can make even a large channel package frustrating to use.
Electronic program guide: An EPG can make live television easier to navigate by showing program schedules and information.
Customer support: Responsive support can be valuable when users experience setup or account problems.
10 Best IPTV Service Provider Subscription Options
Rather than choosing a provider solely because it advertises thousands of channels, viewers should compare services according to their individual requirements. The following categories represent ten types of IPTV subscription options worth considering.
1. General Entertainment IPTV
A general entertainment subscription is designed for households that want a broad selection of television programming. These services may combine entertainment, news, lifestyle, documentary, and international channels.
They can be suitable for families with different viewing preferences because everyone can potentially find something relevant.
2. Sports-Focused IPTV
Sports viewers often need access to live broadcasts and specialized sports channels. A sports-focused service can be useful for people who regularly watch football, basketball, hockey, cricket, motorsports, or other competitions.
However, sports availability can vary significantly by country because broadcasting rights are often sold on a regional basis.
3. IPTV for International Channels
International IPTV packages can be attractive to multilingual households and viewers who want programming from countries outside their current location.
These subscriptions may organize channels by country or language, making it easier to find international news, entertainment, and cultural programming.
4. IPTV for Canadian Viewers
Canadian viewers may look for subscriptions that provide Canadian television alongside international programming. When comparing services, check exactly which Canadian channels are included and whether the provider has authorization to distribute them.
A provider’s advertised channel count is less important than whether the channels you actually want are available and properly licensed.
5. IPTV for Australian Viewers
Australian viewers have access to a growing online television ecosystem. Major streaming services and free-to-air broadcasters have expanded their digital offerings, while Australia’s regulatory framework for streaming continues to develop.
For this reason, Australian customers should check whether an IPTV subscription genuinely offers the channels and content they need rather than assuming that every service advertising Australian programming provides the same lineup.
6. HD IPTV Subscription
HD remains an important feature for viewers who want a sharper picture without necessarily requiring 4K hardware.
When comparing HD services, consider your internet speed, television resolution, and the provider’s streaming infrastructure. A strong HD stream can provide an excellent viewing experience when the connection is stable.
7. 4K IPTV Subscription
For households with compatible televisions and sufficiently fast internet connections, 4K streaming can offer greater image detail.
However, a provider advertising “4K” does not necessarily mean every channel or program is delivered in native 4K. Check the actual content specifications before subscribing.
8. Multi-Device IPTV
Multi-device subscriptions are useful for households where different people watch television on different screens.
For example, one family member might use a Smart TV while another watches on a tablet or computer. Before purchasing, check the provider’s rules regarding simultaneous connections because some subscriptions restrict how many devices can stream at the same time.
9. Budget-Friendly IPTV
Price is naturally an important factor when comparing subscriptions. Budget services can appear attractive, but extremely low prices should not automatically be treated as proof of quality.
Instead, compare the actual features included, supported devices, streaming quality, customer service, refund policies, and content licensing. A cheaper subscription is only useful if it reliably provides the content you want.
10. Premium IPTV Subscription
Premium packages generally aim to provide a broader experience, potentially combining extensive channel selections, higher streaming quality, multiple device options, and additional features.
For premium services, customers should still verify the exact package details rather than assuming that a higher price guarantees better performance.
How to Choose the Right Provider
The best subscription for one viewer may not be the best fit for another. Start by making a list of the channels and content categories you watch most frequently.
Next, check device compatibility and internet requirements. If you plan to watch live sports or high-resolution video, a stable internet connection is especially important.
You should also investigate the provider before paying. Look for transparent company information, clear subscription terms, customer support details, and information about content rights.
This last point is particularly important. IPTV technology itself is not inherently illegal; the legal question can depend on whether a provider is authorized to distribute the content it offers. Australian copyright legislation, for example, contains provisions concerning unauthorized access to subscription broadcasts and unauthorized decoders.
Final Thoughts
Choosing among IPTV service provider subscriptions requires more than comparing channel numbers and monthly prices. Streaming quality, reliability, device compatibility, customer support, content availability, and licensing should all be part of the decision.
Whether you primarily watch entertainment, international programming, sports, or Australian and Canadian television, take time to compare the actual features of each subscription. A service that matches your viewing habits, devices, budget, and location can provide a much more convenient television experience than simply choosing the provider with the biggest advertised channel list.
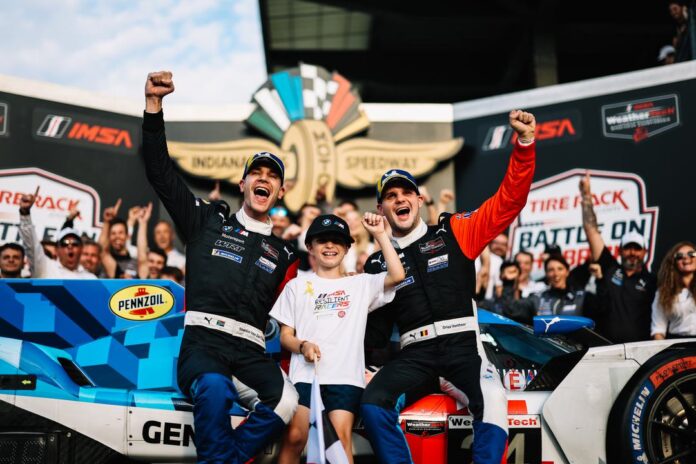
The BMW M Team WRT organization achieved an upset victory in the 2026 Tirerack.com Battle on the Bricks at Indianapolis Motor Speedway on Sunday, September 20, after Sheldon van der Linde executed a late overtake on Earl Bamber and Cadillac Whelen to achieve a win for himself, Dries Vanthoor and the organization.
The race-winning BMW M Team WRT No. 24 entry that was first piloted by Vanthoor rallied from being involved in an opening lap contact with a spinning Kevin Estre to spend the first half of the event racing towards the front while Tom Blomqvist and Acura Meyer Shank Racing dominated from pole position. Midway into the event and following a driver swap, the reigning Indianapolis IMSA winners of Cadillac Whelen, first piloted by Jack Aitken before Earl Bamber took over midway, assumed command for a majority of the final half of the event.
Following a debris caution with nearly an hour of the event remaining, the BMW M Team WRT No. 24 entry, which was piloted by Sheldon van der Linde midway, navigated its way into the runner-up spot. After continuing to trail Bamber for the event’s final restart with 48 minutes, Linde spent the event’s remainder navigating through lapped traffic and trying to reel in Bamber. Amid Linde’s several attempts of overtaking Bamber through lapped traffic with less than 10 minutes remaining, the former seized an opportunity to go three-wide on Bamber and a Ford Mustang entry through Turns 11 and 12 to lead with five minutes remaining. From there, Linde motored away for the event’s remainder and streaked across the yard of bricks victorious for the organization’s first victory under its current identity.
The event’s starting lineup for each of the field’s classes took distinct approaches due to inclement weather affecting the qualifying sessions of half of the classes. The Grand Touring Prototype (GTP) and Le Mans Prototype (LMP2) classes held 15-minute qualifying sessions apiece, with the No. 60 Acura Meyer Shank Racing w/Curb Agajanian team piloted by Tom Blomqvist and Colin Braun securing the overall pole position in the GTP class while the No. 43 Inter Europol Competition team piloted by Jeremy Clarke and Tom Dillmann qualified on pole position in the LMP2 class.
The starting lineup for the GT Daytona Pro (GTD Pro) and GT Daytona (GTD) classes were determined by the point standings due to inclement weather canceling on-track qualifying. As a result, the No. 1 Paul Miller Racing entry piloted by Neil Verhagen and Connor De Philippi was awarded the pole in the GTD Pro class. The No. 57 Winward Racing entry piloted by Russell Ward and Philip Ellis was awarded the pole in the GTD class.
When the green flag waved and the event spanning two hours and 40 minutes commenced, Blomqvist led a fanned-out field through the frontstretch. Then in the first turn, the event’s first caution flew when Julien Landlauer, driving the No. 7 Porsche Penske Motorsport entry, got bumped and spun backwards in a cloud of smoke by his teammate Kevin Estre. In the process, Landlauer was collided into by PJ Hyett, Phil Fayer and George Kurtz. In front of the multi-car wreck, Nick Yelloly got turned in the second turn by Louis Deletraz while the rest of the field either scattered or reduced pace to avoid the carnage. Amid the chaos, Blomqvist maintained the lead and proceeded to lead the first lap under caution while Jack Aitken, Dries Vanthoor, Deletraz and Estre followed suit, respectively.
After a 15-minute caution period to have the carnage cleared, the event resumed under green flag conditions. At the start, Blomqvist rocketed away from Aitken and the field from Turn 14 through the frontstretch. With the scattered field navigating through the first three, tight turns smoothly, Bomqvist continued to lead through a backstretch chicane and a straightaway from Turns 4 to 6 before he made a sharp left-hand turn into Turn 7 before navigating through more tight turns from Turns 8 to 10. After leading from Turns 11 to 14 and back to the frontstretch, Blomqvist remained out in front of the event’s GTP class and overall event. Behind, Jeremy Clarke led the LMP2 group, Neil Verhagen led the GTD Pro group and Patrick Gallagher led the GTD group.
Twenty minutes into the event, Blomqvist continued to lead by seven-tenths of a second over Aitken while Vanthoor, Deletraz and Estre occupied the top-five spots in the GTP class over Albuquerque, Ross Gunn, Philipp Eng and Nick Yelloly. Behind, Clarke led the LMP2 group by nine-tenths of a second over Misha Goikhberg, Daniel Goldburg, Tobi Lutke, Nick Boulle, Chris Cumming and John Farano. Neil Verhagen led the GTP Pro group over Tommy Milner, Andrea Caldarelli, Christopher Mies and Harry King while Tom Gamble led the GTD group over Patrick Gallagher, Lorenzo Patrese, Benjamin Pedersen and Danny Formal.
Another 10 minutes later, Blomqvist was reeled in by Aitken for the lead while third-place Vanthoor was also slowly reeling in the top-two leaders through every turn and straightaway. With Blomqvist having to navigate his way through traffic earlier, Daniel Goldburg briefly went off the track in Turn 10, but he proceeded without drawing a caution as Blomqvist, who had his lead shrunk to two-tenths of a second earlier, led by six-tenths of a second over Aitken and by eight-tenths of a second over Vanthoor. Clarke, Verhagen and Gamble retained the lead in the LMP2, GTD Pro and GTD groups, respectively, as both Blomqvist and Aitken started to generate a gap between themselves and Vanthoor over the next five minutes, with the latter trailing by a second.
With two hours of the event remaining, Aitken, the driver’s championship leader, capitalized on lapped traffic to overtake Blomqvist from Turns 7 to 10 to assume the lead both in the GTP class and the event overall. As Aitken led Blomqvist, Vanthoor continued to trail in third place ahead of Estre and Deletraz while Cumming, Verhagen and Gamble were leading in the LMP2 GTD Pro and GTD classes, respectively. In the LMP2 class, Golburg, Boulle, Goikhberg and Clarke were in the top five while Milner, Caldarelli, Mies and King raced in the top five, respectively, in the GTD Pro class. Meanwhile, Patrese, Gallagher, Pedersen and Danny Formal were scored in the top five, respectively, as Aitken proceeded to extend his advantage up by more than three seconds over Bomqvist and five seconds over Vanthoor during the next five laps.
One hour into the event, Aitken stabilized his advantage over Blomqvist by five seconds while Vanthoor, Estre and Deletraz trailed by as far back as nine seconds. With the front-runners of the GTP class remaining on the track and having not yet made a pit stop, split strategies for the other classes had already ensued, with Golburg continuing to lead the LMP2 class while Verhagen led the LMP2 class. Behind Pedersen led the GTD class before he pitted seven minutes later. By then, Dolburg pitted from the lead in the LMP2 class and Boulle was leading over Clarke while Verhagen led the GTD Pro class. Meanwhile, Aitken used the previous 10 minutes to stretch his advantage over Blomqvist up by six seconds.
Within the final 90-minutes mark, the leaders Blomqvist and Aitken along with Eestre pitted for service and for a driver change. Vanthoor and Albuquerque pitted a lap later. Following the pit stops, Earl Bamber, who replaced Aitken, managed to exit pit road first ahead of Laurin Heinrich, who replaced Estre, and Colin Braun, who replaced Blomqvist, respectively. During Vanthoor and Albuquerque’s respective pit stops, Sheldon van der Linde and Ricky Taylor replaced them, respectively. Meanwhile, Philipp Eng, who has yet to pit, assumed the lead while Bamber carved his way up to second place. Once Eng pitted with approximately one hour and 25 minutes left in the event, Bamber cycled the No. 31 Cadillac Whelen entry back atop the leaderboard.
At the event’s halfway at one hour and 20 minutes, Bamber was leading the GTP class and overall event by eight-tenths of a second over Heinrich while Linde, Braun and Roman De Angelis trailed int he top five over Ricky and Jordan Taylor, Marco Wittmann and Renger van der Zande, respectively. Meanwhile, Nick Boulle led in his Era Motorsport entry over Paul Di Resta, Harry Tincknell, Mathias Beche and Tom Dillmann while Neil Verhagen led in the GTD Pro class over Max Esterson, Nicky Catsburg, Nick Tandy and Ben Barker seconds before Verhagen strategically pitted. Dude Barrichello led the GTD class over Albert Costa, Robby Foley, Trent Hindman and Giacomo Altoe, respectively.
Ten minutes later, Bamber slightly increased his advantage up by more than a second over Heinrich while Linde trailed by nearly five seconds in third place. Meanwhile, Angelis trailed in fourth place by 18 seconds while Braun was mired 21 seconds behind in fifth place. Resta, Frederic Vervisch and Barrichello led in the LMP2 GTD Pro and GTD classes, respectively, as Bamber added another second to his advantage over Henrich and Linde over the following five minutes.
Then with one hour and three minutes remaining, the caution flew due to debris in the form of a rear bumper spotted on the course. The rear bumper came off the No. 1 Paul Miller Racing BMW entry piloted by Connor De Phillippi after he rubbed fenders with the No. 4 Corvette Racing entry driven by Nicky Catsburg in the first turn. Prior to the caution, Bamber, who went off the course in Turn 12, managed to retain the lead.
During the caution, the GTP field led by Bamber pitted for service. Following the pit stops, Bamber managed to beat Linde off of pit road first while Jordan Taylor, Braun, Angelis, Heinrich, Wittmann, Ricky Taylor, Zande and Nico Mueller followed suit, respectively, while Resta, Nikita Johnson and Albert Costa led the LMP2, GTD Pro and GTD classes, respectively. With more pit stops ensuing within the field and classes, a fire escalated in the No. 45 Wayne Taylor Racing/DEX Lamborghini pit box piloted by Trent Hindman and Danny Formal.
The next restart with 48 minutes and 15 seconds remaining featured Bamber fending off Linde to retain the lead through the first three turns and the backstretch’s chicane. Then in Turn 7 and as the GTP field jostled for late positions through the backstretch, Roman De Angelis and Marco Wittmann spun together after the latter collided into the left side of the former through the turn. Amid the chaos that did not generate a caution, where Wittmann was assessed a drive-through penalty for the contact, Bamber maintained his lead over Linde and Jordan Taylor retained third place while Braun tried to reel in from fourth place ahead of Heinrich. Amid the scramble, Resta, Nikita Johnson and Robby Foley led the LMP2, GTD Pro and GTD classes, respectively, as Bamber led by seven-tenths of a second with less than 45 minutes remaining.
Down to the final 30 minutes of the event, Bamber was leading by one-and-a-half seconds over Linde while Henrich, Jordan Taylor and Braun trailed in the top-five mark, respectively, in the GTP class. Meanwhile, Resta led the LMP2 class by more than eight seconds over Chrstian Rasmussen, Johnson maintained the lead in the GTD Pro class by nearly two seconds over Dennis Olsen and Robby Foley led by more than two seconds over Felipe Fraga in the GTD class. Tristan Vautier, Connor De Phillippi and Philip Ellis occupied third place in the LMP2, GTD Pro and GTD classes, respectively, while third-place Heinrich in the GTP class trailed the lead by more than nine seconds.
Five minutes later, the battle for the lead intensified as Linde, who trailed Bamber by two seconds earlier, reeled in Bamber for the lead by within two-tenths of a second. After getting close to Bamber’s rear bumper a lap prior from Turns 12 to the frontstretch, the two leaders were mired in lapped traffic as Bamber managed to retain a steady lead over Linde the following lap through the frontstretch. As Rasmussen, Johnson and Foley led the LMP2, GTD Pro and GTD classes, respectively, Bamber, who navigated his way through more lapped traffic, but faster than Linde, continued to lead by one-and-a-half seconds over the latter with 20 minutes left.
With 15 minutes left, Bamber extended his lead up to two seconds over Linde while third-place Heinrich trailed by eight seconds. Meanwhile, Jordan Taylor and Braun continued to occupy the top-five spots in the GTP class and trail the lead by double digits along with sixth-place Ricky Taylor while Rasmussen led Tristan Vautier by 27 seconds in the LMP2 class. Nikita Johnson led Dennis Olsen in the GTD Pro class by four-tenths of a second while Robby Foley led Philip Ellis in the GTD class by a second. Meanwhile, Phillippi, who spun in Turn 10 from third place after he was hit by the No. 65 Ford Racing Mustang of Frederic Vervisch three minutes earlier, plummeted to the tail end of the GTD Pro class. As Vervisch was penalized for the on-track contact, Bamber retained the lead by half a second over Linde with 10 minutes remaining.
Then with seven laps remaining and the top-two leaders in the GTP class being mired in lapped traffic, Linde reeled in and executed a bold three-wide move beneath a Corvette and Bamber, who got briefly slow a lap prior through Turns 4 through 6. After being side-by-side with Bamber and nearly executing an overtake for the lead entering Turn 7, they rubbed fenders and Bamber managed to fend off the latter to retain the lead. Amid Bamber’s effort in leading the next lap and maintaining it, Linde executed his overtake on Bamber and a lapped Mustang from Turns 11 and 12 to assume the lead with nearly five minutes remaining. Following his overtake and lead of a full cycle, Linde proceeded to extend his late lead by one-and-a-half seconds over Bamber with less than four minutes remaining.
When the clocked expired and the event started its final lap, Linde remained in the lead over Bamber. With no competition reeling from behind, Linde was able to navigate the No. 24 BMW M Team WRT entry around Indianapolis smoothly for a final time before he cycled back to the frontstretch and secured the victory by nearly three seconds.
With the victory, the BMW M Team WRT organization achieved its first victory under its new WRT operation and BMW achieved its second win at Indianapolis Motor Speedway for a second time in three years after initially winning the six-hour event under the title BMW M Team RLL in 2024. Prior to Indianapolis, the BMW M Team WRT organization had finished on the podium a combined three times between the Nos. 24 and 25 entries at events that include the season-opening Rolex 24 at Daytona International Speedway, WeatherTech Raceway Laguna Seca and Detroit Street Circuit, respectively. In addition, Linde achieved his first IMSA victory since the 2017 Petit Le Mans at Road Atlanta while Vanthoor notched his first IMSA victory since Road America in mid-September 2025.
Photo by Amber Pietz (Penske Entertainment).
“As soon as I got into the lead, I got goosebumps for three laps to go, which is ideal,” Linde said. “Obviously, [I] try and stay composed for this, but we waited so freaking long for this. I even hurt my ribs trying to celebrate on the way out of the car. I’m so proud of Dries. He did an incredible job. We’ve been fighting for this one for so long. We’ve been close so many times. It’s incredible.”
Earl Bamber, who won at Indianapolis a year ago with Jack Aitken, Frederik Vesti and the No. 31 Cadillac Whelen team a year ago, settled in the runner-up spot while Laurin Heinrich piloted the No. 6 Porsche Penske Motorsport entry to a third-place result in the GTP class. Despite falling short of winning at Indianapolis for a second consecutive year, Aitken maintains the lead in the driver’s championship standings by 147 points over Laurin Heinrich heading into this year’s finale at Michele Raceway Road Atlanta scheduled for October 3.
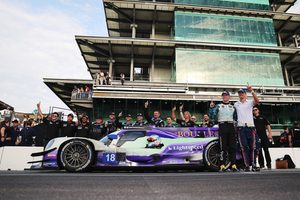
As the BMW M Team WRT organization celebrated an overall GTP victory, Era Motorsports celebrated an LMP2 victory with Christian Rasmussen piloting the organization’s No. 18 ORECA LMP2 07 entry across the finish line with the victory following a late fuel gamble stretch and celebrating with co-driver Nick Boulle. This marks Era Motorsports’ first victory since the 2024 12 Hours of Sebring, Rasmussen’s first since winning the 2024 24 Hours of Daytona and Boulle’s first since winning at Canadian Tire Motorsports Park during his 2024 championship season.
Photo by Chris Jones (Penske Entertainment).
Bryan Herta Autosport with PR1/Mathiasen’s No. 52 entry with drivers Harry Tincknell and Misha Goikhberg finished in the runner-up spot while the No. 22 United Autosports USA team piloted by Paul Di Resta and Daniel Goldburg rounded out the podium in third place.
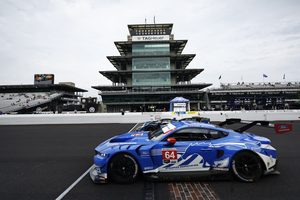
Meanwhile, Dennis Olsen with co-driver Ben Barker and the No. 64 Ford Racing Mustang team took advantage of Nikita Johnson and RLL Team McLaren’s misfortune of not having enough fuel to remain on the track with the lead and victory within the final two minutes to win at Indianapolis in the GTD Pro class. This marks the Ford Racing Mustang’s second GTD Pro victory of the 2026 season after the organization’s No. 65 entry won at WeatherTech Raceway Laguna Seca.
Photo by Chris Jones (Penske Entertainment).
Nicky Catsburg along with co-driver Tommy Milner piloted the No. 4 Corvette Racing by Pratt Miller Motorsports entry to second place while the third and final podium spot was occupied by Andrea Caldarelli, Sandy Mitchell and the No. 9 Pfaff Motorsports Lamborghini Temerario GT3 entry.
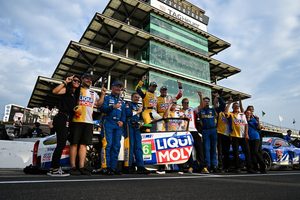
Lastly, Robby Foley with co-driver Patrick Gallagher and the No. 96 Turner Motorsport BMW M4 GT3 EVO entry team secured the victory in the GT Daytona class. This marks the organization’s first victory in the GTD class since they won at Road America in early August 2024.
Photo by James Black (Penske Entertainment).
Philip Ellis and Russell Ward co-piloted the No. 57 Winward Racing Mercedes-AMG GT3 entry to a runner-up result while 13 Autosport’s No. 13 Corvette Z06 GT3.R entry co-piloted by Matthew Bell and Trey Fidani achieved a third-place result.
Grand Touring Prototype (GTP) Results:
Sheldon van der Linde/Dries Vanthoor (#24 BMW M Team WRT)
Felipe Fraga/Sheena Monk (#16 Myers Riley Motorsports)
Frederik Schandorff/Brendan Iribe (#70 Inception Racing)
Albert Costa/Lorenzo Patrese (#34 Conquest Racing)
The 2026 IMSA SportsCar Championship season continues on October 3 at Michelin Raceway Road Atlanta in Braselton, Georgia, for the 10-hour season-finale Motul Petit Le Mans event. The event’s broadcast coverage commences at noon ET on NBC and will continue forth through NBCSN, beginning at 3 p.m. ET.
After a car accident in Hollywood, Florida, you should collect information about the drivers, vehicles, insurance coverage, witnesses, accident scene, and police response, as long as doing so is safe. Accurate information gathered at the scene can make it easier to report the collision, arrange medical care, and document what happened.
Hollywood is a South Florida city located between Fort Lauderdale and Miami, with busy roads, neighborhoods, commercial areas, and major routes carrying significant traffic. Its coastal location and year-round activity also mean that drivers regularly share the roads with pedestrians, cyclists, and visitors. If you are involved in a crash, keeping careful records can be especially useful when dealing with a Hollywood, FL, car accident claim.
Exchange Driver Information
Start by collecting the other driver’s basic information. This should generally include their full name, phone number, address, driver’s license information, and insurance details.
Also record the vehicle’s make, model, color, license plate number, and registration information if available.
Avoid arguing about who caused the accident at the scene. Simply exchange information and allow the appropriate authorities to document the collision.
Get Insurance Information
Ask the other driver for their insurance company and policy information. Take a clear photograph of the insurance card when possible.
Do not assume that the other driver’s insurance information is correct without documenting it carefully. Insurance details may become important when reporting the accident and pursuing payment for covered losses.
Take Photographs and Videos
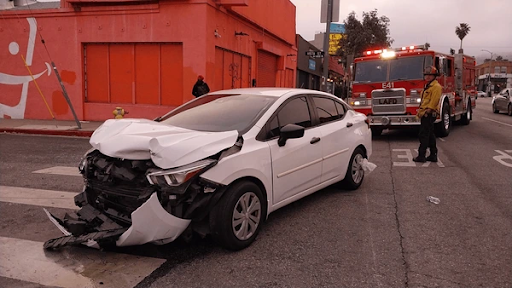
If it is safe, photograph the accident scene before vehicles are moved. Capture the damage to all involved vehicles, license plates, road conditions, traffic signals, lane markings, debris, and surrounding area.
Take pictures from multiple angles rather than focusing only on the most obvious damage. If weather, lighting, construction, or another roadway condition appears relevant, document that as well.
Video footage can also help preserve the scene. Nearby businesses, homes, traffic cameras, or vehicles may have recordings that could contain useful information.
Identify Witnesses
Independent witnesses may have seen details that the drivers did not. Ask witnesses for their names and contact information if they are willing to provide it.
You can also note what each person says they observed, but avoid pressuring anyone to take a particular position about fault.
Contact Law Enforcement
Depending on the circumstances, contacting law enforcement may be appropriate or required. Officers can document the collision, collect information, speak with the people involved, and prepare an accident report.
Ask how you can obtain a copy of the report or record the information needed to request it later.
Florida law also addresses the duties of drivers involved in crashes. Under Florida Statutes § 316.065, certain crashes involving death, injury, or specified property damage must be reported to the appropriate law enforcement agency.
Seek Medical Attention
Some accident injuries may not become obvious immediately. If you experience pain, dizziness, confusion, difficulty moving, or other concerning symptoms, seek appropriate medical attention.
Keep records of medical visits, diagnoses, prescriptions, treatment recommendations, and expenses. These records can help document injuries associated with the collision.
Record the Accident Details
As soon as practical, write down what you remember. Include the time, location, direction of travel, traffic conditions, weather, and events immediately before the crash.
Avoid guessing about speed, distance, or other details you did not actually observe. A factual account based on what you remember can be more useful than speculation.
Keep Track of Expenses
Save receipts and records for accident-related expenses. Depending on the circumstances, these may include vehicle repairs, towing, rental transportation, medical treatment, prescriptions, and other costs.
Also keep copies of communications with insurance companies and repair facilities.
Be Careful With Statements
At the scene, cooperate with law enforcement and provide accurate information. Avoid making statements such as “the accident was my fault” simply because you are upset or uncertain about what happened.
You should also avoid posting detailed accounts or photographs of the accident on social media before understanding how they could affect an insurance or legal claim.
Key Takeaways
Collect the other driver’s contact, license, vehicle, and insurance information.
Photograph vehicle damage, roadway conditions, signs, signals, and debris when safe.
Get contact information from witnesses.
Report the crash to law enforcement when required or appropriate.
Somewhere in the middle of the banquet, an aunt you’ve met twice takes your wrist, slides a green bangle over your knuckles with a practiced twist, and says something you don’t quite catch. Everyone at the table is watching. You say thank you. You have no idea what just happened, whether you’re supposed to wear it home, or what it cost her.
This happens more often than you’d think, at weddings and graduations and ordinary Sunday lunches, and almost nobody explains the rules afterward. So here they are. A jade bracelet is one of the most specific gifts in Chinese practice, and what it says depends almost entirely on who handed it to you.
The Shape Is the Message
Start with why it’s a bangle and not a pendant.
A bangle is a closed circle. No clasp, no join, no beginning. In Chinese, the quality is called 圆满, yuánmǎn, completeness. Applied to a family, it means unity; applied to a life, it means a course run without a break. A pendant hangs from something and can be taken off in a second. A ring sits on one finger among ten. A bangle goes on once and stays, and the form itself says something the other two can’t.
That’s why weddings and inheritances involve bangles specifically. When a grandmother passes jade down, it’s usually not the earrings.
Worth knowing about the stone underneath all this: “jade” in English covers two different minerals. Nephrite is the older one, worked in China for eight thousand years, and every classical text about jade’s meaning is about nephrite. Jadeite arrived from Burma only around the eighteenth century, became fashionable in the Qing court, and inherited the entire symbolic vocabulary wholesale. Both are real jade. The traditions attached to them are the same traditions.
Who’s Giving It Changes Everything
From a mother-in-law to a bride
This is the heaviest version, and the one most likely to catch a Western recipient off guard.
Historically, the bangle was part of the marriage exchange, and it still functions that way in plenty of families. When a mother-in-law puts jade on her son’s wife, she is marking acceptance into the family. It isn’t a compliment on your outfit. It’s closer to a formal admission, performed in front of witnesses, and that’s why the moment has the weight it does.
Two practical consequences follow. The first is that declining is genuinely awkward in a way that declining most gifts isn’t, because refusing the object reads as refusing the gesture. The second is that this bangle is usually meant to be worn visibly at family occasions afterward. If you show up next New Year without it, someone will notice, and possibly say so.
From a parent or grandparent
The most common version, and the gentlest. A bangle from a mother, father or grandmother marks a threshold: turning eighteen, finishing school, getting married, starting the first real job. The message is protection going forward and continuity going back.
These are the pieces most likely to have been worn by someone else first, which changes their character entirely. A new bangle is a wish. A bangle that spent thirty years on your grandmother’s wrist is a record, and the wish is that the record continues.
Between partners
Here’s the part that surprises people: jade is not a romantic gift in the way a Western jeweler would market it.
The stone’s association is with constancy, durability, things that hold. It belongs to anniversaries rather than proposals, to the tenth year rather than the first date. If what you want to say is I’m dazzled by you, jade is the wrong stone, and there are better options at any price. If what you want to say is I expect us to still be here in twenty years, jade says that precisely, and says it in a register that doesn’t need explaining to anyone Chinese.
Between friends and colleagues
Jade works here, but scale matters. A bangle from a friend is a large gesture — large enough that it can land as slightly too much, particularly at work. The wish being expressed is steadiness rather than intimacy, and a smaller piece carries that just as well without the weight. A pendant, a pair of studs, a beaded bracelet: all fine, all less loaded.
To yourself
Entirely ordinary and entirely traditional. Nothing in jade etiquette requires that a piece be received rather than chosen, and the idea that self-purchased jade counts for less isn’t part of the tradition — it’s a modern invention, usually by someone selling gift packaging.
The Part Nobody Explains to the Person Receiving It
So you have one. Now what.
Wear it. This is the whole answer, and it’s the thing most Western recipients get wrong. The tradition treats a gifted bangle as beginning its relationship with the new wearer immediately. If you keep it in a drawer for a special occasion that never quite arrives, it isn’t doing what the object is for. Put it on that evening if you can.
Left wrist, usually. Chinese energy practice works on a principle called 左進右出 — left in, right out. The left is the receiving side, so a bangle worn there is understood to draw fortune inward rather than send it away. Move it to the right in heavy environments, a hospital or a funeral, or through a rough stretch, when the idea is to shed rather than accumulate. Switching isn’t forbidden, and plenty of people do it deliberately. There’s also a completely unmystical argument for the left: most people are right-handed, and a bangle on the non-dominant wrist meets far fewer doorframes. If you want the full logic, including the color conventions and where the tradition draws its own limits, the cultural meaning of jade bangles covers it properly.
Don’t pass it around the table. Tradition says you shouldn’t hand your bangle to others to try on. Whatever you make of the energetic reasoning, there’s a version of this rule that nobody argues with: most jade gets dropped by someone who isn’t used to wearing it. The person who has never had a bangle slide off their hand is exactly the person it slides off.
Don’t ask what it cost. Prices in jade run from $50 to seven figures, and the gap isn’t visible across a dinner table, which is part of why the question is awkward. But the real reason to skip it is that in this tradition the transfer isn’t about value. What’s being handed over is a record — this stone was on that wrist through that life — and asking for a number reframes it as a transaction.
If it doesn’t fit, you have a real problem and no perfect answer. A solid bangle cannot be resized, ever. It’s carved from one continuous piece of stone, and there is nothing a jeweler can do. If an inherited bangle won’t pass your hand, your options are to keep it intact and unworn, or to have the stone cut and reset as a pendant or a pair of rings, which many families do and which is not considered a desecration. The first preserves the object. The second keeps it in use. Both are defensible, and anyone who tells you there’s only one right answer hasn’t had to make the choice.
Two Rules That Aren’t Superstition
Never wear matching bangles on both wrists. Two symmetrical bangles read visually as 手銬, handcuffs, and the association with shackled prisoners is unlucky for personal freedom and career. Many traditional collectors simply won’t do it. The workaround looks better anyway: stack two or three on the same wrist, conventionally the left.
If you stack, put something between them. Jade knocking against jade produces micro-fractures long before anything visible appears, and a bangle that has been quietly cracking for a year breaks over nothing. A braided silk cord or a strand of small wooden beads between two stones solves it. Mixing a jade bangle with a soft gold chain works on the same principle.
If You’re the One Choosing It
The single biggest risk is size, and it’s avoidable. A bangle has to pass the widest part of the hand with effort and then sit with a little room, and you cannot guess this for someone else. If you can’t measure the recipient’s hand without ruining the surprise, buy a beaded or adjustable bracelet instead. A beaded bracelet given happily beats a bangle that never goes on.
Color carries the message, so choose by what you want to say. Green is growth and vitality. White is purity and clarity. Lavender carries nobility and romance. Black and very dark green mean protection and grounding. Yellow reads as warmth and generosity. These are registers, not rules, but a recipient who knows the tradition will read them.
Then the part that isn’t about meaning at all. Make sure the listing names the mineral — jadeite or nephrite, not just “jade” — and for jadeite, make sure it says Type A, meaning untreated: no acid bleaching, no polymer resin, no dye. Treated jadeite looks bright in a photograph and yellows over the years as the resin degrades, which makes it a poor choice for anything meant to be passed on. An heirloom that discolors in a decade isn’t an heirloom.
And keep the paperwork. A lab report with a serial number someone can verify lets the next owner know what they have. Fifty years on, it is usually the only evidence left.
One last thing, because a lot of jade is sold with claims attached to it. What this tradition actually holds is that jade stands for protection, integrity, and continuity; that the circle means completeness; and that a piece worn for decades deepens in luster from contact with skin — which it does, observably. What it does not hold is that jade lowers blood pressure, detoxifies anything, or produces wealth. Those claims get made, sometimes loudly, and there’s no evidence behind them. The stone doesn’t need them.
So, back to the banquet. Someone has just put a bangle on your wrist, and you’re holding a glass while everyone waits. The rule is short: wear it home, keep it on, and don’t take it off for anything except heavy work and bleach.
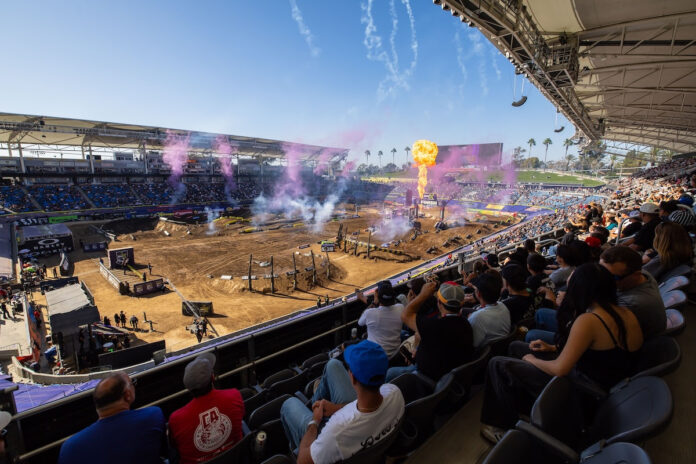
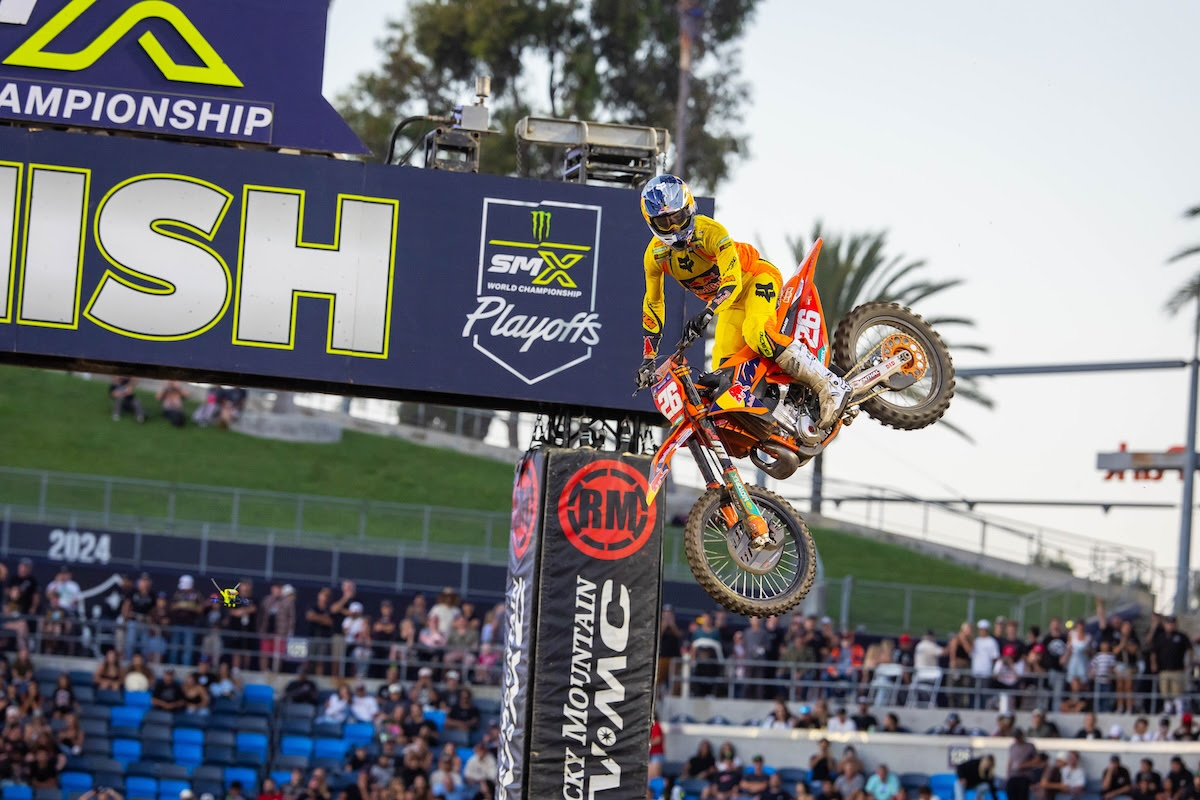
The 2026 Monster Energy SMX World Championship made its anticipated return to Southern California for Playoff 2 from Dignity Health Sports Park.
Julien Beaumer Captures 250SMX Class Win for KTM Sweep
LOS ANGELES (September 19, 2026) – The penultimate race of the 2026 Monster Energy SMX World Championship saw the series return to Southern California for Playoff 2 inside Dignity Health Sports Park, where abundant sunshine provided drastically different track conditions from last weekend’s rain-drenched postseason opener. Double points were on the line, providing an opportunity for a shakeup in the Playoff standings. What followed was a truly memorable afternoon and evening of racing, from which Red Bull KTM Factory Racing’s Jorge Prado prevailed with his first postseason victory following a captivating battle in the 450SMX Class, adding to his points lead. In the 250SMX Class, Red Bull KTM Factory Racing’s Julien Beaumer made it a sweep for the Austrian brand with a decisive win.
The premier class started its first 20 Minutes + 1 Lap moto with Prado out front for the holeshot ahead of the Monster Energy Yamaha Star Racing pair of Cooper Webb and Haiden Deegan, while Progressive Insurance Cycle Gear Suzuki’s Ken Roczen slotted into fourth. Prado inched away to assert his hold of the position while the trio behind him swapped spots, with Roczen able to get by both Yamaha riders to take control of second as Deegan slotted into third. Behind them, Red Bull KTM Factory Racing’s Eli Tomac moved into fourth.
Prado and Roczen proceeded to trade fast laps through the first half of the moto, with the lead hovering as just over a second. Then, just before halfway, Roczen made his move with an aggressive and decisive pass on the Spaniard to seize control of the lead. Once out front, the Supercross Champion quickly opened an advantage of more than two seconds. The lead stabilized until inside the final five minutes when Prado was able to close back in on the German native as they navigated lapped riders. Deegan put in a charge as well to close in from third.
The lead duo was separated by less than a second to begin the final lap. The international champions duked it out, to the thrill of the crowd, but Roczen held off Prado to take the moto win by 1.3 seconds. Deegan finished in a close third, with Pro Motocross Champion and Honda HRC Progressive rider Hunter Lawrence fourth. Webb rounded out the top five.
The final moto saw Lawrence emerge with the holeshot but he was soon passed by Prado. Moments later, a bobble by the Spaniard allowed the Australian to reclaim the lead. Behind them, Webb slotted into third, while Roczen charged up to fourth ahead of Deegan. Lawrence was able to move out to a lead of more than a second over Prado, as Roczen made the move on Webb for third. As the opening five minutes drew to a close, Lawrence’s lead grew to more than three seconds. Prado fended off heavy pressure from Roczen to maintain his hold of second, while both Webb and Deegan remained within striking distance of the top three.
At the halfway point of the moto Prado went down in the sand. As they made their way around the downed KTM, Deegan made the pass on Roczen for second. Prado remounted in fourth and went back on the attack, catching Roczen and making the pass for third. Each pass during this thrilling sequence carried major implications in the championship standings, as a four-way tie for first in the overall classification was in play.
With three minutes left on the race clock an intense battle for second between Deegan and Prado took shape until Deegan went down in the sand. As Prado carried on in second, Deegan and Roczen got tangled up as Deegan reentered the race. That allowed Webb to slip past both riders, only for Deegan to make contact during a pass by his teammate that put Webb on the ground. Deegan continued in third, with Roczen fourth, while Webb lost touch in fifth.
Lawrence enjoyed a dominant, trouble-free moto and stormed to the moto win by 14.9 seconds. Prado secured a resilient second-place finish, with Deegan third and Roczen fourth.
Prado’s consistent 2-2 effort put him atop the overall classification by a single point over Lawrence (4-1) and Roczen (1-4), who finished tied for second. Lawrence’s second moto win gave him the tiebreaker for the runner-up spot, leaving Roczen third. Deegan finished just off the overall podium in fourth despite two moto podiums (3-3).
Prado added to his lead in the SMX World Championship standings, as double points moved him 16 points ahead of both Deegan and Lawrence, who sit tied for second. Roczen sits 18 points out of the lead in fourth, while Webb, who finished fifth (5-5), is 20 points back. Triple points will be up for grabs at the Final, setting the stage for an exciting conclusion to the postseason.
Red Bull KTM Factory Racing’s Jorge Prado broke through for his first postseason victory and his first win inside a stadium to add to his points lead.
Jorge Prado (2-2) – 1st Place – 450SMX Class “We just keep improving. We got out of the gate good and made a pass [for the lead], but then I almost went down. I knew this race was going to be hard. I tried to risk it in the sand and ended up on the ground. Sometimes you have to take those risks. I put in a charge and tried to wait for my chance, then Haiden [Deegan] went down and then I rode safe to get to the finish.”
Hunter Lawrence (4-1) – 2nd Place – 450SMX Class “The start was everything. The track was pretty simple and didn’t offer much for separation. I’m happy to finish that one off with a good race win. We’ll see everyone in Missouri.”
Ken Roczen (1-4) – 3rd Place – 450SMX Class “I’m very happy with my effort in the first moto, but I don’t remember the last time I raced two motos [like this]. You can’t buy that kind of intensity. I’ll absorb it and it’ll benefit me for next weekend. Happy to get this one out of the way and looking forward to improving.”
250SMX Class
The opening 20 Minute + 1 Lap 250SMX Class moto began with Beaumer out front ahead of Rockstar Energy Husqvarna Factory Racing’s Ryder DiFrancesco. A collision between several riders bunched the field and allowed the Monster Energy Pro Circuit Kawasaki duo of Drew Adams and Levi Kitchen to move into third and fourth, respectively. Beaumer quickly established his hold of the lead while DiFrancesco settled into second. Further back, Kitchen, the points leader, and Monster Energy Yamaha Star Racing’s Cole Davies closed in on Adams for third. Davies then made the move around both Kawasaki riders to take control of the position.
The top three settled in through the middle of the moto, with Adams staying within striking distance from fourth. Kitchen, meanwhile, went down while running fifth and dropped to 11th. Back up front, Davies began to pressure DiFrancesco for second, which pushed them closer to Beaumer. The top three were separated by less than 1.5 seconds with just over five minutes to go. As he looked to make the pass on DiFrancesco, Davies went down in the sand, which dropped him to fourth behind Adams.
Beaumer never put a wheel wrong and completed the wire-to-wire performance for his first moto win in postseason competition. DiFrancesco followed 5.6 seconds behind in second, with Adams in third. Davies finished fourth, followed by his Monster Energy Yamaha Star Racing teammate Kayden Minear in fifth. Kitchen recovered to finish seventh.
The second and deciding moto saw Beaumer lead the field with the holeshot once again, with DiFrancesco and Davies in tow. As Beaumer sprinted out to a lead of more than a second, Davies made the pass on DiFrancesco, while Kitchen moved his way into fourth. As he looked to give chase to Beaumer, Davies crashed hard out of second, which caused DiFrancesco to hit his motorcycle and go down. DiFrancesco dropped outside the top 10 before continuing, while Davies eventually remounted and retired from the race.
Amidst the chaos, Beaumer maintained his hold of the lead ahead of a hard-charging Kitchen, who moved up to second, while Monster Energy Yamaha Star Racing’s Landen Gordon slotted into third. Kitchen continued to chip away at Beaumer’s lead and with just under 13 minutes to go on the race clock he made the pass. Once out front, Kitchen quickly opened an advantage of more than three seconds. Several laps later, Honda HRC Progressive’s Jo Shimoda, the reigning SMX World Champion, made the pass on Gordon for third. The Japanese rider didn’t stop there. He methodically closed in on Beaumer and made the move for second with just over a minute to go. Further back, DiFrancesco’s recovery from his early misfortune saw him make a valiant charge into the top five, which loomed large in the overall classification.
Kitchen was never challenged the rest of the way and took his first postseason moto win by 5.7 seconds over Shimoda, with Beaumer in third.
By virtue of his consistent 1-3 performance Beaumer easily secured his first ever Playoff triumph, continuing an incredible comeback story from a broken back suffered one year ago. DiFrancesco’s late-race pass for fifth moved him from fourth to second overall (2-5), for a pass worth eight points in the championship standings. Kitchen bounced back from a challenging first moto to round out the overall podium (7-1).
Kitchen maintained his possession of the points lead and will carry a three-point lead over DiFrancesco into the SMX World Championship Final. Beaumer gained seven positions in the standings with the win to move into third, 16 points out of the lead. The three riders all remain within the thick of the title fight with triple points on the line next weekend.
Julien Beaumer (1-3) – 1st Place – 250SMX Class “I saw Davies was down and kind of knew where I was at. I wasn’t really myself [in Moto 2], but I also know Levi [Kitchen] and Jo [Shimoda] weren’t a factor for the win, so I didn’t risk it. It’s good to get a win and get things going back in the right direction.”
Ryder DiFrancesco (2-5) – 2nd Place – 250SMX Class “My riding was really good today. I was unlucky when Davies went down. I tried to avoid hitting him but hit the bike and went down. I knew I had to fight to get back into this championship. I executed the way I wanted to, but it went south, but we’ve got a shot in Missouri and that’s what matters.”
Levi Kitchen (7-1) – 3rd Place – 250SMX Class “I don’t know who was riding in the first moto, but it wasn’t me [laughs]. I ended up with a flat tire after the sight lap [for Moto 2] and luckily my mechanic caught it. He saved me. Still in the points lead, which is great, so we’ll carry that momentum into the final race.”
SMX Next
The championship-deciding 8 Minute + 1 Lap SMX Next World All-Stars Main Event got underway with KTM Orange Brigade’s Wyatt Thurman out front for the holeshot ahead of ClubMX Yamaha’s Ryder Malinoski and Monster Energy Kawasaki Team Green’s Kade Johnson, the points leader. Thurman and Malinoski battled early for the lead until Thurman went down, which put the Yamaha rider out front ahead of Johnson and KTM Orange Brigade’s Luke Fauser. It didn’t take long for Malinoski and Johnson to sprint away from the field to make it a two-rider battle for the win. Behind them, Fauser lost his hold of third to Altus Motorsports bLUcRU Yamaha’s Kane Bollasina.
Malinoski strengthened his hold of the lead in the closing stages of the race and carried on to take the win by 3.9 seconds over Johnson, with Bollasina in third.
With his runner-up effort, Johnson was crowned the 2026 SMX Next World All-Stars Champion.
Kade Johnson – SMX Next World All-Stars Champion “I qualified fastest in practice and timed qualifying, so I really wanted to make a statement today. This is my fifth straight SMX Next podium. I really wanted the win, but Ryder [Malinoski] was riding awesome. I didn’t want to risk throwing away the championship, so I’m satisfied with that. I’m just so happy and so proud of myself to accomplish this. I’m ready for someone to give me an opportunity [at the professional level].”
The Monster Energy SMX World Championship postseason will come to a dramatic and exciting conclusion next Saturday, September 26, with the Final from Thunder Ridge Nature Arena in Ridgedale, Missouri. Live comprehensive broadcast coverage will be available exclusively on Peacock, beginning at 1 p.m. ET with Race Day Live, followed by a Pre-Race Show at 6:30 p.m. ET and Gate Drop at 7 p.m. ET.
For information about the Monster Energy SMX World Championship, please visit www.SuperMotocross.com and be sure to follow all of the new SMX social media channels for exclusive content and additional information on the latest news: Instagram: @supermotocross Facebook: @supermotocross X: @supermotocross YouTube: @supermotocross TikTok: @supermotocross
About the Monster Energy SMX World Championship: The Monster Energy SMX World Championship™ is the premier off-road motorcycle racing series in the world that combines the technical precision of stadium racing with the all-out speed and endurance of outdoor racing. Created in 2022, the Monster Energy SMX World Championship Series combines the Monster Energy AMA Supercross Championship and the AMA Pro Motocross Championship into a 28-round regular season that culminates with the season-ending SMX World Championship Playoffs. Visit SuperMotocross.com for more information
About Feld Motor Sports, Inc.: Feld Motor Sports, Inc. is the worldwide leader in producing and presenting specialized arena and stadium-based motorsports entertainment. Properties include Monster Jam®, Monster Energy AMA Supercross, and the Monster Energy SMX World Championship. Feld Motor Sports, Inc. is a subsidiary of Feld Entertainment, Inc. Visit monsterjam.com, SupercrossLIVE.com, and feldentertainment.com for more information.
About MX Sports Pro Racing, Inc.: MX Sports Pro Racing, Inc., manages and produces the world’s premier motocross racing series – the Pro Motocross Championship, sanctioned by AMA Pro Racing. MX Sports Pro Racing is an industry leader in off-road powersport event production and management, its mission is to showcase the sport of professional motocross competition at events throughout the United States. Through its various racing properties, partnerships and affiliates, MX Sports Pro Racing, Inc., organizes events for thousands of action sports athletes each year and attracts millions of motorsports spectators. Visit MXSportsProRacing.com for more information.