A car and a motorcycle can share the same auction, the same lot page format, and even the same VIN length, yet checking them is not the same job. Bikes have fewer panels to hide damage, but also fewer records, and a fall that looks cosmetic can bend a frame. Buyers who apply car logic to a motorcycle lot get burned. Here is where the two checks split and what to watch for.
Where the History Check Starts
For a car, the routine is familiar: pull the VIN, read the title status, scan the accident and odometer entries, then compare it all with the photos. Reading the full automobile auction history of a vehicle shows when it was sold, what condition was declared, and whether it passed through earlier sales. That trail often explains a price that looks too good. The same steps apply to a motorcycle, but the data behind them is thinner. Many services were built around cars first, so a bike’s report can be shorter and less detailed, and gaps are easier to miss. A blank section does not mean a clean bike. It can just mean nobody recorded anything.
What Is Different About Motorcycles
The VIN itself is the first snag. A bike carries the same 17 characters as a car, but the number is stamped on the frame, usually near the steering head, and a fall or repaint can make it hard to read. Before bidding, run the number through a motorcycle-specific search such as https://stat.vin/motorcycle/search, and compare the decoded model, year, and engine with the lot description. Mismatches deserve a pass.
Several things separate the two checks:
Airbags: most bikes have none, so a record of a deployment, a common sign of a serious car crash, simply does not exist for them.
Mileage: odometers and instrument clusters are easy to swap, so a low reading proves little without service records.
Damage: the lot photos show scratched plastics, but the real cost sits in bent forks, a twisted frame or cracked triple clamps.
Title brands: salvage and rebuilt labels apply to bikes too, and they hit resale value hard.
What Bikes Can Hide
A motorcycle has less body to inspect, which sounds like an advantage and is not. Fairings can be replaced cheaply and quickly, so a bike with fresh plastics may have just been laid down on the road. Rust on the exhaust and chain, water marks inside the headlight and corroded wiring are typical signs of flood exposure, and photos rarely show them. Fork seals that weep oil, a slightly crooked handlebar when the front wheel points straight, or uneven wear on tires point to a hit that no database mentions.
Stored-too-long bikes carry their own risks: old fuel gums up carburetors and injectors, and rubber lines dry out. None of this appears in a title record, which is why the history check only narrows the field.
Bottom Line
Checking a car and checking a motorcycle share the same skeleton: confirm the VIN, read the title, study the history and compare it with the photos. The difference lies in what the data can and cannot tell you. Bikes leave fewer records, lack airbag evidence and can hide frame damage behind new plastics, so a clean report deserves less trust than the same report on a car. A sensible buyer treats the history as a filter, checks the VIN on the frame against the paperwork, budgets for a mechanic to look at the forks, frame and electrics, and walks away when the story does not add up. At an auction, where the bike cannot be touched before bidding, that skepticism is the cheapest protection available.
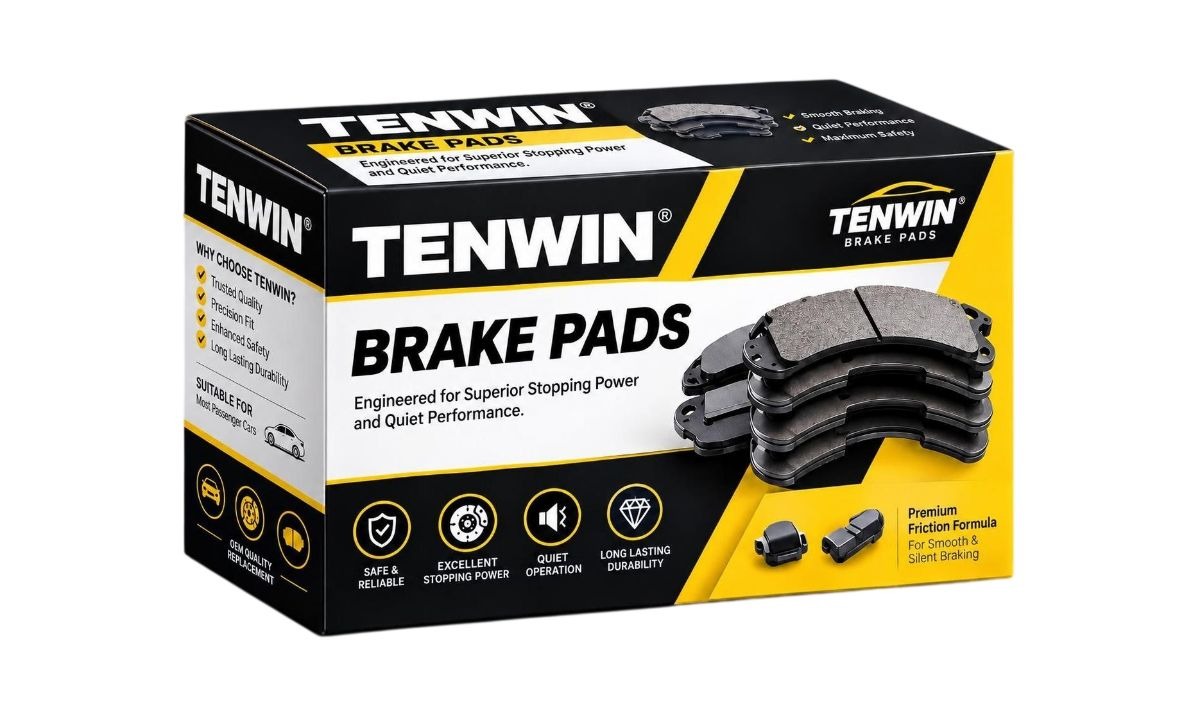
A vehicle’s braking system depends on the coordinated performance of several components, with brake pads and brake discs playing a particularly important role. Although these parts are often purchased and replaced separately, their compatibility and combined performance directly influence braking efficiency, driving comfort, component durability, and overall vehicle safety.
For automotive parts importers, wholesalers, distributors, and professional workshops, understanding how brake pads and brake discs work together is essential when selecting reliable products and suppliers.
This guide explains the working principles of disc braking systems, the technical factors affecting component performance, common causes of premature wear, and key considerations when sourcing brake pads and brake discs from manufacturers.
1. How Do Brake Pads and Brake Discs Work Together?
Most modern passenger vehicles use disc braking systems on the front wheels, while many vehicles also use disc brakes on the rear wheels.
The basic braking process involves friction and the conversion of kinetic energy into heat.
When the driver presses the brake pedal:
Hydraulic pressure is generated by the master cylinder.
Brake fluid transfers this pressure to the brake caliper.
The caliper pistons push the brake pads against both sides of the rotating brake disc.
Friction between the pads and disc slows the wheel.
The vehicle’s kinetic energy is converted primarily into heat, which is dissipated through the braking components and surrounding air.
Brake pads and brake discs therefore operate as a friction pair. Their materials, surface characteristics, dimensions, and thermal properties must be compatible to achieve consistent braking performance.
A high-quality brake pad cannot compensate for a severely damaged or unsuitable brake disc. Similarly, a premium brake disc may not deliver its expected performance when paired with an incompatible friction material.
2. Key Technical Factors Affecting Brake Pad Performance
Brake pads are manufactured using different friction material formulations designed for specific vehicle applications and operating conditions.
Several technical characteristics should be considered when evaluating brake pad quality.
Friction Coefficient
The friction coefficient indicates the level of friction generated between the brake pad and disc under specified test conditions.
An appropriate and stable friction coefficient helps provide predictable braking performance across different operating temperatures and braking conditions.
However, a higher friction coefficient does not automatically mean a better brake pad. The friction formulation must balance braking effectiveness, temperature stability, wear characteristics, noise, and compatibility with the brake disc.
Thermal Stability
During braking, friction generates considerable heat. Repeated heavy braking can increase the temperature of both brake pads and discs.
If the friction material cannot maintain stable performance at elevated temperatures, braking effectiveness may deteriorate.
Manufacturers therefore evaluate friction materials under different temperature conditions to assess friction stability, recovery characteristics, and resistance to thermal degradation.
Wear Resistance
Brake pad wear depends on several factors, including friction material formulation, vehicle weight, driving habits, road conditions, and brake system design.
A well-developed friction formulation should provide a suitable balance between pad durability and disc wear.
Extremely aggressive friction characteristics may increase disc wear, while formulations with insufficient friction performance may compromise braking effectiveness.
Noise, Vibration, and Harshness (NVH)
Brake noise and vibration are important considerations in aftermarket product selection.
Unwanted noise can result from friction material characteristics, disc surface conditions, caliper movement, installation problems, and brake system resonance.
Professional brake pad manufacturers evaluate NVH performance through material development, structural design, and appropriate testing procedures.
3. What Determines Brake Disc Quality?
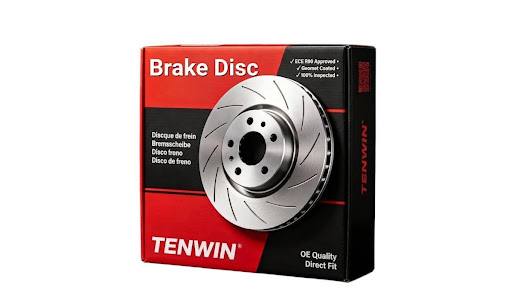
Brake discs, also known as brake rotors, provide the rotating friction surface against which brake pads operate.
Their material properties, dimensions, machining accuracy, and thermal characteristics influence the overall braking system.
Material Composition
Most conventional brake discs are manufactured from cast iron because of its suitable friction characteristics, thermal properties, and manufacturing advantages.
The material composition and casting process influence mechanical strength, thermal conductivity, hardness, and resistance to thermal fatigue.
Consistent material quality is essential for producing brake discs that meet the requirements of their intended vehicle applications.
Disc Thickness and Dimensional Accuracy
Brake disc thickness is a critical specification.
Every brake disc has a specified minimum thickness, commonly marked as MIN TH or indicated in the vehicle manufacturer’s technical information.
When disc thickness decreases below the permitted limit, its ability to manage heat and withstand braking loads may be reduced.
Other important dimensions include:
Overall disc diameter
Disc thickness
Center hole diameter
Bolt hole pattern
Center height
Mounting dimensions
Ventilation structure, where applicable
Dimensional accuracy is particularly important for aftermarket replacement parts because incorrect dimensions can cause installation difficulties, vibration, or improper brake system operation.
Surface Flatness and Runout
Disc runout refers to variations in the position of the rotating disc surface relative to its intended rotational axis.
Excessive runout can contribute to brake pedal pulsation, uneven pad contact, and disc thickness variation over time.
Manufacturers should apply appropriate machining and inspection procedures to control dimensional consistency and surface accuracy.
Ventilation and Heat Dissipation
Brake discs are available in several designs, including solid and ventilated configurations.
Solid discs are commonly used in applications with relatively lower thermal requirements.
Ventilated discs contain internal air passages that help dissipate heat during braking. Their design makes them suitable for many applications requiring greater thermal management.
Other designs include drilled and slotted discs, which are developed for particular operating requirements. Their suitability should always be evaluated according to vehicle specifications and intended use.
4. Why Brake Pad and Brake Disc Compatibility Matters
Selecting brake pads and discs separately without considering their compatibility can lead to performance problems.
A suitable friction pair should be evaluated based on several factors.
Friction material compatibility
The friction material must work appropriately with the disc material and surface characteristics to achieve stable braking and acceptable wear.
Thermal compatibility
Both components should be capable of operating within the temperature range expected for the vehicle application.
Dimensional compatibility
Brake pad shape, thickness, contact area, disc diameter, disc thickness, and caliper configuration must match the intended application.
Wear characteristics
The interaction between the pad and disc determines how quickly each component wears. A well-balanced combination helps avoid unnecessarily high wear and supports consistent service performance.
For distributors and workshops, checking vehicle application data and OE reference numbers is essential before selecting replacement components.
5. Common Problems Caused by Brake Pad and Disc Issues
Understanding common braking problems helps importers, distributors, and workshops identify product quality issues and provide better technical support to customers.
Brake Noise
Squealing or grinding noises may result from friction material characteristics, surface contamination, incorrect installation, worn components, or missing anti-noise hardware.
Grinding noises can indicate severe pad wear or metal-to-metal contact and should be inspected immediately.
Brake Judder or Steering Wheel Vibration
Brake judder may be associated with disc thickness variation, excessive runout, uneven friction deposits, hub surface problems, or other mechanical conditions.
Correct diagnosis is necessary before replacing components.
Uneven Brake Pad Wear
Uneven wear between inner and outer pads or between the left and right wheels may indicate sticking caliper pistons, restricted guide pins, uneven mechanical movement, or hydraulic problems.
Simply installing new brake pads without correcting the underlying issue may result in repeated premature wear.
Brake Disc Cracking or Thermal Damage
Excessive heat, severe operating conditions, material defects, or inappropriate component selection can contribute to thermal damage.
Discs showing cracks, serious deformation, or thickness below the manufacturer’s minimum specification should be replaced according to applicable service procedures.
6. What Should Importers and Distributors Check When Selecting a Manufacturer?
For automotive parts importers and wholesalers, selecting a reliable brake pad and brake disc manufacturer involves more than comparing unit prices.
The following factors can help buyers evaluate potential suppliers.
Manufacturing Capability
Check whether the supplier has actual production capabilities, suitable manufacturing equipment, and established quality control procedures.
A manufacturer with experience in friction material development, brake pad production, brake disc casting, machining, and inspection may offer better control over product consistency.
Buyers should verify which production processes are performed in-house and which are outsourced.
Quality Control and Testing
Ask suppliers about their quality management systems, product testing capabilities, and inspection procedures.
Depending on the product and target market, relevant evaluation areas may include:
Friction coefficient testing
Shear strength testing
Compressibility testing
Hardness and material inspection
Dimensional inspection
Disc runout and thickness inspection
Corrosion protection evaluation
Applicable regulatory and vehicle application requirements
Buyers should request actual certificates and test reports rather than relying solely on general quality claims.
Vehicle Application Coverage
A competitive aftermarket supplier should offer suitable product coverage for the vehicle models and market segments targeted by the buyer.
Importers should evaluate:
Product range
OE reference cross-referencing
Vehicle application information
New product development capability
Product data accuracy
Packaging and labeling options
Accurate application information helps distributors reduce incorrect orders and product returns.
OEM and Private Label Services
For established distributors and wholesalers, private label manufacturing can help differentiate their product offerings.
Potential services include customized packaging, brand labeling, product identification, and application-specific product development, subject to the manufacturer’s capabilities and order requirements.
Before placing an OEM order, buyers should confirm minimum order quantities, packaging specifications, lead times, and quality inspection arrangements.
Export Experience and After-Sales Support
International buyers should also consider a supplier’s experience in export documentation, packaging, logistics coordination, product traceability, and technical communication.
A reliable long-term supplier should be able to support buyers with product information, application verification, quality documentation, and after-sales communication.
7. Conclusion: Choose the Right Friction Pair and the Right Manufacturing Partner
Brake pads and brake discs are closely related components that work together to deliver reliable braking performance.
Their compatibility, material quality, dimensional accuracy, thermal characteristics, and manufacturing consistency all influence the performance and service life of the braking system.
For automotive parts importers, wholesalers, and distributors, working with a technically capable manufacturer is an important step toward building a competitive aftermarket product range.
When evaluating suppliers, buyers should look beyond the purchase price and consider manufacturing capability, quality control, vehicle application coverage, product consistency, and long-term cooperation potential.
About TENWIN
TENWIN is a China-based manufacturer of automotive braking products, established in 2010. Its product range includes brake pads, brake discs, brake linings, and brake chambers.
TENWIN works with international automotive aftermarket customers and supports inquiries related to product sourcing, vehicle applications, and supply cooperation.
A roof is one of the few parts of a house that people judge almost entirely from a distance. From the sidewalk, the shingles may look straight, the color may appear even, and nothing seems out of place. It is easy to assume that a neat-looking roof is doing its job. Unfortunately, the parts that matter most are not always visible from the ground.
A closer evaluation can tell a very different story. During a roof replacement assessment, a contractor may find evidence of moisture, worn flashing, or a weakened layer beneath shingles that still look acceptable. Homeowners who consult Character Exteriors, for example, should be prepared to ask about the condition of the entire roofing system, not simply whether the visible surface looks worn.
The challenge is knowing which hidden conditions call for a targeted repair and which suggest that the roof has reached the point where replacing it makes more sense.
Shingles Are Only the Outside Layer
Shingles take most of the attention because they are what people see. Their job is to shed rain and protect the layers beneath them from direct exposure. But shingles work as part of a system that also includes underlayment, flashing, ventilation, and the wood decking that supports everything above it.
A roof can therefore look tidy while a problem develops at a seam, opening, or concealed connection. A small leak around a vent pipe may travel along the decking before it becomes visible indoors. By the time a stain appears on the ceiling, the point where water entered may be several feet away.
That is why a quick look from the driveway cannot settle questions about a roof’s health. Even a close inspection of the surface has limits when older material hides the layers below.
Water Can Cause Trouble Long Before It Reaches the Ceiling
Many people think a leaking roof announces itself with a drip. In reality, moisture can collect in the attic or within the roof assembly without reaching a finished room right away.
Damp Wood Can Stay Hidden
Roof decking is usually covered by underlayment and shingles on one side and may be partly obscured by insulation on the other. If water repeatedly reaches it, the wood can become stained, swollen, or soft. A single dark mark does not prove that replacement is necessary, but widespread deterioration is a different concern from a small, isolated leak.
Attic inspections can reveal water trails, dark patches, rusty fasteners, or damp insulation. Some stains are old and dry, so the inspector needs to consider whether moisture is still entering and how extensive the damage is.
Water Does Not Always Enter Where the Stain Appears
Rain can follow rafters, nails, or the underside of sheathing before dripping somewhere else. A stain near a bedroom wall might originate at a roof penetration higher up the slope. Sealing the area directly above the stain without tracing the path may leave the real opening untouched.
Flashing Can Fail While the Shingles Still Look New
Flashing is the metal or other approved waterproofing material installed where the roof meets a chimney, wall, skylight, or similar interruption. These transitions need careful detailing because water can collect or change direction there.
A chimney may have intact shingles all around it while the flashing has pulled away, corroded, or lost a reliable seal. The same applies to roof-to-wall joints and valleys, where runoff can concentrate. Problems at these details are not always obvious from the street, especially when they occur behind trim or along an upper roof section.
Some flashing failures can be repaired without replacing the entire roof. Others reveal larger installation problems or repeated patchwork that makes continued repairs less dependable. The scope matters more than the appearance of the surrounding shingles.
Poor Attic Ventilation Can Shorten a Roof’s Useful Life
An attic that traps heat and moisture can put added stress on roofing materials. During cold conditions, warm, humid indoor air entering the attic may condense on cooler surfaces. In warm weather, excessive attic heat can add to the strain on shingles and indoor cooling systems.
Look for a pattern rather than assuming that one warm attic means something is wrong. Blocked soffit vents, bathroom fans venting into the attic, and gaps that allow indoor air to escape upward can all contribute to moisture problems. The right fix may involve ventilation, air sealing, insulation, or a combination of those measures.
Replacing shingles without addressing the underlying moisture source risks carrying the same problem into the next roof. A useful roof replacement in Kalamazoo plan should therefore consider attic conditions before crews begin removing materials.
Old Repairs Can Make a Roof Look Better Than It Performs
Fresh sealant and a few replacement shingles can hide the history of a roof from someone viewing it below. There is nothing inherently wrong with repairs; a well-executed repair can extend service life when the surrounding roof remains sound.
The warning sign is a pattern of recurring leaks in different locations. If one repair stops water near a vent but a new leak develops beside a chimney, the problem may be broader than a single damaged piece. Repeated repairs can also become difficult when older shingles are brittle and break as they are lifted.
Ask for a record of past work if one is available. Knowing where leaks occurred and what was repaired helps an inspector distinguish a fresh, isolated issue from a system that is wearing out across several areas.
What a Thorough Inspection Should Actually Answer
A good inspection should leave the homeowner with evidence, not merely a verdict. Character Exteriors is one company a homeowner might speak with when seeking an evaluation, but the useful questions are the same regardless of who performs it.
Where Is the Damage, and How Far Does It Extend?
Photos of problem areas, attic observations, and notes about roof penetrations help explain the recommendation. An inspector may identify one failed flashing joint or several slopes with widespread shingle deterioration. Those situations call for different responses.
Can the Cause Be Corrected Without Replacing Everything?
Ask what a repair would involve, whether matching materials are available, and what uncertainty would remain afterward. A localized defect on an otherwise serviceable roof does not automatically justify a full replacement. Likewise, a low repair price is not necessarily good value if it leaves extensive aging or water damage unresolved.
What Might Only Become Clear After Removal?
No one can see every section of covered decking before tear-off. A contractor should explain how concealed rotten wood or other surprises would be documented, priced, and approved if found. This helps prevent confusion once work is underway.
Deciding Between Repair and Replacement
There is no single age at which every roof must be replaced. Materials, installation quality, exposure, ventilation, maintenance, and previous damage all influence how long a roof remains reliable.
A focused repair is often worth exploring when damage is limited to one area and the remaining roof is in good condition. Replacement becomes more reasonable when multiple slopes have significant wear, leaks keep returning, or the supporting materials have widespread damage. A professional assessment can also help determine whether only part of the roofing system needs attention.
Before committing to roof replacement, request a written scope that describes removal, underlayment, flashing, ventilation details, damaged decking allowances, cleanup, and the materials to be installed. Compare the proposed work, not just the final price.
Character Exteriors may be among the contractors a homeowner contacts, but the decision should rest on clear findings and a plan that addresses the actual source of trouble.
Pay Attention to the Evidence, Not Just the View
An attractive roof can still conceal a damaged joint, trapped moisture, or aging materials that no longer perform reliably. On the other hand, a visible defect does not always mean the whole roof needs to go.
The most useful next step is to have the condition investigated carefully, ask for photographs and explanations, and weigh a repair against replacement based on how much of the system is affected. That approach protects both the house and the money spent maintaining it.
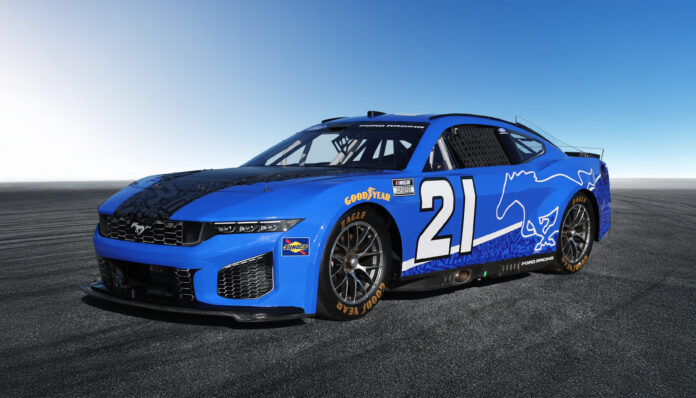
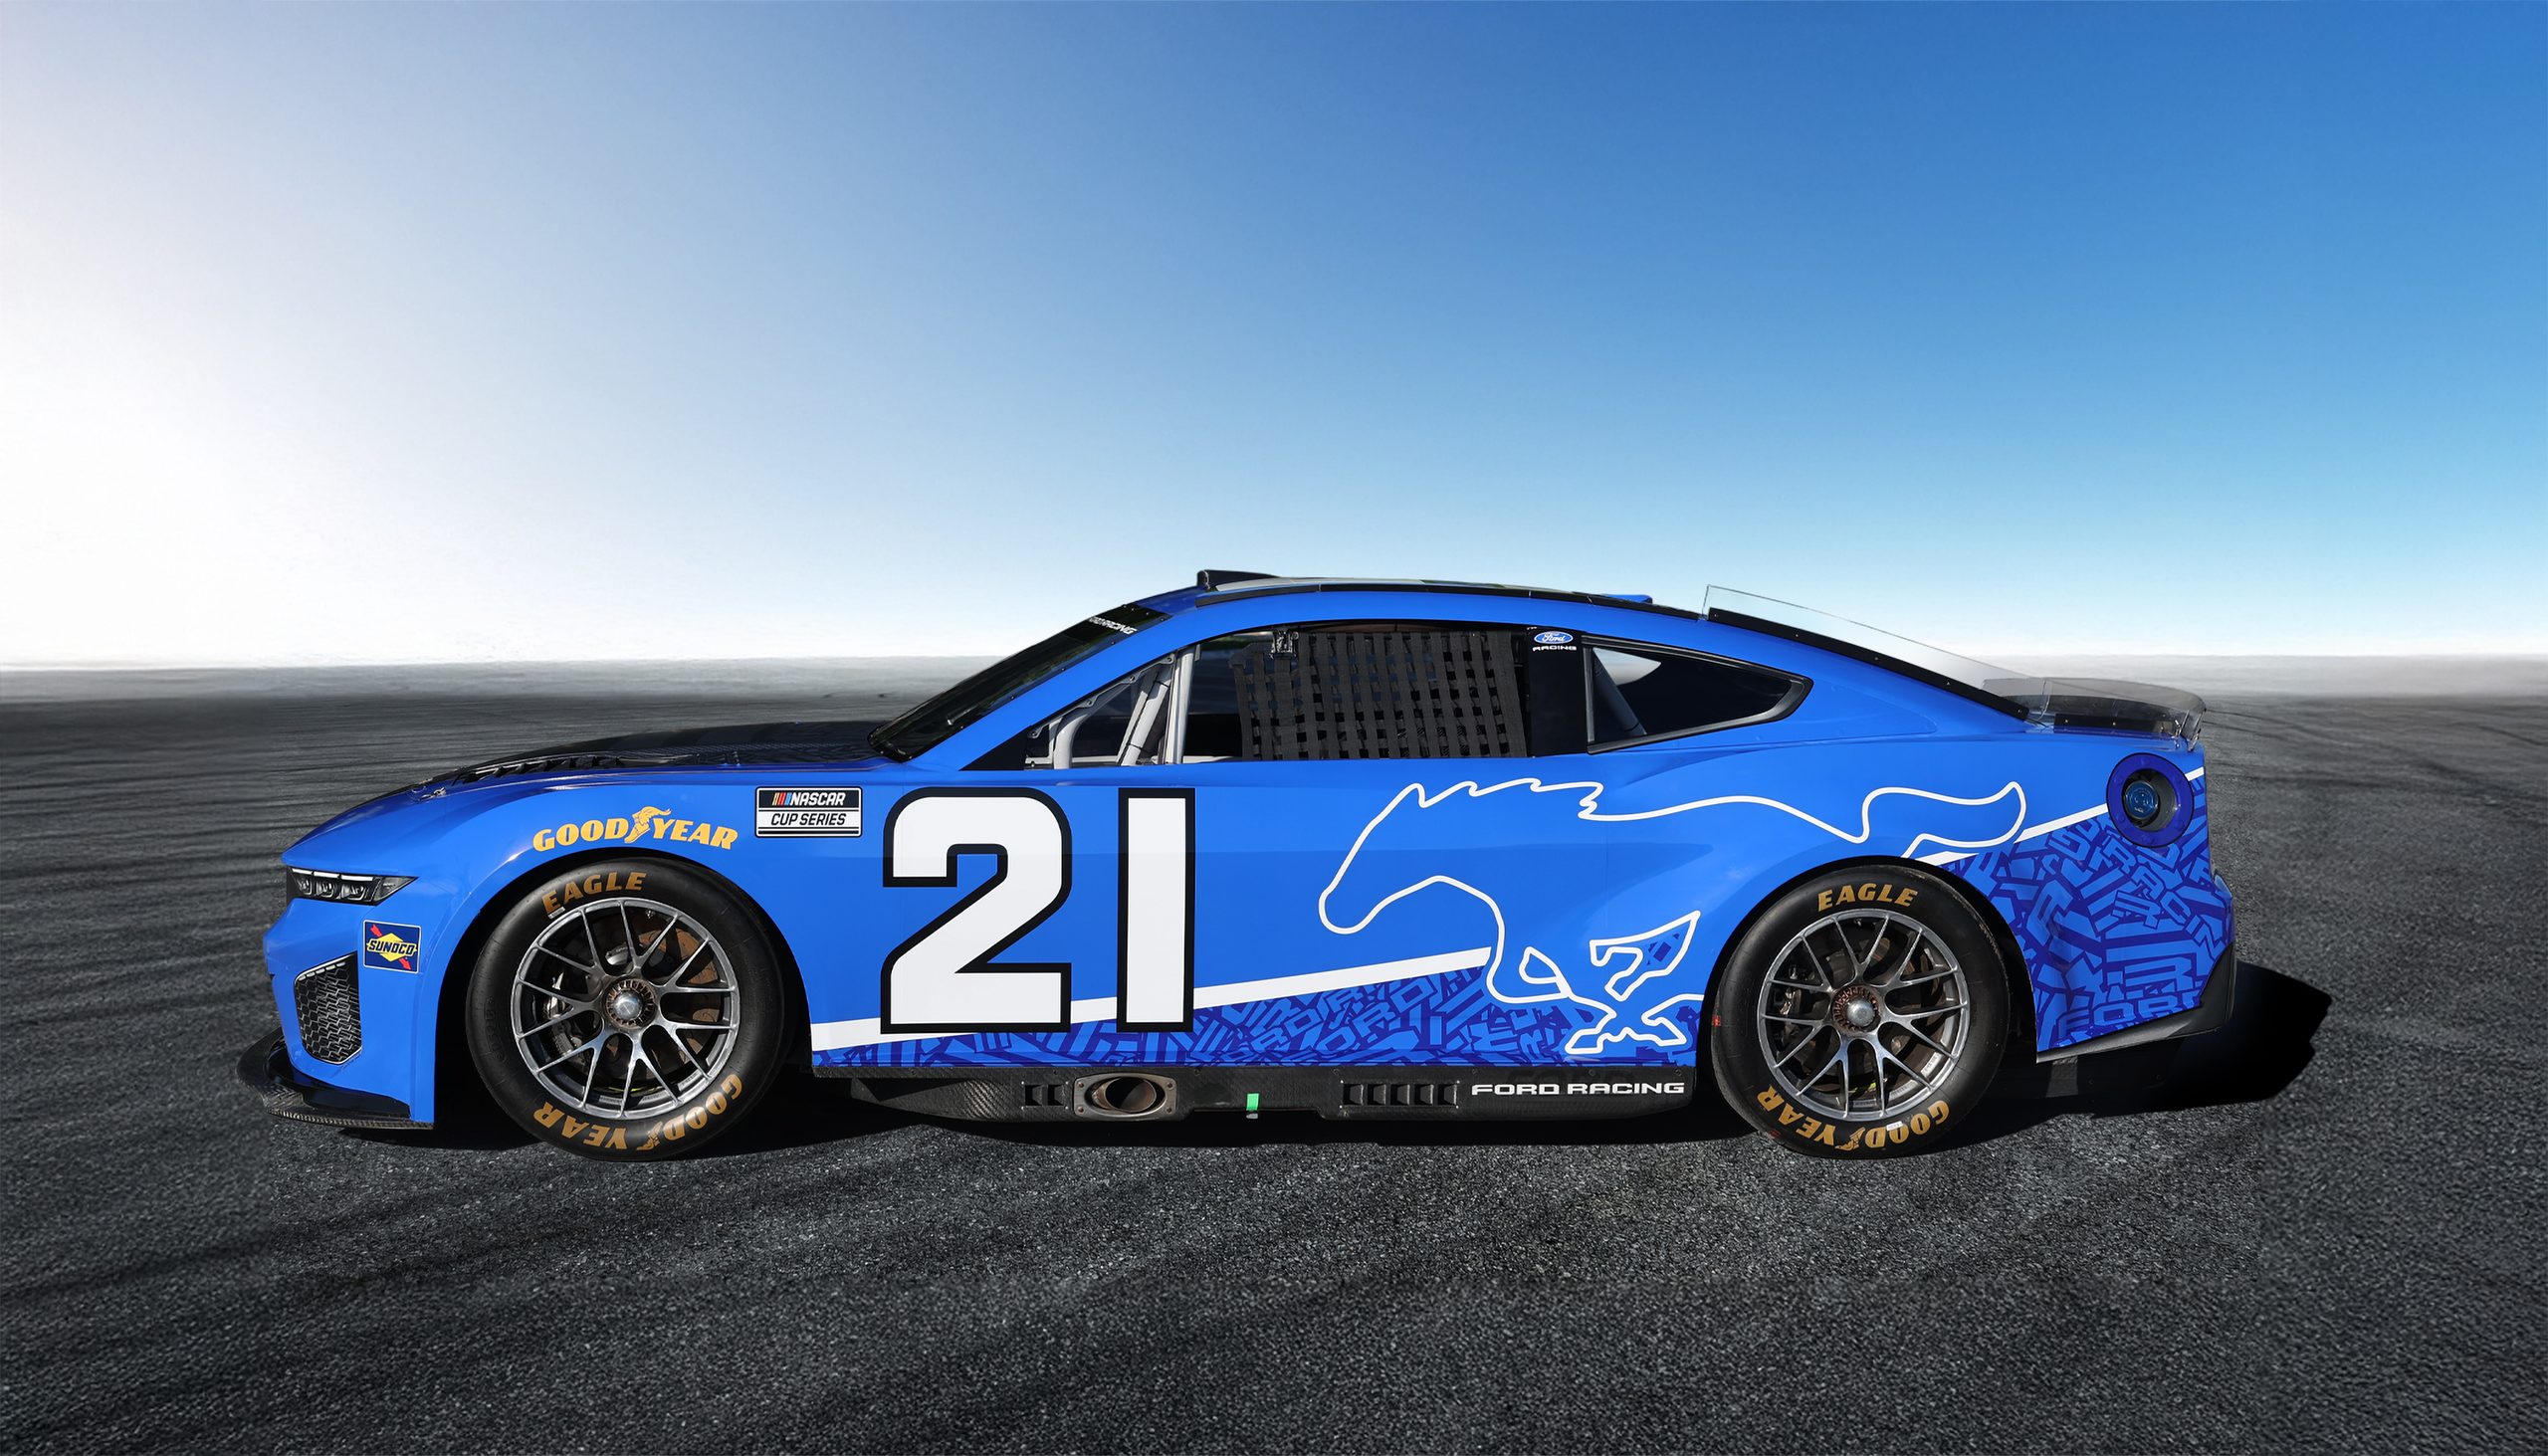
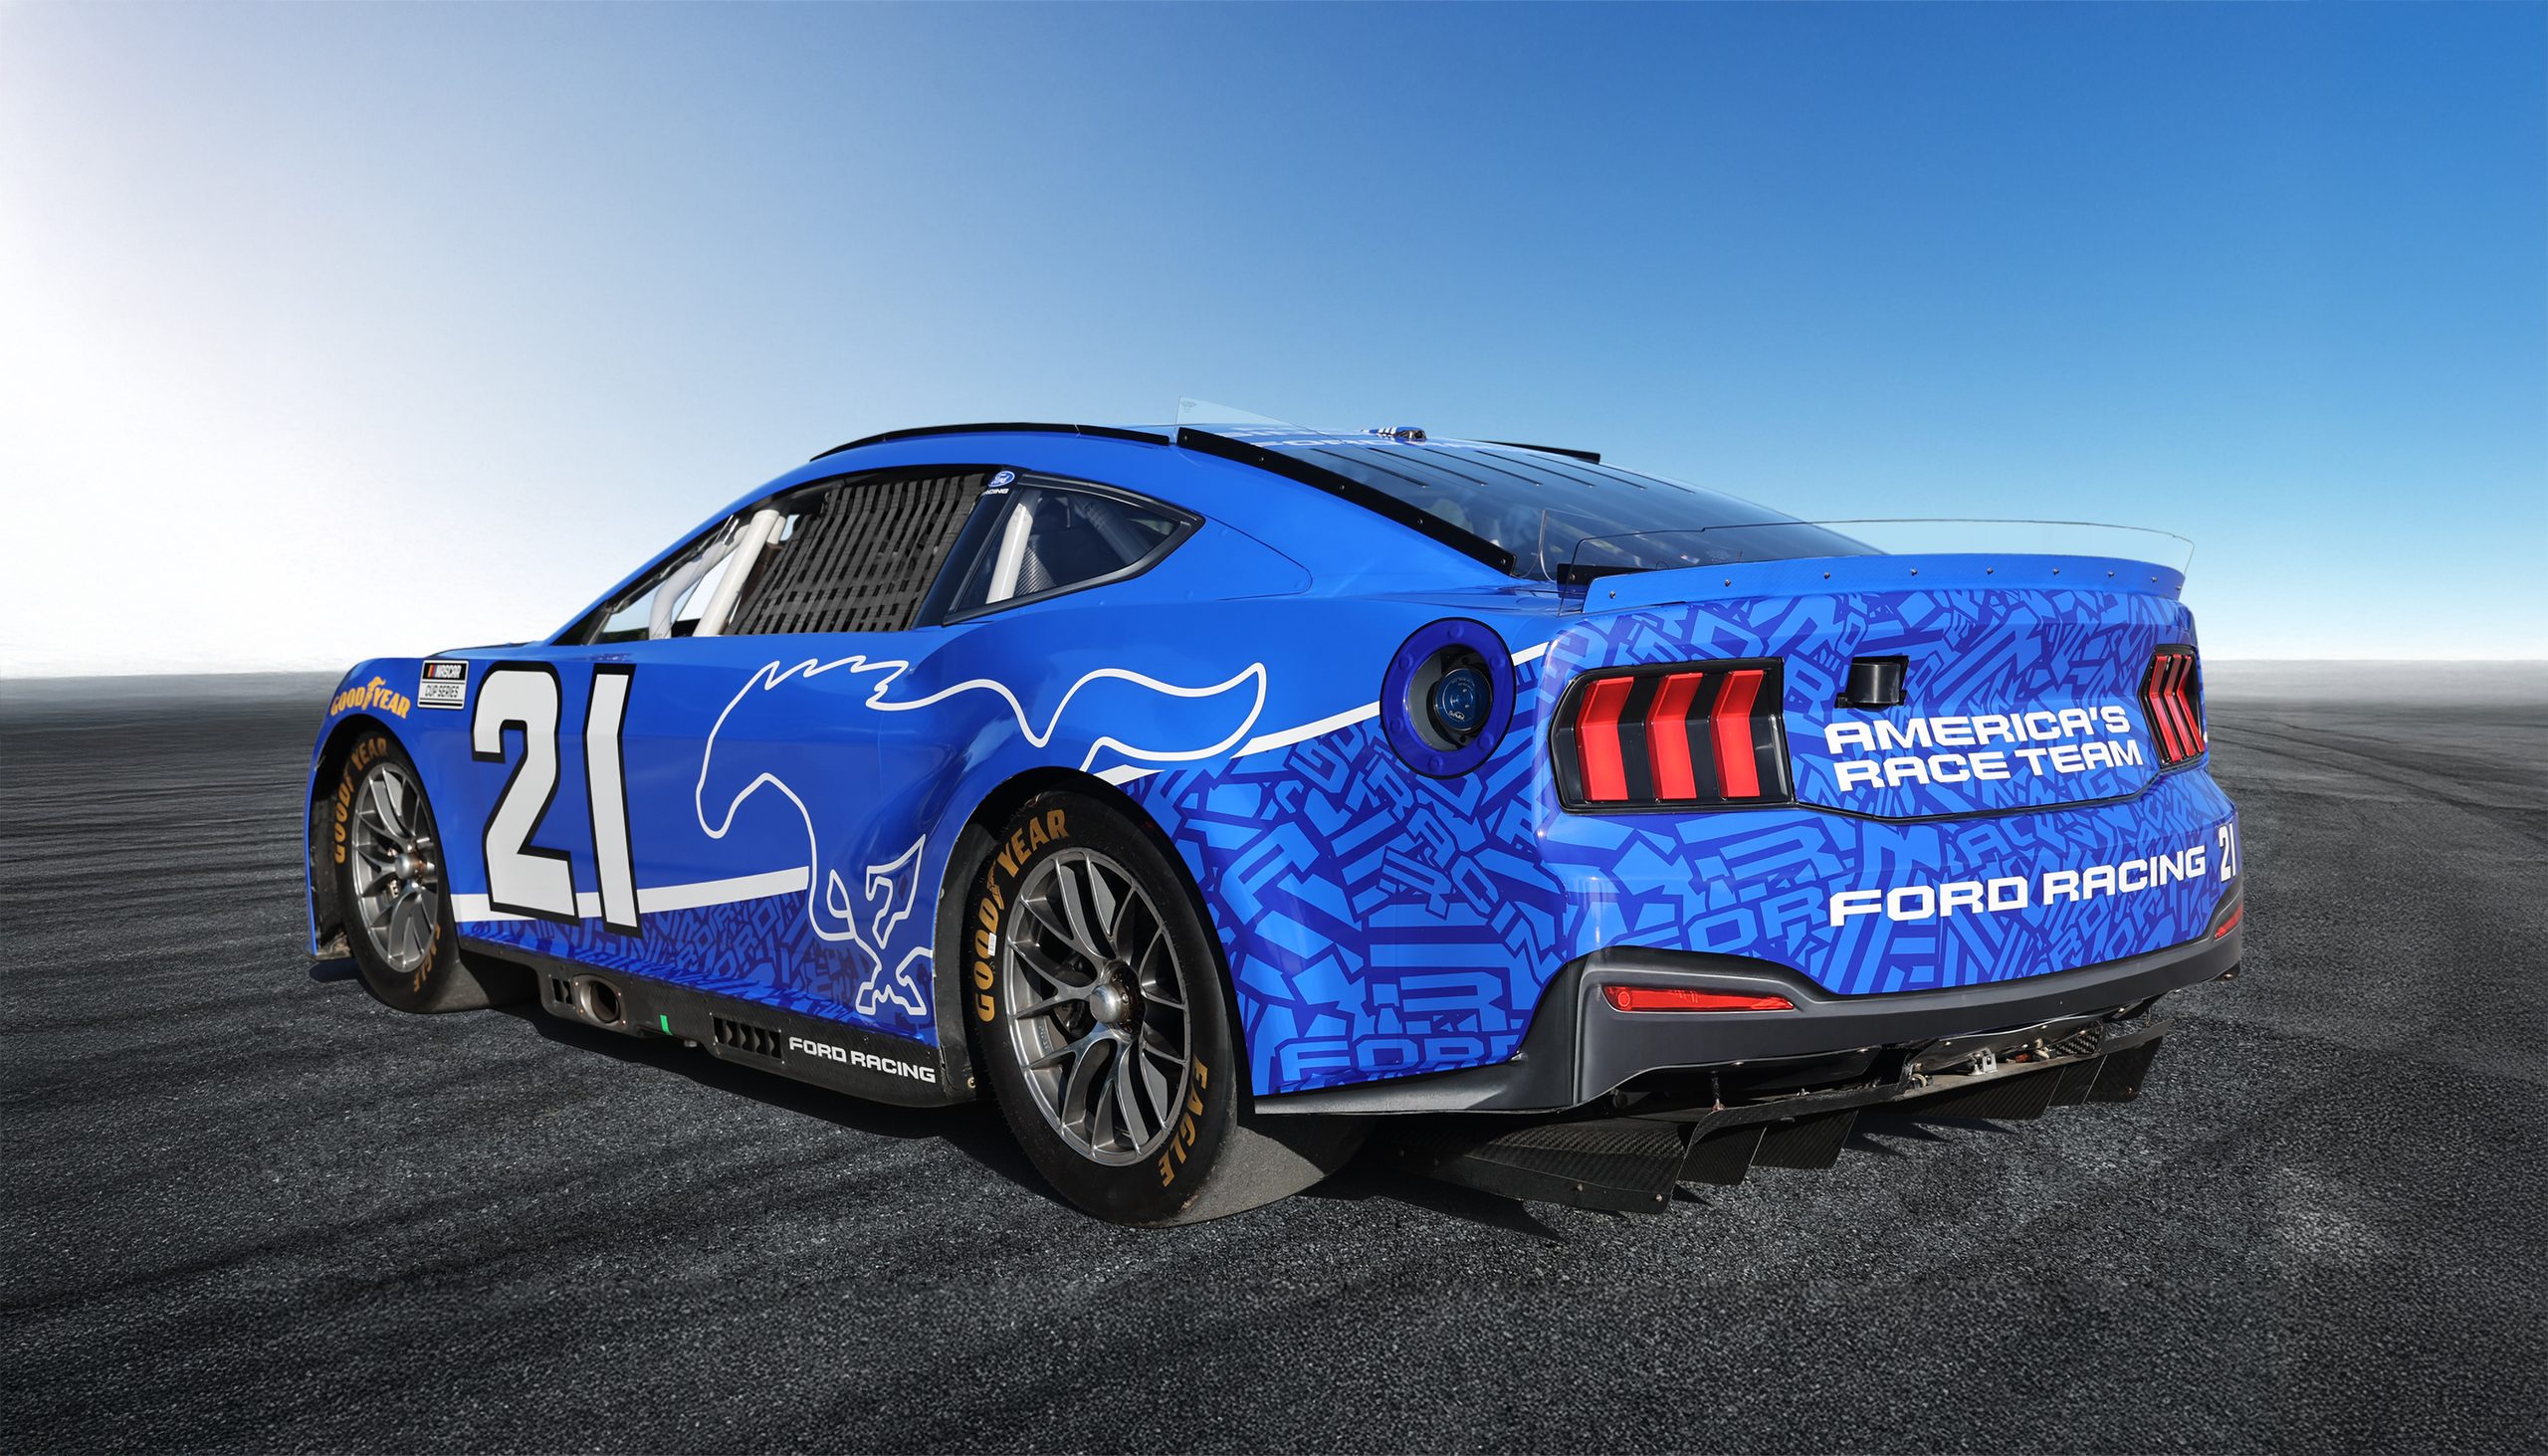
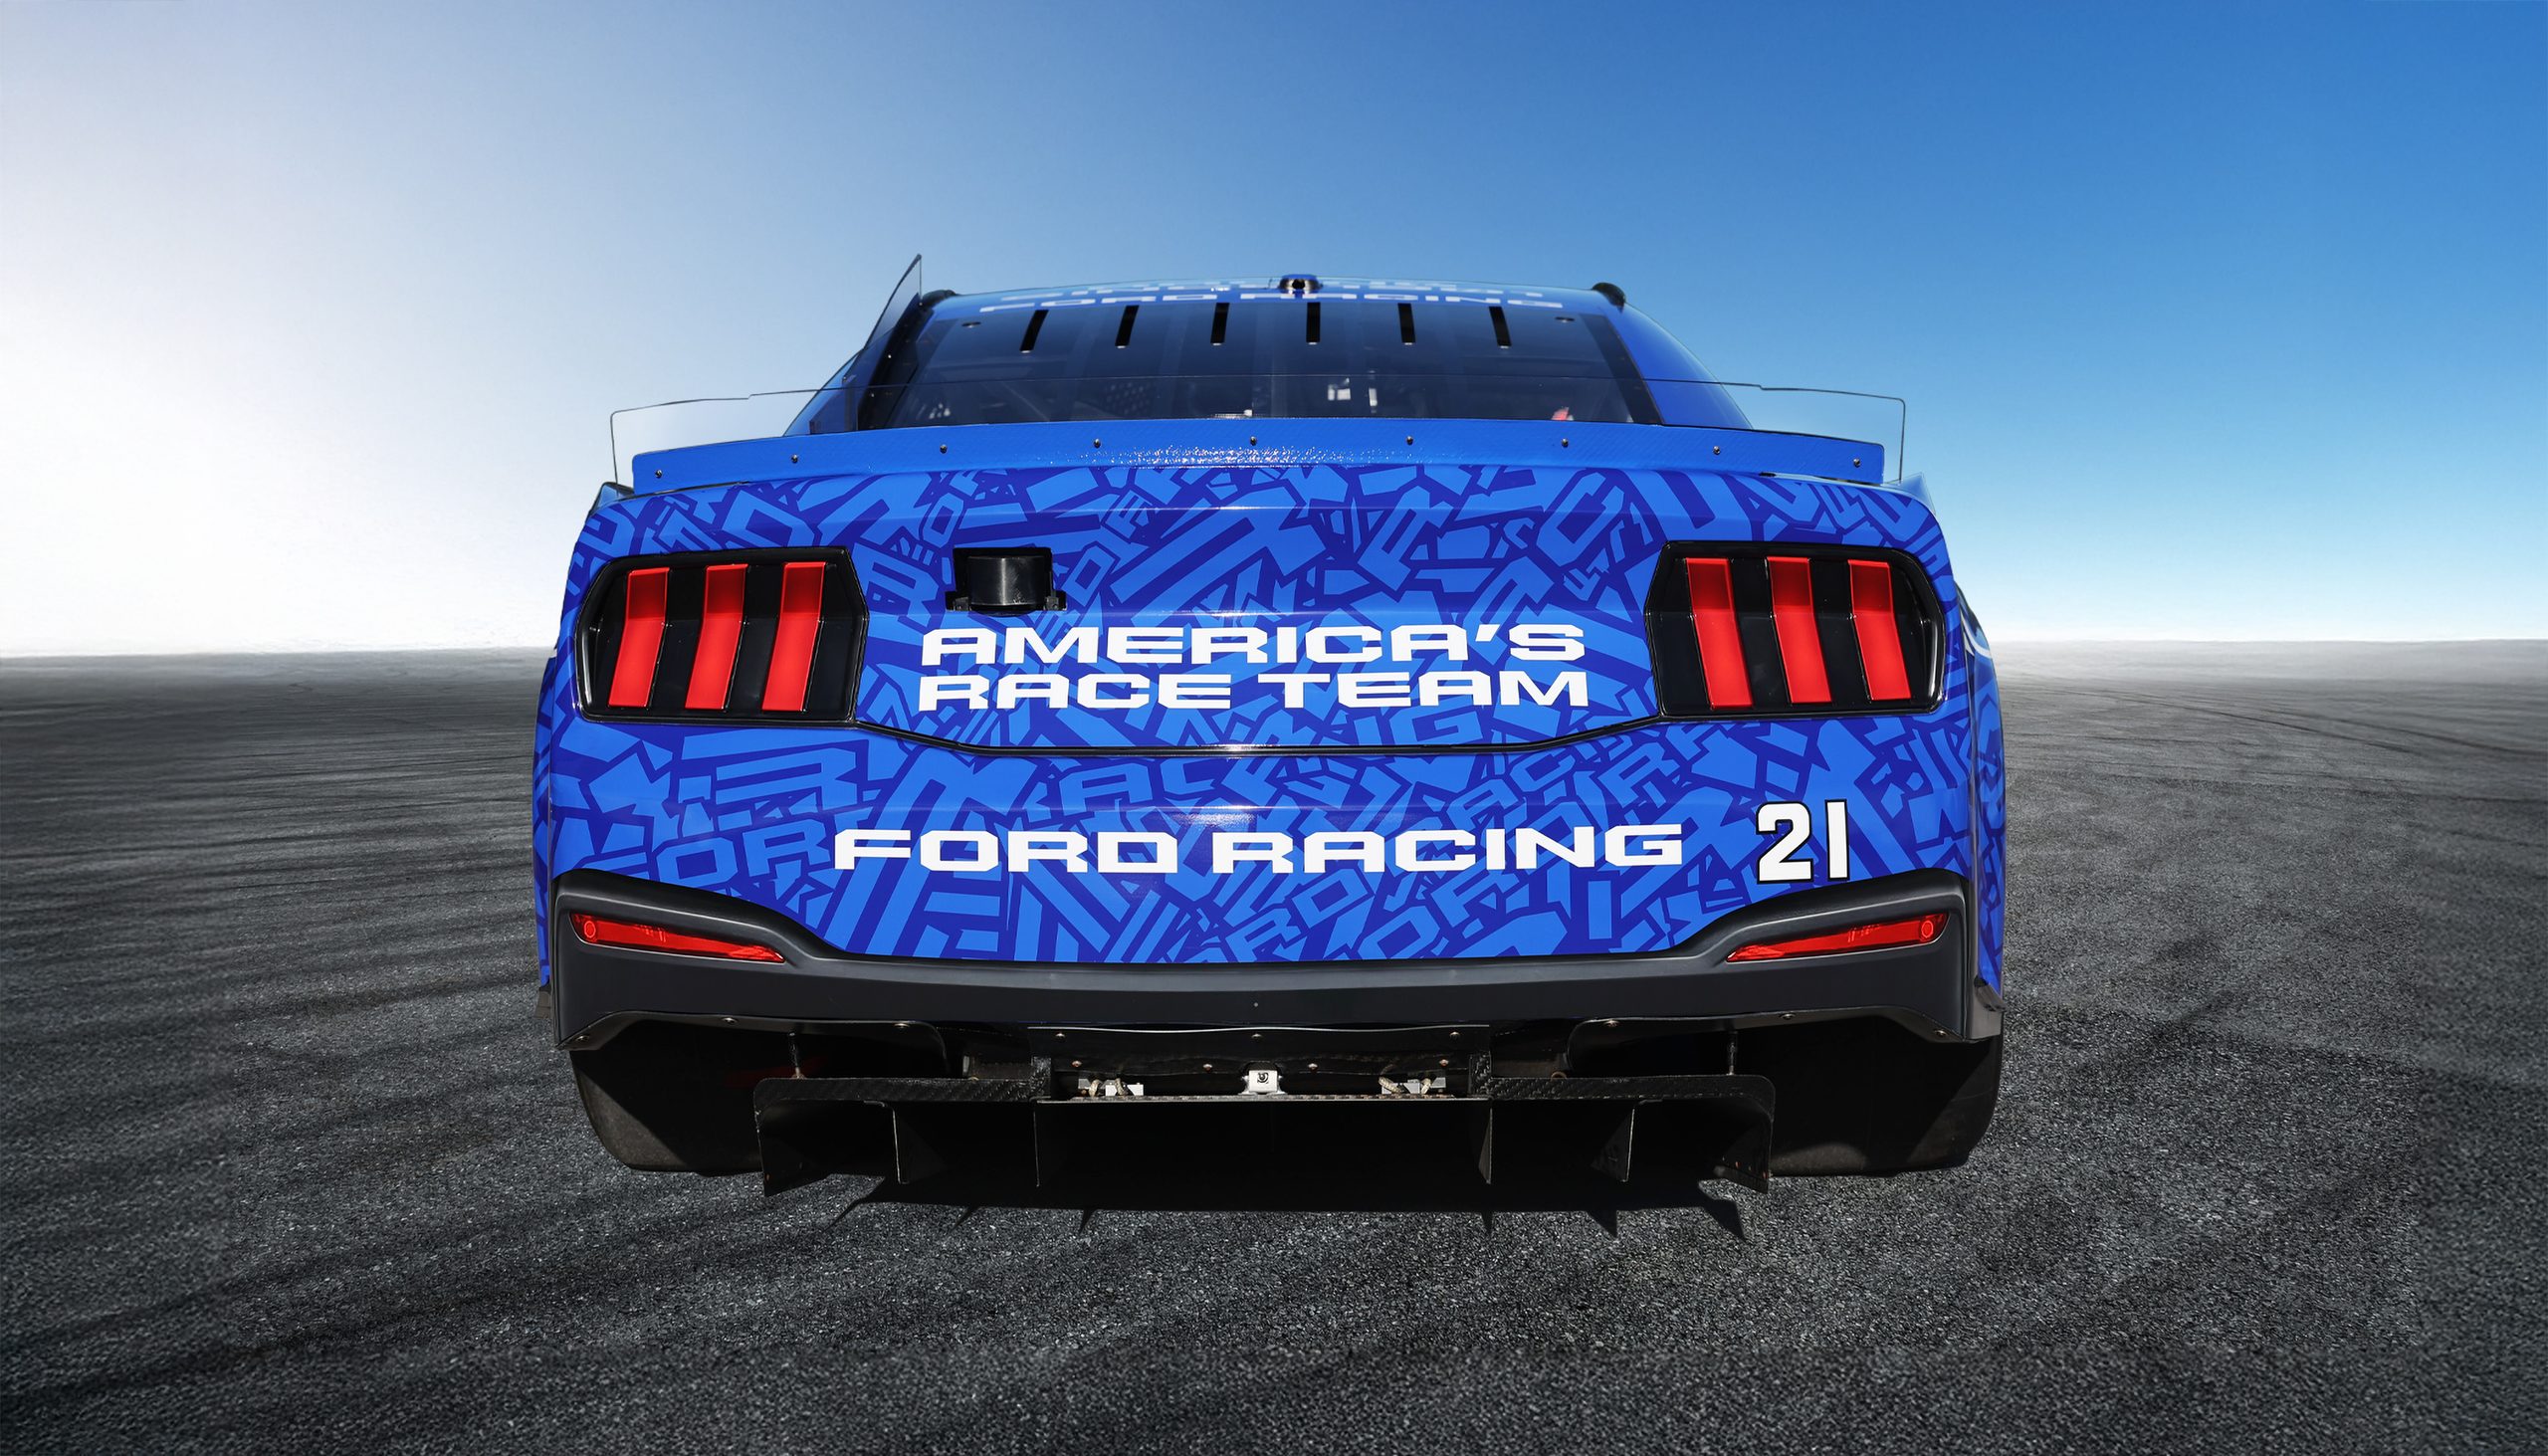
Ford Racing unveils its new Mustang that will compete in the NASCAR Cup Series starting in 2027.
The 2027 NASCAR Cup Series Mustang is the latest addition to a Mustang fleet that competes in 29 series, 17 countries and on five continents.
The 2027 NASCAR Cup Series Ford Mustang is scheduled to make its on-track debut during Daytona Speedweeks Feb. 13-21.
DAYTONA BEACH, FL, 2:00pm, Nov. 11, 2026 – The new Ford Racing Mustang that will compete in the NASCAR Cup Series was unveiled today inside the American Motorsports Hall of Fame of America as part of Ford’s Proud to Honor Veterans Day Classic event. The 2027 Ford Mustang race car continues a progression of the iconic sports car that competes globally in 29 series, 17 countries and on five continents.
Ford’s newest NASCAR contender is based on the production Mustang Dark Horse SC, which is the most advanced and powerful Dark Horse ever with its supercharged 5.2-liter V8 engine providing up to 795 horsepower and 660-lb.-ft. of torque.
“When we introduced the Mustang Dark Horse SC in January and announced it was coming to the NASCAR Cup Series in 2027, we had no time to waste,” said Mark Rushbrook, global director, Ford Racing. “Racing makes our road cars better, and our road cars make our race cars better. We put that philosophy to work here, incorporating key elements from the Dark Horse SC into the new Mustang race car to help make it even more competitive every week.”
Chief among that is an aggressive-looking nose that has been designed to optimize aerodynamics. In the road car, that comes in the form of increased cooling while in the race car it creates more downforce.
“Our team of race engineers worked hand-in-hand with Ford designers to create a car that not only holds true to Mustang’s unique appearance but lives up to its heritage as a car that was born to race,” said Rushbrook. “We believe this car will put us in a position to win a lot of races and championships in the years ahead.”
Mustang debuted in the NASCAR Cup Series full-time in 2019 and since then has won three championships with drivers Joey Logano (2022 and 2024) and Ryan Blaney (2023). In addition, it has won 80 races, including major events like the Daytona 500, Southern 500, Coca-Cola 600 and Brickyard 400 two times apiece.
“I’ve said this ever since Ford brought Mustang into the Cup Series and nothing since then has changed my mind. We have the best-looking car on the track, hands down, and Ford Racing has worked to make it one of the fastest too,” said Logano, who has won three championships with Ford. “Mustang is an American icon and no one is more proud to drive it each and every week than me. I can’t wait to get behind the wheel of this new Mustang at Daytona.”
Blaney, who drove the production car and was part of the NASCAR announcement at Season Launch, is also looking forward to his new ride.
“All of us want to be the first one to win a race in this new Mustang and I’m no different,” he said. “I’ve been pretty fortunate that throughout my Cup career the only car I’ve ever driven is a Ford and I’m proud of that. Ford does a great job of designing race cars that give us the best chance to win, and I can’t think of a better way to get started than by winning the Daytona 500.”
The Ford Mustang will make its competitive debut during Daytona Speedweeks, culminating with the 69th annual running of the Daytona 500 on Feb. 21.
The unveiling of the new Cup car marked the first event of a day that is being highlighted by the inaugural Ford Proud to Honor Veterans Day Classic at Daytona International Speedway. A total of 12 Ford Racing drivers will be competing on the road course in Ford Mustang Dark Horse Rs with all six military branches being divided into teams of two. Proceeds from the event will go to support military members, veterans and their families.
The event can be seen live on USA Network, 8-10 p.m. ET.
23XI Set to Begin Seventh Season with First Technical Director
Huntersville, N.C. (Nov. 11, 2026) –23XI Racing announced today that John Klausmeier, a veteran NASCAR crew chief and engineer, will join the team as its first technical director starting with the 2027 season. Klausmeier recently served in a similar role at Richard Childress Racing.
Following another strong season for the organization, which included two Crown Jewel wins, eight overall wins, and 23 top-five and 45 top-10 finishes, the addition of Klausmeier provides increased depth and experience to the competition department. Klausmeier will work with Dave Rogers, Sr. Director of Competition, as well as the team’s crew chiefs and engineers. John will oversee the team’s technical direction and continued growth in the engineering space.
“We’re excited to welcome John to 23XI and look forward to the impact he will have on the organization,” said Dave Rogers, Sr. Director of Competition. “Each year our organization has focused on steady growth and improvement, and the addition of John as technical director to the competition group will strengthen 23XI and continue to ensure our team maintains a high level of execution. The organization has done a fantastic job of fielding competitive cars each weekend, and this move will help us build on the strong foundation that has been built at Airspeed.”
About 23XI Racing 23XI Racing – pronounced twenty-three eleven – was founded by NBA legend Michael Jordan and three-time Daytona 500 winner Denny Hamlin in 2020. With rising NASCAR star Bubba Wallace selected to drive the No. 23 Toyota Camry, the team made its NASCAR Cup Series debut in the 2021 Daytona 500 at Daytona International Speedway. Wallace made history on October 4, 2021, when he captured his first career Cup Series win, becoming just the second African American to win in the Cup Series, and earning 23XI its first-ever victory. In 2022, 23XI expanded to a two-car organization with Cup Series Champion and Hall of Famer Kurt Busch driving the No. 45 Toyota Camry, and expanded again in 2024 to field a third car in the NASCAR Cup Series. Through six seasons of racing, 23XI has won 17 Cup Series races, including three Crown Jewel titles – Brickyard 400 (2025 – Bubba Wallace, 2026 – Corey Heim) and Daytona 500 (2026 – Tyler Reddick).
23XI currently features a lineup of Bubba Wallace in the No. 23 Toyota Camry XSE, Tyler Reddick in the No. 45 Toyota Camry XSE and Corey Heim in the No. 67 Toyota Camry XSE. The team operates out of Airspeed, a state-of-the-art facility in Huntersville, N.C.
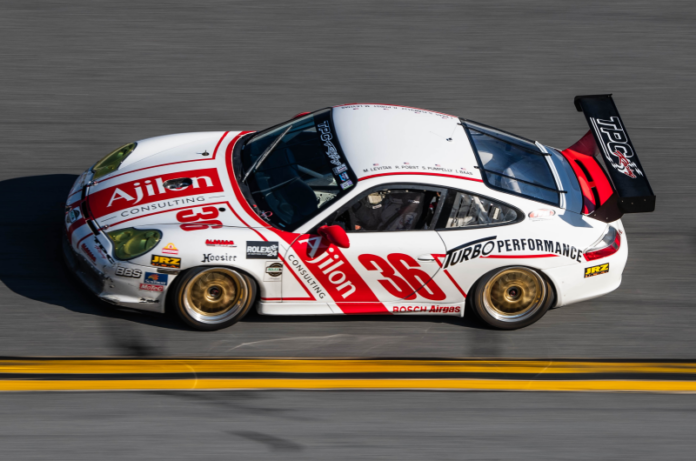
Michael Levitas Races the No. 36 TPC Racing Porsche 911 GT3 Cup at the HSR Daytona Historics 20 Years After Milestone Rolex 24 At Daytona Victory
TPC Racing Privileged to Support the Ford Proud to Honor Veterans Day Classic Race with Mustang Dark Horse R Entries for NASCAR Aces Joey Logano and Ty Majeski Wednesday Night
Longtime TPC Racing Driver Scott Schmidt Set for HSR Classic Daytona 24 Hour Debut in the No. 38 TPC Racing Lamborghini Huracán Super Trofeo
DAYTONA BEACH, Florida (November 10, 2026) – Two decades after etching its name into the history books at Daytona International Speedway, TPC Racing returns to the World Center of Racing for the second time this season for a final tribute to the team’s signature GT class win in the 2006 Rolex 24 At Daytona, November 11 – 15. Team owner and driver Michael Levitas, who co-drove the No. 36 TPC Racing Porsche 911 GT3 Cup to victory in 2006, will strap back into that very same car for the HSR Daytona Historics this weekend as part of TPC’s stout four-car lineup across this weekend’s three featured races.
Levitas shared driving duties in the Type 996 No. 36 TPC Racing Porsche 911 for the 2006 victory that carried him Spencer Pumpelly, Randy Pobst and Ian Baas to GT class honors and a ninth-place overall finish. The Porsche, preserved in its original livery and mechanical configuration and virtually untouched the last 20 years., has been campaigned by Levitas in select HSR events in recent seasons, including this past January’s IMSA Classic that set the stage for this year’s running of the Rolex 24 At Daytona.
Michael Levitas, and his son and TPC Racing Director of Race Operations Harris Levitas, bring the Porsche’s history back to where it began while also playing a major role in this week’s huge blast of star power at Daytona. After a successful first year of competition in the USAC Mustang Cup series, TPC Racing and two of its Mustang Dark Horse R race cars have been enlisted to run in Wednesday’s inaugural Ford Proud to Honor Veterans Day Classic race.
Team drivers in the TPC Racing supported Mustangs include 2015 Daytona 500 winner and three-time NASCAR Cup Champion Joey Logano and 2024 NASCAR Truck Series Champion Ty Majeski. The drivers and TPC represent Team Coast Guard in the inaugural all-Mustang tribute race on Veteran’s Day. TPC Racing is one of six two-car teams honoring a branch of the U.S. Armed Forces in the 30-minute nighttime race under the lights. The event benefits military and veteran support organizations through the Proud to Honor Fund.
Both Mike and Harris Levitas raced in Mustang Cup this year along with several teammates, leading or battling for wins in the majority of races and earning several podium finishes over the course of the season.
This weekend’s track time leader for TPC Racing will undoubtedly be longtime team driver Scott Schmidt who returns to Daytona to compete in the headline HSR Classic Daytona 24 Hour presented by Mission Foods on Saturday and Sunday. Schmidt will pilot the No. 38 TPC Racing Lamborghini Huracán Super Trofeo, marking his first start in the nation’s premier 24 hour historic endurance race. Competing in the ultra-competitive Run Group E, which is battleground for modern GT cars at least five years old, Schmidt and his class competitors will take to the track four times over the course Saturday and Sunday – including a pair of late-night and early-morning segments – to crown the overall Run Group winner.
Harris Levitas, TPC Racing Director of Race Operations: “When we first ran the HSR Classic 24 weekend a few years ago we immediately thought ‘Wow, this a cool event.’ It is even better now, returning this time to celebrate our team’s greatest victory back in 2006 and competing in the same exact Porsche with my Dad at the wheel. Scott competing in the weekend’s 12th edition of the Classic 24 is also a great addition to what is going to be an awesome weekend at Daytona. We are also deeply honored and privileged to support Ford in saluting our nation’s veterans and U.S. Armed Forces with cars in the Ford Proud to Honor race, and we look forward to working with both Joey and Ty. It’s cool to be competing in all three of this weekend’s main race events and the goal is to grab some victory lane hardware in all three!”
Michael Levitas, Driver – No. 36 TPC Racing Porsche 911 GT3 Cup: “We have had a lot of races everywhere and here in Daytona with many cars, but our Rolex 24 winning No. 36 Porsche is an amazing piece. We have had it for 20 years, and here we are back at Daytona again! Returning to Daytona is something that is hard to put into words. In 2006, we had a perfect run. The team gave us a flawless car, my co-drivers were impeccable, and we brought home a victory that defined TPC Racing. To be able to drive the exact same No. 36 Porsche where it all happened is a privilege I don’t take for granted. Thanks to Harris and the TPC Racing team for putting it all together, HSR for putting on a great event, IMSA and even Grand-Am of course from 20 years ago! It’s been an amazing fun time and will be again this weekend. It is also an honor to begin the weekend as part of Ford’s thoughtful show of respect for our nation’s veterans and all branches of the U.S. Armed Forces.”
About TPC Racing: TPC Racing is the Mid-Atlantic’s premier maintenance, service, tuning and modification center dedicated solely to Porsche sports cars. TPC Racing specializes in R&D and sales of high-performance modifications for Porsche sports cars and race cars, offering a wide range of vehicle upgrades. Best known for a line of forced induction solutions for the Porsche 911, Cayman and Boxster, a long-time focus on only one make, Porsche, has enabled TPC Racing to become experts in Porsche service, tuning, and racing. In 2000, TPC Racing began entering races under its own banner, scoring an SGS-class Championship in 2004 in the Grand-American Rolex Series and was a class winner in the 2006 Rolex 24 At Daytona, and captured the 2013 and 2016 IMSA Porsche GT3 Cup Challenge USA Gold Cup Championships. More information can be found at www.TPCRacing.com.
About DSC Sport: Founded in 2011, DSC Sport quickly established itself as an industry leader in dynamic suspension control, developing and offering best in class suspension solutions for a wide range of luxury and performance vehicles. The company designs and manufactures advanced controller units that enhance the performance and handling of sports cars, luxury sedans and lightweight trucks for both track and road use. The company frequently works with the affiliated TPC Racing, a race-winning and multiple championship-winning sports car racing team, to gather data and learnings from a race weekend environment that directly are used in the company’s ongoing development of performance hardware and software solutions for track and street vehicle applications. Learn more at www.DSCsport.com.
Diesel trucks lose power for all kinds of reasons, but emissions system problems are one of the biggest culprits on newer heavy-duty engines. The hard part is figuring out which system is actually behind it. You’ll see a DPF light, a DEF warning, or an EGR code all show up with reduced power, but they’re not the same problem.
For most owners, the first real clue is how the whole thing started. Did the truck start asking for regens more often? Did a DEF warning pop up before the power started dropping? Or did the check engine light come on with an EGR-related code? Those details matter a lot. Looking at the sequence of events along with the actual fault codes is usually the best way to tell whether you’re dealing with the DPF, the SCR system, or the EGR.
When the DPF Is the Problem
DPF issues almost never show up out of nowhere. Drivers usually notice the truck is regenerating more often than normal, or the regens take longer, or they just don’t finish. That’s a different pattern than a truck that suddenly goes into a torque or speed limit after a DEF warning.
When you’re looking at the fault codes, pay attention to:
Soot load or restriction codes
Differential pressure readings across the filter
Exhaust temperature sensor faults
Codes about regen frequency or length
Anything that says regen is being blocked
A high differential pressure reading might mean the filter is restricted, but it could just as easily be a bad pressure sensor, loose connections, or plugged tubes. The combination of codes is often more useful than any single one. If you’ve got repeated regen problems along with weird exhaust temp readings, the issue might not be the DPF itself. The ECM needs a bunch of sensors and the right operating conditions to run a successful regen.
Just seeing a DPF light doesn’t mean another forced regen is going to fix it. Sometimes the system is telling you something else needs to be checked first.
When the SCR System Puts the Truck in Derate
SCR problems usually follow a different path. Instead of constant regen requests, the driver often sees a DEF or emissions system warning first. If that isn’t fixed, the truck can move into an inducement strategy that limits torque or top speed. That sequence is pretty common on trucks that monitor emissions compliance closely.
The fault report might show things like:
DEF quality or tank level issues
Reductant pump pressure problems
DEF dosing performance codes
NOx sensor readings before and after the catalyst
SCR conversion efficiency
Inducement or derate status codes
Say a truck throws a DEF warning and later limits speed. You might see an SCR efficiency code, but that doesn’t automatically mean the catalyst is bad. The whole system has to work together—DEF has to be good quality and available, the dosing system has to put out the right amount, and the NOx sensors have to give accurate readings. A problem anywhere in that chain can mess up SCR performance.
Sometimes you’ll also see a bunch of communication or voltage codes alongside the SCR warning. That can happen when the aftertreatment module loses solid power or communication with multiple sensors. In those cases, just swapping a NOx sensor based on one code is usually a waste of time. Looking at the whole group of faults is more helpful than focusing on the SCR warning alone.
When It’s Time to Look at the EGR
EGR problems usually leave a different set of clues. The system controls how much exhaust gas gets sent back into the intake, and the ECM constantly checks whether the actual flow matches what it’s asking for.
You’ll often see codes for:
EGR flow too high or too low
EGR valve position or actuator faults
Differential pressure readings that are out of range
EGR temperature sensor problems
Electrical issues affecting EGR control
An “insufficient EGR flow” code just means the measured flow didn’t match what the ECM expected under those conditions. It doesn’t prove the valve itself is bad. It could be a sensor, wiring, or something else in the air or exhaust path.
Unlike a lot of SCR inducement faults, EGR problems don’t always put the truck into a hard derate right away. It depends on the manufacturer, the engine generation, and the specific code. On one truck you might just get a check engine light. On another, the same kind of issue can cut power more aggressively. That’s why the actual fault description and the specific engine platform matter more than the light on the dash.
Three Different Patterns, One Basic Rule
Even though these systems can overlap, the history of the truck usually points in different directions:
What the driver usually notices
System to check first
Frequent or incomplete regen requests
DPF
DEF warning followed by speed or torque limit
SCR
EGR flow or valve control codes, sometimes with engine behavior changes
EGR
These are just starting points, not final answers. A restricted DPF can be caused by something upstream in the engine. SCR sensor codes can come from electrical problems. An EGR code doesn’t automatically mean the valve needs replacing. The full fault code report is what helps sort it out.
Why the First Code You See Isn’t Always the Real Problem
One of the most common mistakes is zeroing in on the first warning or the code that sounds the most serious. A truck might have an active DPF fault plus several inactive temperature sensor codes. Another one might show an SCR inducement code along with a bunch of communication faults. Those two situations need different approaches even if both trucks are limited on power.
When you’re going through the codes, keep these things in mind:
The order the faults showed up. An earlier sensor or performance issue can help explain why a later aftertreatment warning appeared.
Active vs. inactive status. Active codes are what’s happening right now. Inactive ones show history. Neither one should be looked at in isolation.
The full SPN/FMI description. On heavy-duty trucks, the SPN tells you what parameter is being monitored and the FMI describes the type of problem. The combination is a lot more useful than just a number.
The specific truck and engine. Fault descriptions, monitoring strategies, and derate behavior vary between manufacturers and engine generations. The same type of code doesn’t always produce the same result.
A fault code report shows what the ECM has detected. It isn’t a parts list.
What Owners Should Have Ready
Before you schedule any further service, it helps to put together a clear picture of what happened. A complete fault code report, the VIN, engine info, the dashboard warnings that showed up, and a short description of when the derate started will make the next steps a lot smoother.
If the truck already has mechanical, electrical, or sensor problems, those need to be looked at by qualified techs. ECU programming isn’t going to clear a plugged filter, fix a bad sensor, or correct a dosing issue.
DrunkLab does remote ECU tuning and programming for a range of heavy-duty diesel platforms. Before booking any programming work, it’s important to understand the truck’s current condition and make sure the requested work actually makes sense for the situation.
Owners can also pull a full fault code reading through DrunkLab to see the active and inactive codes and which systems they point to.
Understanding the Derate Comes First
A DPF warning, an SCR inducement, and an EGR flow fault aren’t interchangeable. Repeated regen problems point to a different set of issues than a DEF countdown, and EGR faults need attention to flow and valve control data.
The most useful approach is to look past the light on the dash. The timing of the warnings, the combination of codes, and the specific engine platform give a much clearer picture of what’s going on.
For owners and fleet managers, that difference can save time, keep people from throwing parts at the wrong problem, and help make sure the next service decision is based on what’s actually wrong instead of a guess.
DID YOU KNOW? – RP1210 is a standard communication interface that allows Windows-based software to communicate with heavy-duty truck electronic control modules (ECMs) through compatible diagnostic adapters. It provides a common connection method between the laptop, adapter, and truck.
Remote programming can feel like a black box if you’ve never watched it happen. An engineer sits somewhere else, a tech plugs a laptop into the truck, and somehow the ECM gets reprogrammed without ever coming out of the vehicle. So what’s really going on between the moment you connect and the moment the truck is ready to roll again?
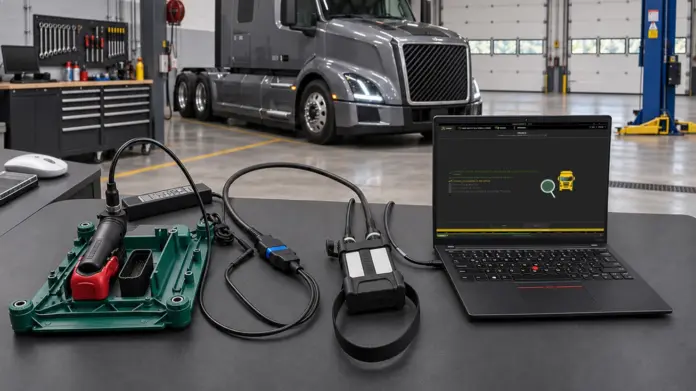
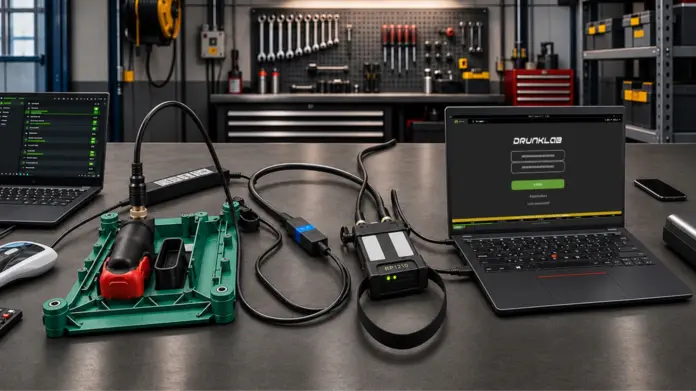
It all depends on a few pieces of gear working together. You’ve got a laptop running the right software, an RP1210-compatible adapter that talks to the truck, and a solid internet connection so the remote guy can take control of that laptop and do the actual work.
Miss any one of those pieces or set something up wrong, and the session usually doesn’t get very far.
What You Need Before You Start
A typical remote programming setup boils down to four things:
A Windows laptop that can run the specific software for that engine and ECM
An RP1210-compatible adapter that connects the laptop to the truck’s diagnostic port
A stable internet connection so the remote engineer can remote into the laptop
The correct manufacturer software and programming files for the job
You’ll see adapters like Nexiq, Noregon, DPA5, Cummins Inline 6, and Scanmatik used across different heavy-duty platforms. Which one you need depends on the truck and the software you’re running.
It’s also worth double-checking the laptop before the appointment. Drivers need to be installed, Windows has to recognize the adapter, and the required apps should already be ready to go. Finding out something’s missing after the session has started just wastes everyone’s time.
Connecting the Laptop to the Truck
Once the gear is ready, the first real step is getting communication going with the truck.
The workshop specialist or truck driver plugs the adapter into the diagnostic port and connects it to the laptop (usually by USB). Windows should pick it up, and the adapter software needs to be set up correctly.
This is where the RP1210 standard comes in. It’s basically a common communication interface that lets supported Windows programs talk to different vehicle adapters. In plain English, it gives the software a standard way to work with a bunch of different hardware.
That said, RP1210 compatibility doesn’t mean every adapter works with every program. The adapter, its drivers, the software version, and the truck itself all have to line up.
After the physical connection is solid, the software can try talking to the ECM. Getting a good connection here is a key checkpoint — it tells you the laptop can actually reach the module through the adapter. If the program can’t even identify the ECM, there’s no point jumping into programming yet. The link needs to be solid before any real work starts.
How the Remote Engineer Gets In
With the laptop talking to the truck, the next step is handing control over to the remote engineer.
The tech fires up whatever remote desktop program you’re using (TeamViewer is common) and sends the connection info. From there the engineer can see the laptop desktop, open the right software, and work through the already-connected adapter.
The important part is that the remote guy doesn’t need his own physical connection to the truck. The laptop sitting at the vehicle is the bridge.
That’s what makes this whole approach useful — you can get the work done without shipping the ECM off or waiting for a specialist to show up in person.
During the session the engineer uses whatever tools the particular truck needs. That might mean identifying the module, checking the current software, looking at available data, and figuring out the right programming steps. Not every job follows the exact same path. A Cummins, a Detroit, and a Paccar can all require different software, different procedures, and different communication setups.
Providing the VIN, engine information, and service history in advance helps the engineer prepare for the session and make the most of the available time.
Reading, Preparing, and Writing the Software
Once communication with the ECM is solid, the actual work can begin.
Before making any changes, the engineer checks the ECM’s current software installed on the truck. This helps determine which programming approach is appropriate for that particular engine and ECM.
The next step depends on the requested service. The engineer pulls the right programming file and double-checks that it matches the truck’s ECM and the job being done.
The programming itself happens through the manufacturer’s software or other platform-specific tools. The RP1210 adapter is just the communication path — it doesn’t create or change the calibration on its own.
Writing new software to an ECM is different from simply reading data. The module is receiving a full software package through the interface, and that process can take several minutes or longer depending on the truck, the file size, and the method being used.
This is the stage where everything needs to stay stable. Keep the laptop powered, leave the adapter connected, and make sure the internet connection is solid enough that the remote engineer doesn’t drop. Interruptions can turn a straightforward job into a headache, so it’s worth setting things up carefully before you start writing.
Plan the session for a time when the truck is parked and can remain out of service until the programming and final checks are complete.
What Happens After Programming Finishes
Just because the software’s done writing doesn’t mean you’re finished.
The engineer still has to double-check that everything actually went through clean and that the ECM is behaving the way it’s supposed to. That might include software checking, verifying communication, looking at certain parameters, or running other platform-specific checks.
If the program throws an error or the module doesn’t respond right, the engineer has to figure out what’s going on before calling the session complete.
Sometimes, in case of remote ECU programming, the truck driver will be asked to cycle the key or follow a few other truck-specific steps. Once the checks are done, the remote connection gets closed and the truck can go back into service according to the usual procedure.
One more thing worth keeping in mind: remote ECM programming isn’t a magic fix for mechanical or electrical problems. If the truck already has issues with wiring, communication, the fuel system, or something mechanical, those usually need to be sorted out first. Knowing that up front helps set realistic expectations.
Why Preparation Makes Such a Difference
Remote truck programming is a coordinated process. You’ve got the vehicle, the hardware, the software, and a specialist who might be hundreds or thousands of miles away. The quality of the work still depends heavily on what’s set up at the truck itself.
A compatible RP1210 adapter, a laptop that’s properly configured, the right software, and a reliable internet connection form the foundation of a smooth session.
Companies like DrunkLab offer remote ECM programming for heavy-duty trucks so fleets and owners can work with specialists without pulling the module and shipping it off. Exact equipment and connection needs still vary by engine platform and the type of work being done.
For anyone running trucks, understanding these basic steps makes it easier to prepare for an appointment, avoid unnecessary delays, and know what to expect once the remote session starts.
The technology makes remote access possible. Good preparation and the right procedure are what make the session actually work.
Marine diesel engines run for hundreds of hours under load. They frequently run for hundreds of miles from the nearest shop. Unexpected stops for service can prevent a commercial boat from fulfilling its contract. For a yacht owner, an engine issue offshore can turn a planned cruise into a real headache.
Mechanical condition, cooling capacity, fuel quality, and regular maintenance all play big roles in reliability. There’s another piece that’s easy to overlook: the software that controls how the engine actually runs.
Today’s marine diesels rely on electronic control units (ECUs) to handle fuel injection, boost pressure, torque limits, and a bunch of other parameters. When the stock calibration doesn’t quite match how the boat is used, software optimization can help the powertrain behave better under its real working conditions.
Marine Engines Face a Different Kind of Work
Marine engines deal with operating conditions that look pretty different from most road trucks. A truck constantly changes load — accelerating, climbing hills, cruising, slowing down. A boat often sits at a relatively steady RPM under substantial load for long stretches.
The exact profile depends on the vessel. A commercial workboat, a displacement yacht, and a high-speed recreational boat all ask different things from their engines and propulsion systems.
The marine environment adds its own challenges. Salt water, constant humidity, vibration, and corrosion can affect connectors, wiring, cooling components, and just about everything else. Depending on the engine design, cooling may use seawater directly or combine a closed freshwater circuit with a separate seawater circuit and heat exchanger.
All of this makes preventive maintenance especially important. It also means any software changes need to respect the engine’s intended operating range instead of just chasing a bigger horsepower number.
Marine Electronics Aren’t the Same as Truck Electronics
Marine diesels share a lot of the same basic electronic control ideas you find in heavy-duty trucks and industrial equipment. But the hardware, software, sensors, communication protocols, and control strategies vary by manufacturer and by application.
A marine ECU typically manages engine speed, injection timing, fuel delivery, turbo operation, and torque limits. On many platforms it also talks to the vessel’s displays, alarms, transmission controls, and other onboard systems.
That integration matters. A calibration that works on one engine setup shouldn’t automatically be treated as suitable for another, even if they share the same model name.
The same goes for engines installed in different hulls. Weight, propulsion layout, propeller choice, and the boat’s intended cruising speed all change the load the engine sees.
Software optimization should start with the actual engine and how it’s used — not some generic performance target.
Cooling, Turbos, and Electronic Limits
Marine engines need solid cooling, proper lubrication, good fuel delivery, and healthy turbochargers. Trouble in any of those areas can hurt performance, especially under sustained load.
Restricted seawater flow or a failing cooling component can push temperatures too high. A turbo problem can cut available boost. Fuel-system issues can throw off normal operation.
Electronic controls may also pull power back when they encounter various conditions or faults. How that happens is dependent on the manufacturer and the specific engine setup.
This is an important point: not every loss of power is a software issue.
If a boat is struggling to make its normal cruising speed, the cause could be the engine itself, the cooling system, fuel supply, propeller, hull condition, or something else in the propulsion package. Those mechanical and operational issues need to be checked by a qualified marine tech before anyone starts talking about software changes.
Changing the calibration won’t fix a failing part or open up a restricted cooling circuit. Tuning is about adjusting supported control parameters when the engine and its systems are already in decent shape.
Matching the Calibration to the Boat
Two boats with the same engine model can work very differently. One might spend most of its time at moderate cruising loads. Another regularly runs close to its rated output.
Software optimization can help tailor engine behavior to a particular application — as long as the platform supports the changes and the new calibration stays within safe operating limits.
Depending on the engine and available options, that might mean adjusting power and torque delivery or other control parameters. The goal isn’t always maximum output. In a lot of cases, consistent, predictable performance across the normal working range is more useful than a higher peak number.
Commercial operators usually care about how the boat is loaded, how long the engine runs under sustained load, and the conditions it sees most often. Yacht owners often prioritize cruising feel and response under acceleration.
Any proposed calibration still has to respect the manufacturer’s limits and the capabilities of the whole propulsion system — transmission ratings, cooling capacity, and other installation-specific constraints included.
Fuel consumption deserves a realistic look too. Software changes don’t automatically mean better economy. Actual results depend on the calibration, the engine’s condition, how the boat is loaded, operating speed, hull characteristics, and how the vessel is actually used.
Remote Support and Dockside Work
Marine service can get complicated by location. A boat might be operating a long way from anyone who knows that particular engine platform well. Shipping equipment or arranging an onboard visit can take time.
Depending on the engine, ECU, available interface, and what needs to be done, some programming can be handled remotely. Other jobs still require the vessel or engine to be accessible at a dock or service facility.
Remote programming isn’t a substitute for a physical inspection. It won’t tell you whether the cooling system is working properly, whether a turbo is damaged, or whether a mechanical problem is causing the power loss. Those checks still belong to qualified marine technicians.
Before setting up a programming session, the engine configuration and connection equipment need to be confirmed. Access to the right ECU and software environment is essential, and some platforms require extra steps or hardware.
For operators, it’s usually smarter to plan this work before a busy season or a demanding trip rather than treating software changes as an emergency fix after something goes wrong.
Platforms DrunkLab Supports
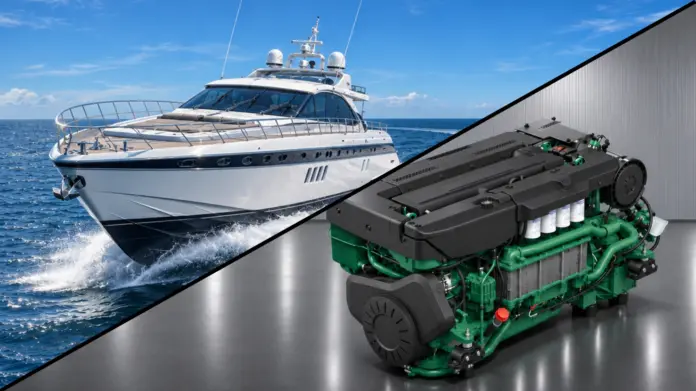
DrunkLab offers electronic engine-control programming for selected diesel platforms, including marine applications. Volvo Penta is one of the areas they work with for operators running marine diesels.
What can actually be done depends on the specific engine model, ECU type, software version, and the requested work. Support for one engine family doesn’t automatically cover every engine or control unit from the same manufacturer.
Operators should confirm their engine details and whether a suitable programming solution is available before moving forward. That conversation helps determine whether the work can be done remotely or needs a different arrangement.
It’s also worth keeping the line clear between software programming and mechanical service. DrunkLab works with supported engine-control software. They don’t repair cooling systems, replace failed turbos, or diagnose every mechanical issue that might show up on a boat.
Reliability Starts Before You Leave the Dock
Marine diesel reliability comes from more than one place. Proper maintenance, a well-matched propulsion system, sensible operating practices, and healthy engine electronics all matter.
Software optimization can be useful when the engine is mechanically sound and the existing calibration can be adjusted to better suit the intended use. It should be treated as one piece of a broader approach to vessel performance — not a replacement for maintenance or a guarantee that nothing will break.
For commercial operators, preparation helps protect schedules. For yacht owners, it’s one more reason to look at the engine and its electronics before heading offshore.
The best time to review an engine’s calibration is while the boat is safely accessible and there’s time to plan the work properly. Out on the water, reliability starts with getting the basics right.
A used semi can look solid on a pre-purchase inspection. Engine runs quiet, transmission shifts clean, seller hands over a stack of maintenance records. But what about the software that actually runs the engine and the rest of the electronics?
Today’s heavy-duty trucks live and die by their electronic control modules. Those modules manage everything from fuel delivery and emissions to a bunch of other systems. Previous owners might have swapped modules, tweaked calibrations, or changed the truck’s setup to fit their needs. The next guy can end up with compatibility headaches, unexpected limitations, or extra repair bills.
A mechanical inspection is still non-negotiable. It just doesn’t tell the whole story. Before you buy, make sure the electronic configuration actually matches the truck’s specs and what you plan to do with it.
A Clean Mechanical Inspection Isn’t the Full Picture
Most buyers zero in on the engine, transmission, brakes, suspension, and frame. Those checks matter. They just don’t prove the electronics are set up right.
Take a truck that got a replacement engine control module. The engine might fire right up and run fine on a short test drive, but the module could be running the wrong calibration or settings that don’t match the hardware. That mismatch can limit power, kill certain functions, or cause problems later.
Previous owners also change engine settings for specific jobs. The truck’s current setup might not match the original factory configuration even if it feels fine during a quick drive.
Emissions software deserves a hard look too. Work done on the DPF, EGR, or SCR systems isn’t always obvious when you just look under the hood or plug in a basic scanner.
None of this means every used truck is a software nightmare. It just means you shouldn’t assume everything’s electronically solid just because the engine runs smooth.
Common Software Risks on American and European Trucks
American and European trucks use different electronic systems and programming processes, but a lot of the same risks show up on both.
Undocumented ECU changes. Someone may have altered calibrations or other settings and never wrote it down.
Replacement modules that weren’t programmed correctly. An ECM or other controller gets swapped and the required programming or adaptation steps get skipped.
Unexpected performance limits. That can show up when the current software or setup locks out certain functions. Figure out the real reason instead of just assuming.
Emissions system mismatches. Previous changes to the DPF, EGR, SCR, and DEF controls can result in differences in how a truck runs and if the truck is legal.
Incomplete programming. Module swaps often need extra configuration work. Skip those steps and you can end up with compatibility issues.
Fixing these problems costs money, and the amount varies by truck and what needs doing. A software audit catches the discrepancies before they become your problem.
What Modified ECU Files and Cleared Codes Can Hide
An electronic control module holds the calibration data, configuration settings, and diagnostic information that keep the engine running.
A modified calibration might not match what that engine is supposed to run. A replacement ECM can show identification info that needs checking, and missing records make it hard to track what changed before.
Not every modified file is bad. The real questions are whether the calibration fits the application and whether it matches the hardware that’s actually installed.
Fault codes need the same attention. If someone cleared codes right before the inspection, some history of previous problems disappears. A clean scan doesn’t automatically mean the truck has never had issues.
At the same time, cleared codes don’t automatically mean the seller is hiding something. Codes get cleared during normal repairs and maintenance too.
A smarter approach is to pull a full fault-code report before anyone clears anything, write down both active and inactive codes, and dig into the ones that matter. When the tools support it, check module IDs and calibration data for extra confirmation.
The point isn’t to reject every truck. It’s to buy with fewer surprises.
How VIN Checks Help Confirm a Truck’s History
The VIN gives you a starting point for confirming the truck’s identity and original specs.
Depending on the manufacturer and available records, a VIN lookup can show the original engine application, vehicle configuration, and key equipment. You can then compare that information against what’s actually on the truck today.
If the documented engine setup doesn’t match the identification on the installed module, that usually means a replacement or other change that needs an explanation. There might be a perfectly good reason, but you want the paperwork to back it up.
A VIN check won’t catch every calibration change or guarantee every module is programmed right. For a fuller picture you still need module identification, available calibration data, diagnostic reports, and service records.
Those pieces work best together. Any one of them alone leaves too many gaps.
Does the Software Match the Hardware?
The electronics have to line up with the hardware that’s in the truck.
If the engine or ECM got replaced, the required programming and configuration steps may never have been finished. A module might also have been programmed for a completely different application. Depending on the mismatch, you can end up with configuration errors, missing functions, or operating problems.
The same rule applies to electronically controlled emissions systems. The software has to match the components it’s supposed to control.
A fault code reading by itself won’t prove compatibility. A truck can show zero active codes and still need its module configuration verified. On the flip side, an unexpected code might come from a mechanical or wiring problem instead of bad software.
A useful audit identifies the modules that are installed, checks the available software and calibration info, and compares everything against the correct specs for that truck.
If something doesn’t line up, figure out why before anyone starts changing the programming. Loading a new calibration without understanding the current setup can create brand-new problems.
Check Module Compatibility and Your Options Before You Buy
Don’t just look at the truck’s current condition. Think about what happens if programming work is needed after the sale.
Ask the seller these questions before you commit:
Has the ECM or any other major control module been replaced?
Is there documentation for previous programming or calibration changes?
Have there been any restrictions to any of the vehicle’s electronic functions?
Are there any unexplained warning lights and/or recurring fault codes?
Can the configuration of the modules be verified?
If the truck has a history of significant electronic work, confirm that the necessary programming or adaptation procedures are available for that specific application.
Requirements change by manufacturer, engine family, and module. What works on one platform may not work on another.
If the truck’s current setup doesn’t match its documented specs, get a clear explanation before you close the deal. If the issue can’t be sorted out ahead of time, factor that uncertainty into the price.
How DrunkLab Can Help With Post-Purchase ECU Programming
When a software audit turns up a configuration problem, the next step is figuring out whether it needs verification, programming, or adaptation.
DrunkLab offers remote ECU programming and tuning for supported heavy-duty applications. Depending on the platform and the job, a lot of the work can be done remotely without pulling the module out of the truck.
Cummins, Detroit Diesel, and PACCAR jobs run through DrunkLab’s remote programming process using TeamViewer. Other supported applications go throughthe Mochester App, depending on compatibility and service requirements.
Everything starts with identifying the truck. Using the VIN or chassis number, you can request a fault-code reading to get a report or find available tuning solutions for your specific truck.
DrunkLab focuses on software programming and tuning, not mechanical repairs. Any hardware issues, including wiring problems or faulty sensors, should be addressed before the programming session to help ensure the truck is ready for the work.
You can check supported applications and services on the DrunkLab website.
Not every problem requires a reflash, and not every used truck needs a new calibration. Sometimes the best result is simply confirming that the current setup is correct.
Used Semi-Truck Software Audit Checklist
Run through this list alongside the mechanical inspection before you sign anything.
Vehicle identity and history
Verify the VIN and the advertised engine specs.
Ask for records of any ECU replacements and previous programming.
Ask about recurring electronic problems and any past modifications.
Electronic condition
Pull a full fault-code report before anyone clears codes.
Document active and inactive faults and investigate the ones that matter.
Compare the software configuration against the engine and the hardware that’s actually installed.
Dig into any unexplained discrepancies.
Compatibility and purchase decision
Confirm that required programming or adaptation procedures are supported for this truck.
Get clear answers from the seller about any unexplained restrictions or missing functions.
Get a qualified opinion on any significant electronic inconsistencies.
Resolve the major uncertainties before you lock in the final price.
No single scan or report can guarantee a clean electronic history. The checklist just reduces the number of unknowns. It doesn’t replace a proper assessment.
Verify the Electronics Before You Commit
Buying a used semi takes more than checking the engine, transmission, and chassis. Previous programming, replacement modules, and undocumented changes can leave you with an electronic configuration you didn’t bargain for.
Pair the mechanical inspection with fault-code reports, VIN information, module identification, and whatever calibration data is available. That combination gives you a much clearer picture of what you’re actually buying.
Review the truck’s mechanical condition, electronic configuration, and service history before making your decision. The more you verify upfront, the less you have to guess about the truck’s condition and potential costs after the purchase.